Reading List
The most recent articles from a list of feeds I subscribe to.
Moving away from Tailwind, and learning to structure my CSS
Hello! 8 years ago, I wrote excitedly about discovering Tailwind.
At that time I really had no idea how to structure my CSS code and given the choice between a pile of complete chaos and Tailwind, I was really happy to choose Tailwind. It helped me make a lot of tiny sites!
I spent the last week or so migrating a couple of sites away from Tailwind and towards more semantic HTML + vanilla CSS, and it was SO fun and SO interesting, so here are some things I learned!
As usual I’m not a full-time frontend developer and so all of my CSS learning has happened in fits and starts over many years.
it turns out Tailwind taught me a lot
When I started thinking about structuring CSS, I was intimidated at first: I’m not very good at structuring my CSS! But then I started reading blog posts talking about how to structure CSS (like A whole cascade of layers or How I write CSS in 2024) and I realized a couple of things:
- Every CSS code base has a bunch of different things going on (layouts! fonts! colours! common components!)
- It’s extremely useful to have systems or guidelines to manage each of those things, otherwise things descend into chaos
- Tailwind has systems for some of these, and I already know those systems! Maybe I can imitate the systems I like!
For example, Tailwind has:
- a reset stylesheet
- a colour palette
- a font scale
the systems I’m going to talk about
I’m going to talk about a few aspects of my CSS codebase and my thoughts so far what kind of rules I want to impose on the codebase for each one. Some of them are copied from Tailwind and some aren’t.
- reset
- components
- colours
- font sizes
- utility classes
- the base
- spacing
- responsive design
- the build system
1. reset
I just copied Tailwind’s “preflight styles”
by going into tailwind.css and copying the first 200 lines or so.
I noticed that I’ve developed a relationship with Tailwind’s CSS reset over time,
for example Tailwind sets box-sizing: border-box on every element (which means
that an element’s width includes its padding):
* { box-sizing: border-box; }
I think it would be a real adjustment for me to switch to writing CSS without
these, and I’m sure there are lots of other things in the Tailwind reset (like
html {line-height: 1.5;}) that I’m subconsciously used to and don’t even realize are
there.
2. components
This next part is the bulk of the CSS!
The idea here is to organize CSS by “components”, in a way that’s spiritually related to Vue or React components. (though there might not actually be any Javascript at all in the site)
Basically the idea is that:
- Each “component” has a unique class
- The CSS for one component never overrides the CSS for any other component
- Each component has its own CSS file
So editing the CSS for one component won’t mysteriously break something in another component. And probably like 80% of the CSS that I would actually want to change is in various component files, so if I’m editing a 100-line component, I just have to think about those 100 lines. It’s way easier for me to think about.
For example, this HTML might be the .zine “component”.
<figure class="zine horizontal">
    <img src="whatever.jpg">
</figure>
And the CSS looks something like this, using nested selectors:
.zine {
  ...
  &.horizontal {
    ...
  }
  &.vertical {
    ...
  }
  &:hover {
    ...
  }
}
I haven’t done anything programmatic (like web components or @scope) that ensures that components won’t interfere with each other, but just having a convention and trying my best already feels like a big improvement.
Next: conventions to maintain some consistency across the site and keep these components in line with each other!
3. colours
colours.css has a bunch of variables like this which I can use as necessary.
Colour is really hard and I didn’t want to revisit my use of colour in this
refactor, so I left this alone.
The only guideline I’m trying to enforce here is that all colours used in the site are listed in this file.
:root {
  --pink: #fea0c2;
  --pink-light: #F9B9B9;
  --red: #f91a55;
  --orange: rgb(222, 117, 31);
  ...
}
4. font sizes
One thing I appreciated about Tailwind was that if I wanted to set a font
size, I could just think “hm, I want the text to be big”, write text-lg, and
be done with it! And maybe if it’s not big enough I’d use xl or 2xl instead.
No trying to remember whether I’m using em or px or rem.
So I defined a bunch of variables, taken from Tailwind, like this:
  --size-xs: 0.75rem;
  --line-height-xs: 1rem;

  --size-sm: 0.875rem;
  --line-height-sm: 1.25rem;
Then if I want to set a font size, I can do it like this. It’s a little more verbose than Tailwind but I’m happy with it for now.
h3 {
  font-size: var(--size-lg);
  line-height: var(--line-height-lg);
}
5. utilities
There are some things like buttons that appear in many different components. I’m calling these “utilities”.
I copied some utility classes from Tailwind (like .sr-only for things that
should only appear for screenreader users).
This section is pretty small and I try to be careful about making changes here.
6. the base
“base” styles are styles that apply across the whole site that I chose myself. I
have to keep this section really small because I’m not confident enough to
enforce a lot of styles across the whole site. These are the only two I feel
okay about right now, and I might change the <section> one:
/* put a 950px column in the middle of each <section> */
section {
  --inner-width: 950px;
  padding: 3rem max(1rem, (100% - var(--inner-width))/2);
}

a {
  color: var(--orange);
}
I think for the base styles it’s going to be easiest for me to work kind of bottom up – first start with almost nothing in the base styles, and then move some styles from the components into base styles as I identify common things I want.
7. spacing
I haven’t completely worked out an approach to managing padding and margins yet. I’m definitely trying to be more principled than how I was doing it in Tailwind though, where I would just haphazardly put padding and margins everywhere until it looked the way I wanted.
Right now I’m working towards making the outer layout components in charge of
spacing as much as possible. For example if I have a <section> with a bunch of
children that I want to have space between them, I might use this to space the
children evenly:
section > *+* {
  margin-top: 1rem;
}
Some inspiration blog posts:
8. responsive design: use more grid!
The way I was doing responsive design in Tailwind was to use a lot of media
queries. Tailwind has this md:text-xl syntax that means “apply the text-xl
style at sizes md or larger”.
I’m trying something pretty different now, which is to make more flexible CSS grid layouts that don’t need as many breakpoints. This is hard but it’s really interesting to learn about what’s possible with grid, and it’s a good example of something that I don’t think is possible with Tailwind.
For example, I’ve been learning about how to use auto-fit to automatically use
2 columns on a big screen and 1 column on a small screen like this:
  display: grid;
  grid-template-columns: repeat(auto-fit, minmax(min(100%, 400px), max-content));
  justify-content: center;
I also used grid-template-areas a lot which is an amazing feature that I don’t think you can use with Tailwind.
Some inspiration:
- A responsive grid layout with no media queries from CSS Tricks
9. the build system: esbuild
In development, I don’t need a build system: CSS now has both built in import statements, like this:
@import "reset.css";
@import "typography.css";
@import "colors.css";
and built in nested selectors, like this:
.page {
  h2 { ...}
}
If I want, I can use esbuild to bundle the CSS file for production. That looks something like this.
esbuild style.css --bundle --loader:.svg=dataurl --loader:.woff2=file --outfile=/tmp/out.css
Even though I usually avoid using CSS and JS build systems, I don’t mind using esbuild (which I wrote about in 2021 here) because it’s based on web standards and because it’s a static Go binary.
why migrate away from Tailwind?
A few people asked why I was migrating away from Tailwind. A few factors that contributed are:
- Tailwind has become much more reliant on a build system since 2018, I think it’s impossible (?) to use newer versions of Tailwind without using a build system. So I’ve been using Tailwind v2 for years. (there’s also litewind apparently)
- It’s always been true that you’re supposed to use Tailwind with a build
system, but I’ve never really done that, so I have 2.8MB
tailwind.min.cssfiles (270K gzipped) in a lot of my projects and it feels a little silly. - I’m a lot better at CSS than I was when I started using Tailwind
- Ultimately Tailwind is limiting: if you want to do Weird Stuff in your CSS, it’s not always possible with Tailwind. Those limits can be extremely useful (a lot of this post is about me reimplementing some of Tailwind’s limits!) but at this point I’d like to be able to pick and choose.
- I ended up with sites that mixed both vanilla CSS and Tailwind in the same project and that was not fun to maintain
- I got curious about what writing more semantic HTML would feel like.
CSS features I’m curious about
While doing this I learned about a lot of CSS features that I didn’t use but am curious about learning about one day:
@layer(from A Whole Cascade of Layers)- @scope) (especially this example of how to use @scope in a “component” CSS design from the specification!)
- container queries
- subgrid
one last reason I moved away from Tailwind
I’ve been talking a lot in this post about what I learned from using Tailwind, and that’s all true.
But I read this post 3 years ago called Tailwind and the Femininity of CSS that really stuck with me. I honestly probably started out with an attitude towards CSS a little like that post describes:
They’ve heard it’s simple, so they assume it’s easy. But then when they try to use it, it doesn’t work. It must be the fault of the language, because they know that they are smart, and this is supposed to be easy.
But in the last 10 years I’ve learned to really love and respect CSS as a technology.
So I decided years ago that I wanted to react to “CSS is hard” by getting better at CSS and taking it seriously as a technology, instead of devaluing it. Doing that changed everything for me: I learned that so many of my frustrations (“centering is impossible”) had been addressed in CSS a long time ago, and that also what “centering” means is not always straightforward and it makes sense that there are many ways to do it. CSS is hard because it’s solving a hard problem!
I’ve been so impressed by the new CSS features that have been built in the last 10-15 years (some of which I’ve talked about in this post!) and how they make it easier to use CSS, and spending the time to improve my CSS skills has been a really cool experience.
And that post made me feel like Tailwind contributes to the devaluing of CSS expertise, and like that’s not something I want to be a part of, even if Tailwind has been a useful tool for me personally. Especially in this time of LLMs where it feels more important than ever to value humans’ expertise.
Another blog post criticizing Tailwind that influenced me:
that’s all for now!
Thanks to Melody Starling who originally designed and wrote the CSS for wizardzines.com, everything cool and fun about the site is thanks to Melody.
Also I read so many incredible blog posts about CSS while working on this (from CSS Tricks, Smashing Magazine, and more), I’ve tried to link some of them throughout this post and I really appreciate how much folks in the CSS community share their practices.
Links to CSS colour palettes
A while back I decided to stop using Tailwind for new projects and to just write vanilla CSS instead.
But one thing I missed about Tailwind was the colour palette (here as CSS).
If I wanted a light blue I could just use blue-100 and if I didn’t like it
maybe try blue-200 or blue-50. I’m not very good with colours so it makes
a big difference to me to have a reasonable colour palette that somebody who is
better at colour than me has thought about.
But I’m also a little tired of those Tailwind colours, so I asked on Mastodon today what other colour palettes were out there. And then a friend said they wanted links to those colour palettes, so here’s a blog post so my friend can see them, and all the rest of you too :)
my favourites
The ones I liked the most were:
- uchū (css file, FAQ)
- flexoki (css file)
- reasonable colours, which seems to have a focus on accessibility (css file)
more colour palettes
colourscheme generators
Folks also linked to a bunch of colour palette generators
I’ve always found these types of generators too hard to use but maybe one day I will get better enough at colour that I’m able to use a colour palette generator successfully so I’ll leave those links there anyway.
and more colour tools:
- colorhexa has some info about colorblindness
oklch
Generative colors with CSS gives an example of
how to use the oklch CSS function to dynamically generate colors.
Testing Vue components in the browser
Hello! One of my long term projects on here is figuring out how to write frontend Javascript without using Node or any other server JS runtime.
One issue I run into a lot in my frontend JS projects is that I don’t know how to write tests for them. I’ve tried to use Playwright in the past, but it felt slow and unwieldy to be starting these new browser processes all the time, and it involved some Node code to orchestrate the tests.
The result is that I just don’t test my frontend code which doesn’t feel great. Usually I don’t update my projects much either so it doesn’t come up that much, but it would be nice to be able to make changes with more confidence! So a way to do frontend testing that I like has been on my wishlist for a long time.
idea: just run the tests in the browser tab
Alex Chan wrote a great post a while back called Testing JavaScript without a (third-party) framework in response to one of my previous posts in this series that explained how to write a tiny unit-testing framework that runs in a page in browser.
I loved this post at the time, but it only talked about unit testing and I wanted to write end-to-end integration tests for my Vue components, and I didn’t know how to do that.
So when I was talking to Marco the other day and he said something like “you know, you can just run tests for your Vue components in the browser”, I thought “hey, I should try that again!!!”
I just did all of this yesterday so certainly there’s a lot to improve but I wanted to write down a few things I noticed about the process before I forget.
This was a bit tricky for me because the Vue site usually assumes that you’re
using Node as part of your build process in some way (there’s a lot of “step 1:
npm install THING), and I didn’t want to use Node/Deno/etc. But it turned
out to not be too complicated.
The project I’m going to talk about testing is this zine feedback site I wrote in 2023.
the test framework: QUnit
I used QUnit. It worked great but I don’t have anything interesting to say about how it works so I’ll leave it at that. I think that Alex’s “write your own test framework” approach would have worked too. I followed these directions.
I did appreciate that QUnit has a “rerun test” button that will only rerun 1 test. Because there are so many network requests in my tests, having a way to run just 1 test makes it a lot less confusing to debug the test.
step 1: set up the component for testing
The first thing I needed to do was get my Vue components set up in the test environment.
I changed my main app to put all my components in window._components,
kind of like this:
const components = {
  'Feedback': FeedbackComponent,
  ...
}
window._components = components;
Then I was able to write a mountComponent function which
does basically exactly the same thing my normal main app does
(render a tiny template with the component I want to use).
The only differences are:
- I can optionally pass some some extra data to use as its props.
- It mounts the component to a temporary invisible div which will get removed
from the DOM after the test is done. The div is positioned off the page
(
position: absolute; top: -10000, ...) so you can’t see it.
Here’s what using the mountComponent function looks like:
const {div} = mountComponent(
  '<Page :feedbacks="feedbacks" id=2 />',
  {feedbacks: [testFeedback]},
);
and here’s the code for it:
function mountComponent(template, data) {
  const app = Vue.createApp({
    template: template,
    data: () => data,
  })
  for (const [c, v] of Object.entries(window._components)) {
    app.component(c, v);
  }
  const div = document.getElementById('qunit-fixture')
             .appendChild(document.createElement('div'));
  return div;
}
The result is a div where I can programmatically click, fill in form data, check that the right content appears, etc.
step 2: add some fixture data
Because I was writing end-to-end integration tests to make sure my client JS worked properly with my server, I needed to have some test data in my database. So I wrote ~25 lines of SQL to set up some test data in my database, and added an endpoint to my dev server to run the SQL to reset the test data to a known state.
async function reset() {
    return fetch('/api/reset_test_data', {method: "POST"})
}
Then I just run await reset() at the beginning of any test that needs the
test data.
My reset() function actually doesn’t always totally reset everything which is
kind of bad, but it was workable to start with and can always be improved.
step 3: a basic test
Here’s what a basic test looks like! Basically we’re rendering the div and make sure it contains some approximately correct data.
QUnit.test('renders feedback content', async function (assert) {
  const {div} = mountComponent(
    '<Page :feedbacks="feedbacks" id=2 image=2 page_hash=2 />',
    {feedbacks: [testFeedback]},
  );
  assert.ok(div.textContent.includes('loved this section'));
})
Those are all the basic pieces! Now here are a few issues I ran into along the way
waiting for parts of the page to render
I have a lot of network requests in my tests, and it takes time for them to finish and for the Vue code to do what it has to do with the results and update the DOM.
I think we all learned a long time ago that putting random sleep() calls in
your tests and hoping that the timings are right is slow and flaky and extremely
frustrating, so I needed a different way.
As far as I can tell the normal way to deal with this is to figure out a way to tell from the DOM whether it’s okay to proceed or not. Like “if this button is visible, we can “.
So I wrote a little waitFor() function that polls every 20ms to see if a
condition has finished yet. It times out after 2 seconds.
Here’s what using it looks like:
QUnit.test("click item", async function (assert) {
  const {div} = mountComponent(
    '<Feedback zine_id="test123" image_width="800px" />',
    {});
  const item = await waitFor(() => div.querySelector('.feedback-item'));
  item.click();
  // rest of test goes here...
})
It looks like there are a lot of implementations of this concept out there and they’re all better thought-through than mine. (from a quick Google: qunit-wait-for, playwright expect.poll)
figuring out the right thing to wait for is not straightforward
In some cases I thought I’d identified the right thing to wait for in the DOM (“just wait for this textarea to appear!’) but it turned out that because of some internal details of how my program works, actually I needed to wait for something else later on which was hard to pin down.
I ended up changing one of my components to add some random value to the DOM
when it was finished an important action (like data-this-thing-is-ready=true)
which didn’t feel great.
My best guess is that the right way to fix this kind of test issue is a refactor that also makes the app more reliable for the users: if there’s an element in the DOM that isn’t actually ready for the user to interact with, maybe I shouldn’t be displaying it yet!
adding some CSS classes to identify things (but is that right?)
I ended up adding a few classes to HTML elements that I needed to find in the tests, either because I needed to click on them or wait for them to appear in the DOM.
I might want to change this approach later - frontend testing frameworks seem to suggest avoiding using CSS classes and instead using something like getByRole or as a last resort something like a data-testid. Feels like there’s a way to make the app more accessible and easier to test at the same time.
filling out forms is tricky
To fill out a form, I can’t just set the value, I also need to dispatch an
event to tell Vue that the element has changed. For example, checkbox and
textarea need different kinds of events.
textarea.value = 'banana banana banana';
textarea.dispatchEvent(new Event('input'));
checkbox.checked = true;
checkbox.dispatchEvent(new Event('change'));
This is kind of annoying and it made me realize why I might want to use some kind of UI testing library, for example:
- Testing Library’s example of filling out a form looks extremely different from what I’m doing
- Vue Test Utils: their section on form handling looks like it simplifies this a lot.
test coverage
I want to have an idea of what my test coverage was, and it turns out that Chrome actually has a built-in code coverage feature for JS and CSS!
My JS is bundled into a file called bundle.js with esbuild, so I could just
look at bundle.js and see which lines weren’t covered.
The process was a little finicky: I had to turn off sourcemaps in the Chrome devtools to get this to work, and there’s a specific not super obvious series of actions I have to do in order to see the coverage data.
this was so fun!
As usual with these posts I’ve never really worked as a frontend or backend developer (other than for myself!) and I feel like I’m constantly learning how to do super basic tasks.
I really had a blast doing this. My frontend projects always feel so fragile because they’re untested, and maybe one day I’ll have a test suite I’m confident in!
Some things I’m still thinking about:
- While writing this post I found this frontend testing library called
Testing Library that has a lot of
guidelines for how to write tests that are very different from my initial ideas.
I experimented with rewriting everything to use Testing Library and it felt
pretty good, so we’ll see how that goes. They distribute a
.umd.jsfile that works without Node. - I’m not sure how I feel about not having a way to run these tests on the command line at all. Maybe there’s a simple way to work primarily in the browser but have an way to run them in CI too if I want?
Examples for the tcpdump and dig man pages
Hello! My big takeaway from last month’s musings about man pages was that examples in man pages are really great, so I worked on adding (or improving) examples to two of my favourite tools’ man pages.
Here they are:
- the dig man page (now with examples)
- the tcpdump man page examples (this one is an update to the previous examples)
the goal: include the most basic examples
The goal here was really just to give the absolute most basic examples of how to use the tool, for people who use tcpdump or dig infrequently (or have never used it before!) and don’t remember how it works.
So far saying “hey, I want to write an examples section for beginners and infrequent users of this tools” has been working really well. It’s easy to explain, I think it makes sense from everything I’ve heard from users about what they want from a man page, and maintainers seem to find it compelling.
Thanks to Denis Ovsienko, Guy Harris, Ondřej Surý, and everyone else who reviewed the docs changes, it was a good experience and left me motivated to do a little more work on man pages.
why improve the man pages?
I’m interested in working on tools’ official documentation right now because:
- Man pages can actually have close to 100% accurate information! Going through a review process to make sure that the information is actually true has a lot of value.
- Even with basic questions “what are the most commonly used tcpdump flags”,
often maintainers are aware of useful features that I’m not! For
example I learned by working on these tcpdump examples that if you’re saving
packets to a file with
tcpdump -w out.pcap, it’s useful to pass-vto print a live summary of how many packets have been captured so far. That’s really useful, I didn’t know it, and I don’t think I ever would have noticed it on my own.
It’s kind of a weird place for me to be because honestly I always kind of assume documentation is going to be hard to read, and I usually just skip it and read a blog post or Stack Overflow comment or ask a friend instead. But right now I’m feeling optimistic, like maybe the documentation doesn’t have to be bad? Maybe it could be just as good as reading a really great blog post, but with the benefit of also being actually correct? I’ve been using the Django documentation recently, and it’s really good! We’ll see.
on avoiding writing the man page language
The tcpdump project tool’s man page is
written in the roff language,
which is kind of hard to use and that I really did not feel like learning it.
I handled this by writing a very basic markdown-to-roff script to convert Markdown to roff, using similar conventions to what the man page was already using. I could maybe have just used pandoc, but the output pandoc produced seemed pretty different, so I thought it might be better to write my own script instead. Who knows.
I did think it was cool to be able to just use an existing Markdown library’s ability to parse the Markdown AST and then implement my own code-emitting methods to format things in a way that seemed to make sense in this context.
man pages are complicated
I went on a whole rabbit hole learning about the history of roff, how it’s
evolved since the 70s, and who’s working on it today, inspired by learning about
the mandoc project that BSD systems (and some Linux
systems, and I think Mac OS) use for formatting man pages. I won’t say more
about that today though, maybe another time.
In general it seems like there’s a technical and cultural divide in how documentation works on BSD and on Linux that I still haven’t really understood, but I have been feeling curious about what’s going on in the BSD world.
Notes on clarifying man pages
Hello! After spending some time working on the Git man pages last year, I’ve been thinking a little more about what makes a good man page.
I’ve spent a lot of time writing cheat sheets for tools (tcpdump, git, dig, etc) which have a man page as their primary documentation. This is because I often find the man pages hard to navigate to get the information I want.
Lately I’ve wondering – could the man page itself have an amazing cheat sheet in it? What might make a man page easier to use? I’m still very early in thinking about this but I wanted to write down some quick notes.
I asked some people on Mastodon for their favourite man pages, and here are some examples of interesting things I saw on those man pages.
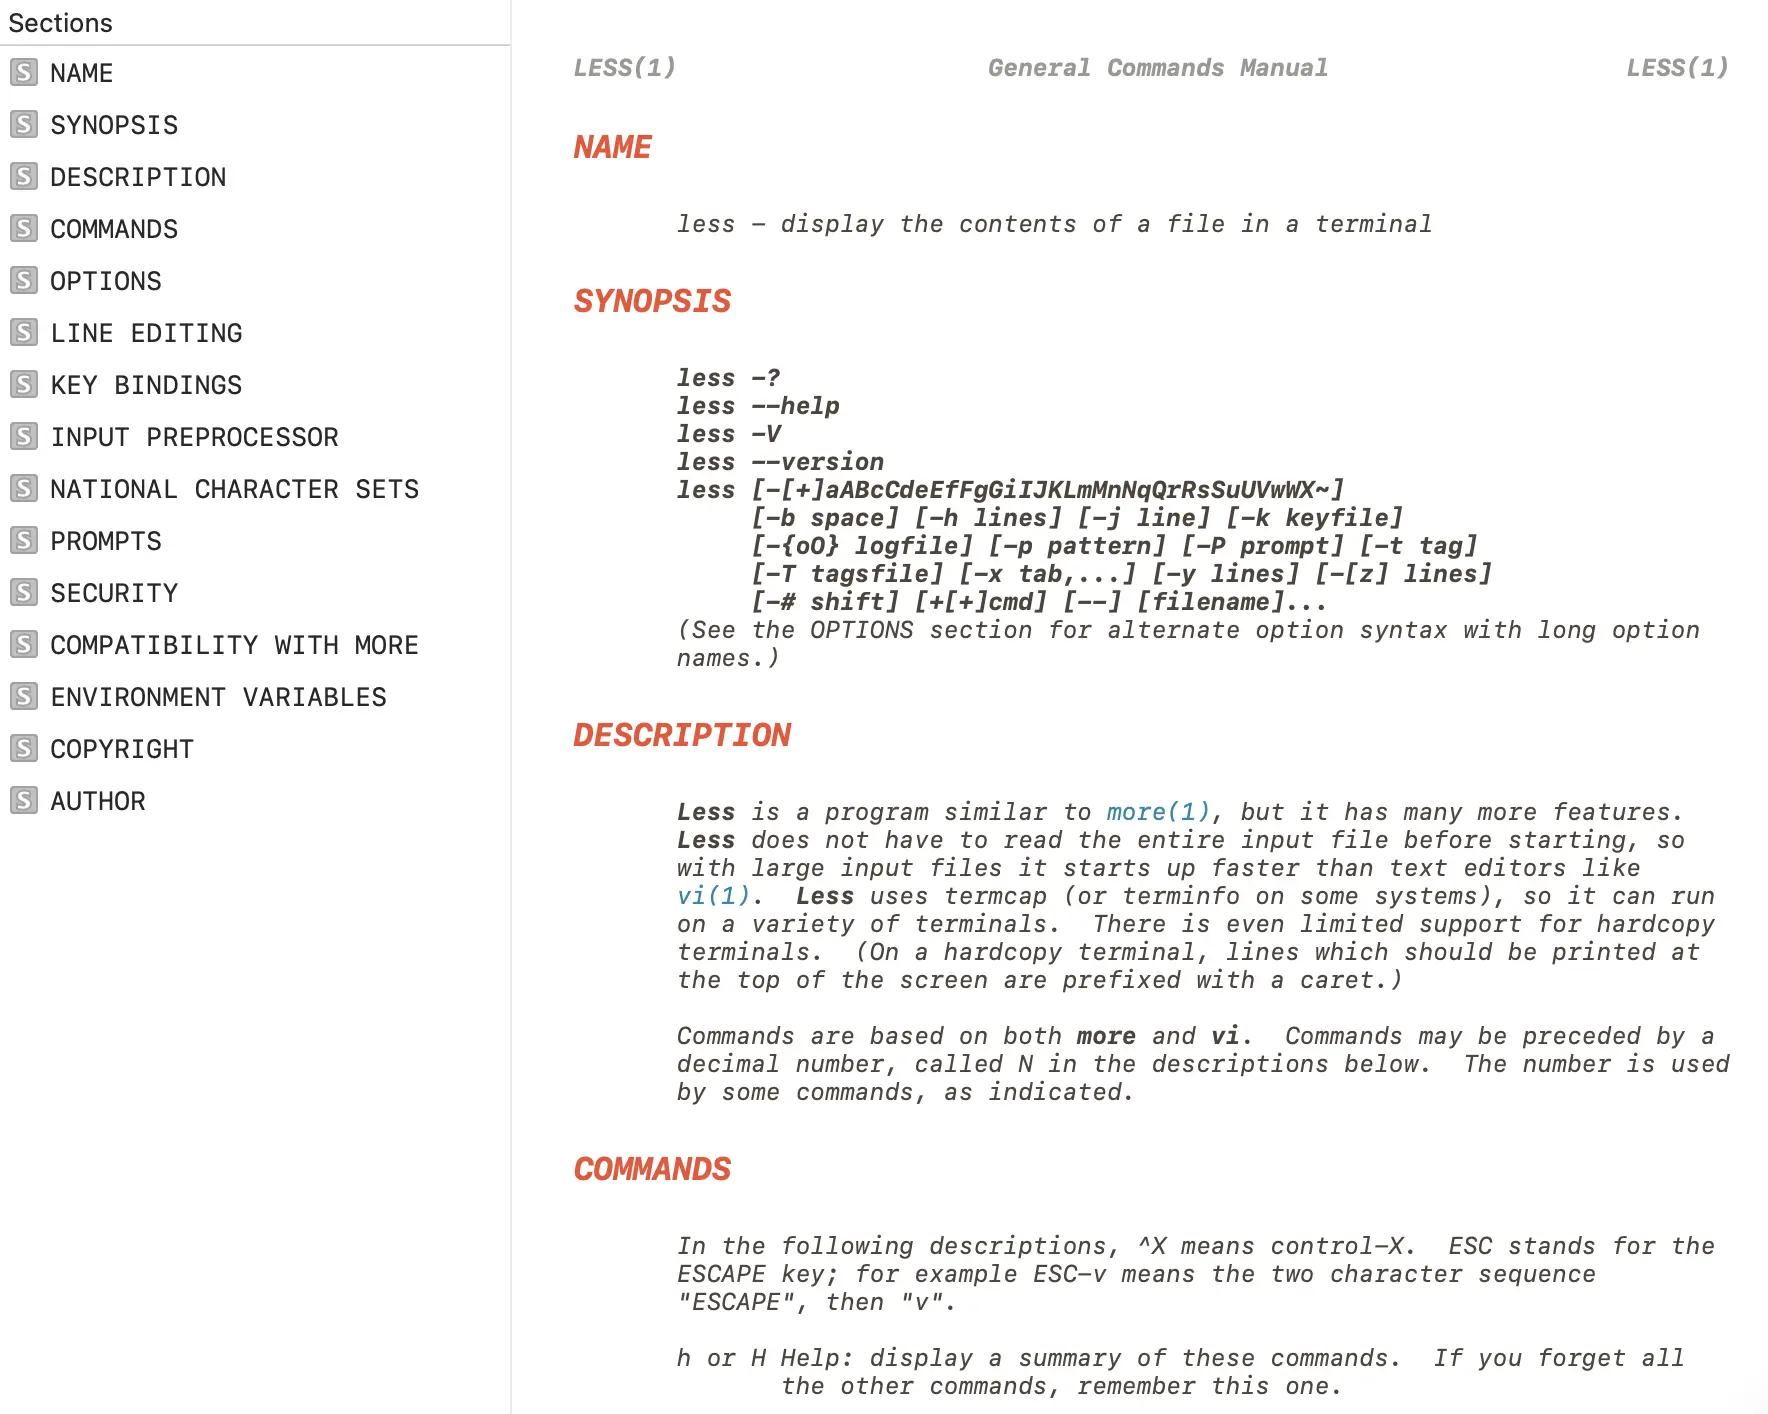
an OPTIONS SUMMARY
If you’ve read a lot of man pages you’ve probably seen something like this in
the SYNOPSIS: once you’re listing almost the entire alphabet, it’s hard
ls [-@ABCFGHILOPRSTUWabcdefghiklmnopqrstuvwxy1%,]

grep [-abcdDEFGHhIiJLlMmnOopqRSsUVvwXxZz]
The rsync man page has a solution I’ve never seen before: it keeps its SYNOPSIS very terse, like this:
 Local:
     rsync [OPTION...] SRC... [DEST]
and then has an “OPTIONS SUMMARY” section with a 1-line summary of each option, like this:
--verbose, -v            increase verbosity
--info=FLAGS             fine-grained informational verbosity
--debug=FLAGS            fine-grained debug verbosity
--stderr=e|a|c           change stderr output mode (default: errors)
--quiet, -q              suppress non-error messages
--no-motd                suppress daemon-mode MOTD
Then later there’s the usual OPTIONS section with a full description of each option.
an OPTIONS section organized by category
The strace man page organizes its options by category (like “General”, “Startup”, “Tracing”, and “Filtering”, “Output Format”) instead of alphabetically.
As an experiment I tried to take the grep man page and make an
“OPTIONS SUMMARY” section grouped by category, you can see the results
here. I’m not
sure what I think of the results but it was a fun exercise. When I was writing
that I was thinking about how I can never remember the name of the -l grep
option. It always takes me what feels like forever to find it in the man page
and I was trying to think of what structure would make it easier for me to find.
Maybe categories?
a cheat sheet
A couple of people pointed me to the suite of Perl man pages (perlfunc, perlre, etc), and one thing I
noticed was man perlcheat, which has
cheat sheet sections like this:
 SYNTAX
 foreach (LIST) { }     for (a;b;c) { }
 while   (e) { }        until (e)   { }
 if      (e) { } elsif (e) { } else { }
 unless  (e) { } elsif (e) { } else { }
 given   (e) { when (e) {} default {} }
I think this is so cool and it makes me wonder if there are other ways to write condensed ASCII 80-character-wide cheat sheets for use in man pages.
examples are very popular
A common comment was something to the effect of “I like any man page that has examples”. Someone mentioned the OpenBSD man pages, and the openbsd tail man page has examples of the exact 2 ways I use tail at the end.
I think I’ve most often seen the EXAMPLES section at the end of the man page, but some man pages (like the rsync man page from earlier) start with the examples. When I was working on the git-add and git rebase man pages I put a short example at the beginning.
a table of contents, and links between sections
This isn’t a property of the man page itself, but one issue with man pages in the terminal is it’s hard to know what sections the man page has.
When working on the Git man pages, one thing Marie and I did was to add a table of contents to the sidebar of the HTML versions of the man pages hosted on the Git site.
I’d also like to add more hyperlinks to the HTML versions of the Git man pages at some point, so that you can click on “INCOMPATIBLE OPTIONS” to get to that section. It’s very easy to add links like this in the Git project since Git’s man pages are generated with AsciiDoc.
I think adding a table of contents and adding internal hyperlinks is kind of a nice middle ground where we can make some improvements to the man page format (in the HTML version of the man page at least) without maintaining a totally different form of documentation. Though for this to work you do need to set up a toolchain like Git’s AsciiDoc system.
It would be amazing if there were some kind of universal system to make it easy
to look up a specific option in a man page (“what does -a do?”).
The best trick I know is use the man pager to search for something like ^ *-a
but I never remember to do it and instead just end up going through
every instance of -a in the man page until I find what I’m looking for.
examples for every option
The curl man page has examples for every option, and there’s also a table of contents on the HTML version so you can more easily jump to the option you’re interested in.
For instance the example for --cert makes it easy to see that you likely also want to pass the --key option, like this:
curl --cert certfile --key keyfile https://example.com
The way they implement this is that there’s [one file for each option](https://github.com/curl/curl/blob/dc08922a61efe546b318daf964514ffbf41583 25/docs/cmdline-opts/append.md) and there’s an “Example” field in that file.
formatting data in a table
Quite a few people said that man ascii was their favourite man page, which looks like this:
 Oct   Dec   Hex   Char
 ───────────────────────────────────────────
 000   0     00    NUL '\0' (null character)
 001   1     01    SOH (start of heading)
 002   2     02    STX (start of text)
 003   3     03    ETX (end of text)
 004   4     04    EOT (end of transmission)
 005   5     05    ENQ (enquiry)
 006   6     06    ACK (acknowledge)
 007   7     07    BEL '\a' (bell)
 010   8     08    BS  '\b' (backspace)
 011   9     09    HT  '\t' (horizontal tab)
 012   10    0A    LF  '\n' (new line)
Obviously man ascii is an unusual man page but I think what’s cool about this man page (other than the fact that it’s always
useful to have an ASCII reference) is it’s very easy to scan to find the
information you need because of the table format. It makes me wonder if there
are more opportunities to display information in a “table” in a man page to make
it easier to scan.
the GNU approach
When I talk about man pages it often comes up that the GNU coreutils man pages (for example man tail) don’t have examples, unlike the OpenBSD man pages, which do have examples.
I’m not going to get into this too much because it seems like a fairly political topic and I definitely can’t do it justice here, but here are some things I believe to be true:
- The GNU project prefers to maintain documentation in “info” manuals instead of man pages. This page says “the man pages are no longer being maintained”.
- There are 3 ways to read “info” manuals: their HTML version, in Emacs, or with a standalone
infotool. I’ve heard from some Emacs users that they like the Emacs info browser. I don’t think I’ve ever talked to anyone who uses the standaloneinfotool. - The info manual entry for tail is linked at the bottom of the man page, and it does have examples
- The FSF used to sell print books of the GNU software manuals (and maybe they still do sometimes?)
After a certain level of complexity a man page gets really hard to navigate: while I’ve never used the coreutils info manual and probably won’t, I would almost certainly prefer to use the GNU Bash reference manual or the The GNU C Library Reference Manual via their HTML documentation rather than through a man page.
a few more man-page-adjacent things
Here are some tools I think are interesting:
- The fish shell comes with a Python script to automatically generate tab completions from man pages
- tldr.sh is a community maintained database of examples, for example you can run it as
tldr grep. Lots of people have told me they find it useful. - the Dash Mac docs browser has a nice man page viewer in it. I still use the terminal man page viewer but I like that it includes a table of contents, it looks like this:
it’s interesting to think about a constrained format
Man pages are such a constrained format and it’s fun to think about what you can do with such limited formatting options.
Even though I’m very into writing I’ve always had a bad habit of never reading documentation and so it’s a little bit hard for me to think about what I actually find useful in man pages, I’m not sure whether I think most of the things in this post would improve my experience or not. (Except for examples, I LOVE examples)
So I’d be interested to hear about other man pages that you think are well designed and what you like about them, the comments section is here.