Reading List
The most recent articles from a list of feeds I subscribe to.
Too Much
Glass-Steagall Act Farewell Show
Six years ago Mark Mager convinced me it was a good idea to play an acoustic Beatles medley in front of our entire Morgan Stanley division to celebrate my departure and his return. Now you too can witness the final (only) show of The Glass-Steagall Act (thankfully featuring the talents of Bill "The Intern" Ward):
Space Time Travel with Wormie

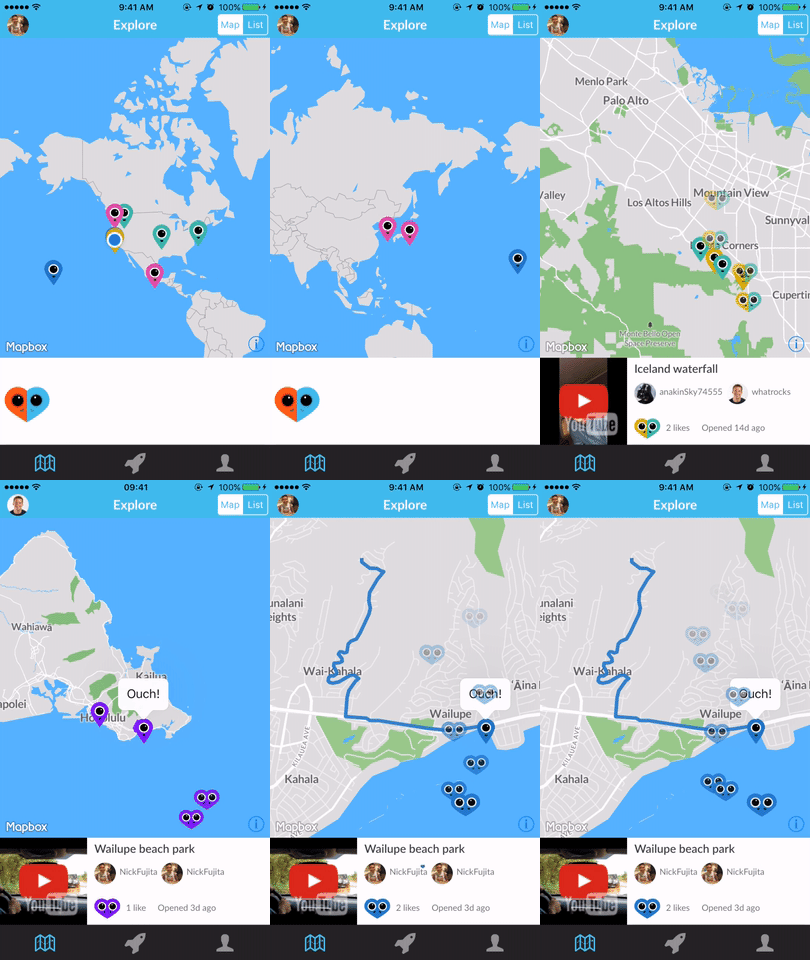
Wormie is an iOS app to connect you with people in the places you want to see.

Maybe you want to see if there's a line at your favorite restaurant right now. Or maybe you want to see tonight's sunset, but from Australia.

Just open up Wormie, make a new Wormhole request, and Wormie will connect you with someone who can live stream back your request in real-time.

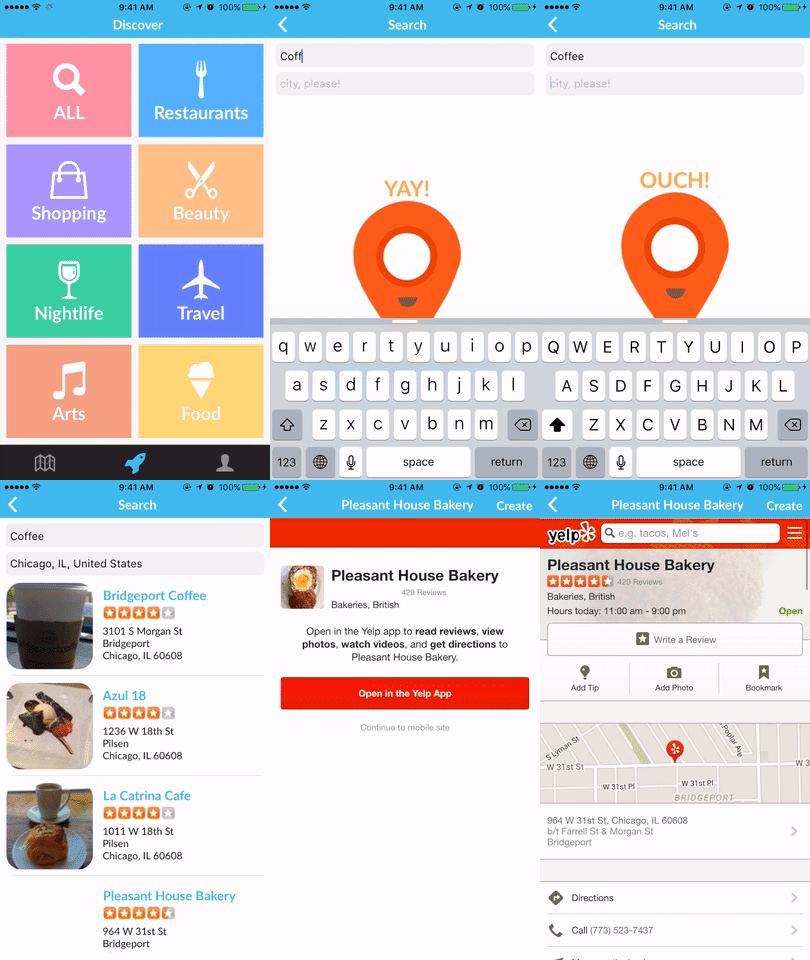
Think TaskRabbit meets Periscope. You can look up specific places with Yelp within Wormie to help you make your Wormhole requests.

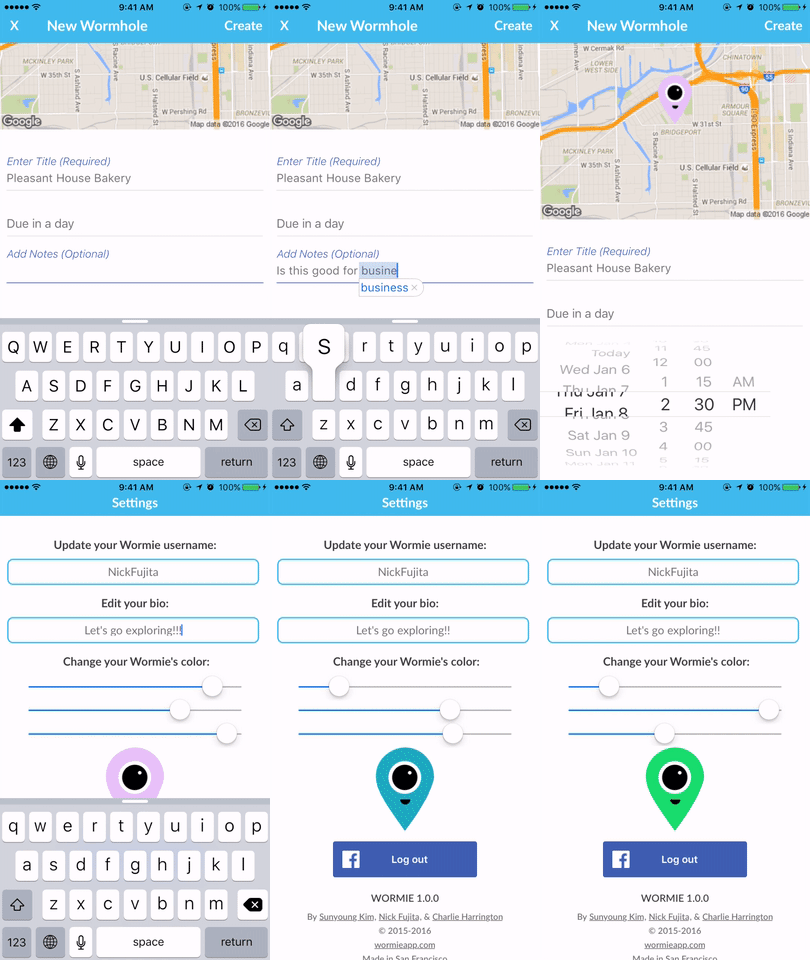
Design your own Wormie icon, and when you make a Wormhole connection, your Wormies will join together in unique heart!

The react natives
The Wormie team is:
- Sunyoung Kim
- Nick Fujita
- Me (Charlie Harrington)
We had a great time building Wormie as a way to learn some new technologies and libraries:
Minnow
Pseudoclassical Star Wars
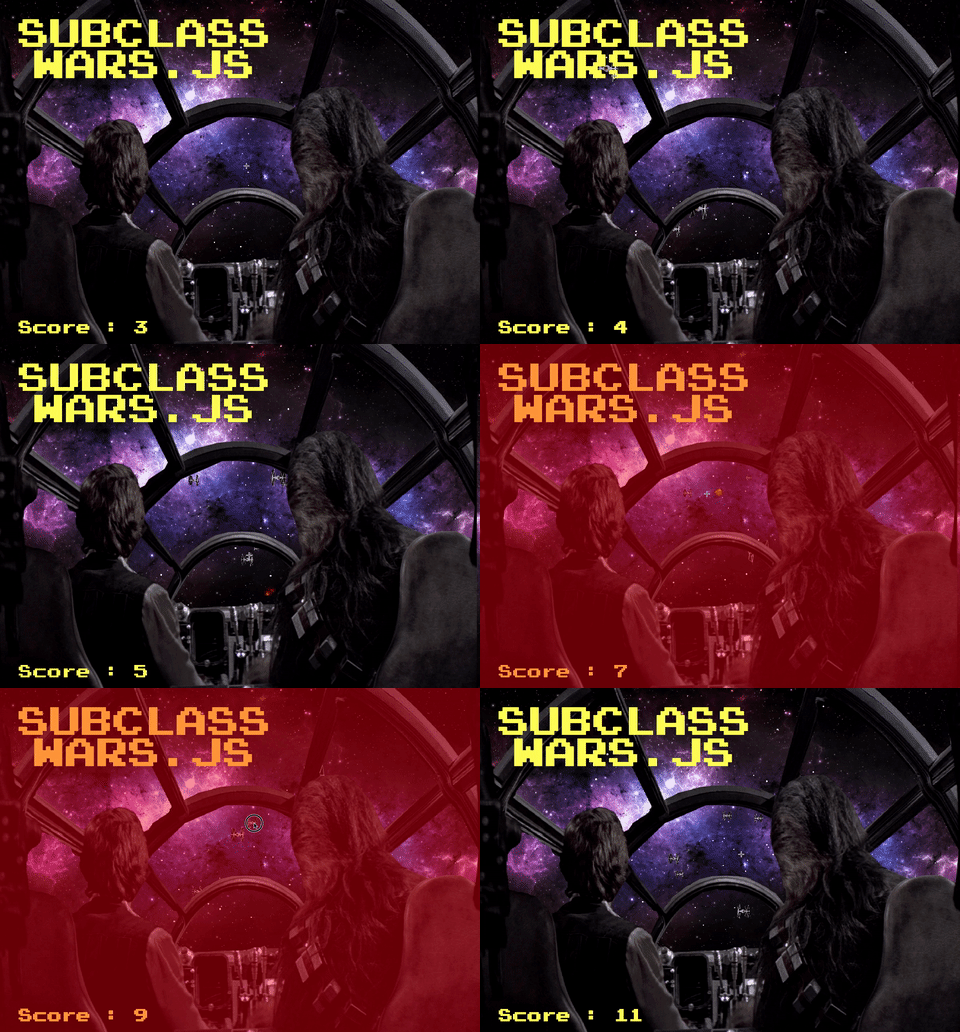
Subclassing in JavaScript is quite useful. I used JavaScript subclasses to create this Star Wars inspired game.

You can play it right now, or check out the code on Github. The rest of this insanely long post will demonstrate how to use JavaScript subclassing to build the foundations of a similar game or visualization.
Subclassing overview
A class can be written to create fleets of similar objects with shared properties and methods. For example, if you're building the game Frogger, you can create a class called Vehicle that will produce a single instance of one of those pesky little cars. Let's imagine that your Vehicle class has one property (location, to track a car's current location) and one method (move, to drive a car forward). Based on the difficulty of the game level, you can use your Vehicle class to produce as many cars as you want to hinder that frog from its goal.
But what if you get the idea to introduce a new type of vehicle that nefariously changes lanes at random, or a friendly car that scoops up the froggie and brings him to the pond? You could certainly add those features to your original Vehicle class, but then all instances of Vehicle would have those new properties and methods, and it may prove difficult to track and turn them on for certain Vehicle instances based on your game design (e.g. produce one and only one friendly car per level).
Another option could be replicating the existing class for these new vehicle types. Now you'll have separate Vehicle, AggressiveVehicle, and FriendlyVehicle classes, and you can instantiate them all independently to your heart's delight. However, you've likely duplicated a lot of similar code in each of these classes - such as the location property and the move method. If you ever want to change how all the vehicles move, you'll now need to remember to change the code in each of the classes. There's got to be a better way to do this. And there is - subclassing!
Subclassing allows you to create a fleet of objects that look vaguely similar to other objects. Subclasses are able to "share" properties and methods from their "parent" or "superclass". In JavaScript, subclassing is implemented via delegation. Rather than keeping the Frogger metaphor going, let's transition to a galaxy far, far away...
Starfield simulation
Like all great games, SubclassWars.js is based on a Windows screensaver.
We want to simulate moving through space. A good first step could be randomly drawing a bunch of white dots on a black background. They don't even have to move - just get them to show up.
Let's create a base class called Star:
    /**
    *  Star class: the base class
    */
    var Star = function(x, y){
    // "Stars" are just HTML spans
    this.$node = $('<span class="star"></span');
    // Location along x-axis
    this.x = x;
    // Location along y-axis
    this.y = y;
    this.setPosition();
    };
    // // Position the HTML span based on x and y
    Star.prototype.setPosition = function(){
    var positionSettings = {
        top: this.x,
        left: this.y
    };
    var styleSettings = {
        "border": "2px",
        "border-style": "solid",
        "border-color": "white",
        "border-radius": "2px",
        "position": "absolute"
    };
    this.$node.css(styleSettings);
    this.$node.css(positionSettings);
    };

    /**
     *  Setup starfield size
     */
    var height = 200;
    var width = 700;

    /**
     *  Build star helper function
     */
    var buildStar = function() {
    var star = new Star((Math.random() * width),
                        (Math.random() * height)
                        );
    $('#stars').append(star.$node);
    };

    /**
    *  Initialize the game
    */
    $(document).ready(function() {

    $('.starfield').css({
        "height": height,
        "width": width,
        "background-color": "black",
        "position":"relative"
    });

    for (var i = 0; i < 20; i++) {
        buildStar();
    }

    });
Hello, stars! Note that I've used the pseudoclassical instantiation pattern (rather than the functional or prototypal patterns) to build the Star class, so new stars need to be instantiated with the "new" keyword. Another important detail for this and any other HTML visualizations is that the origin (the [0,0] location) of any HTML element or document is the upper left corner.
Now, let's make those stars twinkle to show you how subclassing works. We will need to refactor our base Star class slightly:
/**
 *  Star class: the base class
 */
 var Star = function(x, y, timeBetweenSteps){
   this.$node = $('<span class="star"></span');
   this.x = x;
   this.y = y;
   // New param to create a loop
   this.timeBetweenSteps = timeBetweenSteps;
   this.step();
   this.setPosition();
 };
 Star.prototype.step = function(){
   setTimeout(this.step.bind(this),
     this.timeBetweenSteps);
 };
 Star.prototype.setPosition = function(){
   var positionSettings = {
     top: this.y,
     left: this.x
 };
   var styleSettings = {
     "border": "2px",
     "border-style": "solid",
     "border-color": "white",
     "border-radius": "2px",
     "position": "absolute"
   };
   this.$node.css(styleSettings);
   this.$node.css(positionSettings);
 };

 /**
 *  TwinkleStar class (our first subclass!)
 */
 var TwinkleStar = function(x, y, timeBetweenSteps){
   Star.call(this, x, y, timeBetweenSteps);
 };
 TwinkleStar.prototype = Object.create(Star.prototype);
 TwinkleStar.prototype.constructor = TwinkleStar;
 TwinkleStar.prototype.step = function(){
   Star.prototype.step.call(this);
   this.$node.toggle();
 };

 /**
  *  Setup starfield size
  */
 var height = 200;
 var width = 700;

 /**
  *  Build star helper function
  */
 var buildStar = function() {
   var star = new Star((Math.random() * width),
                       (Math.random() * height),
                       100
                       );
   $('#stars').append(star.$node);
 };

 var buildTwinkleStar = function() {
   var star = new TwinkleStar((Math.random() * width),
                       (Math.random() * height),
                       100
                       );
   $('#twinkle').append(star.$node);
 };

 /**
 *  Initialize the game
 */
 $(document).ready(function() {

   $('.starfield').css({
     "height": height,
     "width": width,
     "background-color": "black",
     "position":"relative"
   });
   for (var i = 0; i < 20; i++) {
     buildStar();
     buildTwinkleStar();
   }

 });
Now we're getting somewhere!
A lot happened in the last in the last iteration of code, and it's important to highlight some things now. First, we introduced a new method to our base Star class called 'step' that essentially mimics a game loop with the native JS function setTimeout. This is a little hacky and definitely not what you want to use for a real game, but this is just a demo, and hey, it's me.
TODO: fix stars
With our new step method built into the base Star class, we can now create lots of different subclasses of Star that add unique functionality. TwinkleStar twinkles, but we might want other stars that don't twinkle. How about stars that move instead of twinkle? Good idea, but we're not ready to get there just yet.
Notice that we are calling setTimeout within the step method, and then passing in step as the function argument for setTimeout. setTimeout takes two arguments, a function to execute after a specified time, and that specified time. However, when setTimeout receives the function argument, it will simply accept the function value without maintaining any reference to the star instance that called step in the first place. That means that step will be called again as a free function invocation - 'this' will be bound to the global window object. That's not what we want at all. One solution is to set a context variable (var that = this) in the step function and use it as context for calling step. Another solution, which I've used, is to use bind to create a function called step where "this" is specifically bound to the star that called step. That was a mouthful, but an important mouthful.
Let's talk about how we created the TwinkleStar subclass. We created a function called TwinkleStar with the same parameter signature as Star. Within that function, the Star class function is called using the .call method to bind 'this' to the new TwinkleStar object being created. Now, the new TwinkleStar will be set up with the base properties of a regular ol' Star (e.g. x, y, timeBetweenSteps, $node). Outside of the TwinkleStar function, we set up property and method delegation to the Star class using the Object.create pattern so that our new TwinkleStars can use any of the methods from the Star class (e.g. step, setPosition). Then we changed the constructor property to the TwinkleStar class so that any new TwinkleStars will be able to state that they are an "instanceof" TwinkleStar (and not Star). Finally, the coolest thing we do is write a new step method for TwinkleStar where we specify our unique action for all TwinkleStars. First we call the original Star step method, and then, crucially, we use jQuery to toggle the star span node on and off each time step gets executed - AKA making them twinkle.
That's it! JavaScript subclassing in the pseudoclassical pattern.
The lost city of Z
Now it's time to get serious about our screensaver replica. We need to make moving stars. But not just any moving stars, we need our stars to move in such a way that it feels like we are being whisked away to a faraway planet for a new and exciting adventure. The stars need to move "towards" the screen, even though we can only place these HTML spans on a flat 2D surface. Yikes. Now, there are lots of really impressive implementations of moving starfields on the web, so it's definitely possible, but will require some math. After some searching, I discovered a very simple procedure that can calculate an x and y position for a star taking into account a simulated z-axis property.
I'll walk through our changes in the code. Note that I'm not including the code for the Star or TwinkleStar classes since those won't be changing anymore.
/**
 *  MoveStar class
 */
 var MoveStar = function(x, y, z, timeBetweenSteps){
   this.z = z;
   Star.call(this, x, y, timeBetweenSteps);
 };
 MoveStar.prototype = Object.create(Star.prototype);
 MoveStar.prototype.constructor = MoveStar;
 MoveStar.prototype.setPosition = function(){

   var k = 128.0 / this.z;
   // Translate into x-pos in 2D
   var px = (this.x * k) + (width / 2);
   // Translate into y-pos in 2D
   var py = (this.y * k) + (height / 2);

   var positionSettings = {
     top: py,
     left: px
   };

   // Stars "grow" larger when closer
   var size = ( (1 - (this.z / 32)) * 3 );

   var styleSettings = {
     "border": size,
     "border-style": "solid",
     "border-color": "white",
     "border-radius": "2px",
     "position": "absolute"
   };
   this.$node.css(styleSettings);
   this.$node.css(positionSettings);

 };
 MoveStar.prototype.step = function(){

   this.setPosition();

   // Each tick, decrement z slightly
   this.z -= 0.2;

   if ( this.z <= 0 ||
         (this.y * 128.0 / this.z) + (height / 2) < 0 ||
         (this.y * 128.0 / this.z) + (height / 2) > height ||
         (this.x * 128.0 / this.z) + (width / 2) < 0 ||
         (this.x * 128.0 / this.z) + (width / 2) > width
     ){
    // When star "reaches" the screen, send it far away!!
    this.x = randomInRange(25);
    this.y = randomInRange(25);
    this.z = 31;
   }

   Star.prototype.step.call(this);
 };
 /**
  *  Helper function
  */
 var randomInRange = function(n){
       var sign = Math.random() > 0.5 ? 1 : -1;
       return sign * Math.floor( Math.random() * n);
 };

 /**
  *  Setup starfield size
  */
 var height = 400;
 var width = 700;

 /**
  *  Build star helper function
  */
 var buildStar = function() {
   var star = new Star((Math.random() * width),
                       (Math.random() * height),
                       200
                       );
   $('#stars').append(star.$node);
 };

 var buildTwinkleStar = function() {
   var star = new TwinkleStar((Math.random() * width),
                       (Math.random() * height),
                       200
                       );
   $('#twinkle').append(star.$node);
 };
 var buildMoveStar = function() {
   var star = new MoveStar(randomInRange(50),
                       randomInRange(50),
                       Math.floor( 32 * Math.random() + 1),
                       50
                       );
   $('#moving').append(star.$node);
 };

 /**
 *  Initialize the game
 */
 $(document).ready(function() {

   $('.starfield').css({
     "height": height,
     "width": width,
     "background-color": "black",
     "position":"relative"
   });
   for (var i = 0; i < 20; i++) {
     buildStar();
     buildTwinkleStar();
   }
   for (var i = 0; i < 100; i++) {
     buildMoveStar();
   }

 });
The MoveStar subclass includes an additional parameter called z that will represent the star's position on the z-axis. A value of 32 is as "far away" as possible and a value of zero is as "close" as possible (basically at the screen). The MoveStar subclass will have to simulate motion along the z-axis by starting the stars quite far away, decrementing their z property with each "step" in the setTimeout loop, and then translating their current posision into an x and y position on the screen. Once the stars reach the screen, we reposition them again far away. Because the stars are being replaced in random positions around the center of the 'div' using the new randomInRange helper function, each star will "move" towards its respective quadrant over time as the decrementing z value exaggerates its respective x and y positions on screen. This is key to the visualization looking realistic. We've also decided to have the stars "grow" larger as they get closer to the screen, which further helps simulate motion.Through the magic of subclassing, the "step" and "setPosition" methods were both overwritten while still referencing the superclass methods.
The Tie Fighters That Bind
We've now recreated our 90's screensaver. This alone is a very cool accomplishment. But we're still not yet in game territory yet. Specifically, enemy territory. The next change I'll make is to introduce a new subclass of MoveStar called TieFighter. This should be easy.
/**
 *  TieFighter class
 */
 var TieFighter = function(x, y, z, timeBetweenSteps){
   MoveStar.apply(this, arguments);
   this.$node = $('<img src=".subclass-wars/tiefighter.png"></img>');
   this.step();
 };
 TieFighter.prototype = Object.create(MoveStar.prototype);
 TieFighter.prototype.constructor = TieFighter;
 TieFighter.prototype.step = function() {
   var size = ( (1 - (this.z / 32)) * 100 );
   this.$node.css({height: size, width: size});
   MoveStar.prototype.step.call(this);
 };
Okay, that worked, sort of. Simply by replacing the type of DOM element with an img tag, we've turned our MoveStars into Tiefighters! But there's clearly some kind of CSS border situation going on that we'll have to investigate. And the TieFighters are not disappearing immediately when they hit the bottom or right side of the div. But they are disappearing correctly when they hit the left or top. Strange. However, if you recall that the origin of an HTML element is the upper left hand corner of its rectangle, then this bug makes more sense. In order to resolve, we would have to overwrite some of MoveStar's calculations around resetting the image location to also account for the size of the img.
And then there's this horrible border thing. The border is definitely the result of setting the CSS properties for the Star and MoveStar classes directly in the JavaScript rather than in a separate CSS class that we can toggle on or off. If we move the styling of the Star and MoveStar (specifically the border-style, border-color, and border-radius) to a separate CSS file, then we wouldn't have these white borders on our TieFighters. For now, let's just pretend these boxes are from the Millenium Falcon's weapons targetting system.
The Force Awakens
At this point, we've now demonstrated how to use JavaScript subclassing to create the foundations of a Stars Wars or Star Trek type game. A big Chewbacca-style hug to Tate Thurston who was my co-conspirator on this project.
Rather than continue to walkthrough the code (because this post is long enough already), I'll instead list some considerations, challenges, and steps we faced in the transition from this visualization to our game:
- Millenium Falcon cockpit
- Use GIMP to create transparent png and overlay Han and Chewie cockpit image on top with CSS "z-index" property.
- Use animate.css to "shake" the cockpit image after a hit from a TieFighter (when the TieFighter reaches a z-position of zero), and/or flash the screen semi-transparent red with CSS.
Tiefighters
- Use CSS to flip the image based on initial x-position to make their flight pattern look more realistic.
- Turn the mouse cursor into a crosshair with CSS
- Use setInterval to consistently generate new Tiefighters
- Set an onClick listener to track succesful "hits", and then turn the Tiefighter img source into an explosion-type gif, and then remove the destroyed TieFighter. (Sidenote - this is more challenging than simply removing the DOM node, since the TieFighter object will continue to exist in memory even though the DOM node was removed. Frustratingly, we kept getting invisible "hits" from already-destroyed TieFighters, and we finally resolved by using a boolean flag to track whether a Tiefighter had been destroyed or not before iterating to the next call to the original Star "step" function).
Sounds
- Use one of the many free sound effects websites to create laser, explosion, injury, and other fun videogame sounds, and then trigger them via event listeners
- Find some background music and set on autoplay with an HTML audio tag
Hyperspace
If you've already tried the game demo, you may have noticed that the Millenium Falcon's hyperdrive is not operational. That's an obvious next step for future development!