Reading List
The most recent articles from a list of feeds I subscribe to.
Writer's Bane
That's right, it's a post about writing advice.
Not from me! Goodness, no.
Instead, here's a compendium of books and other odd bits that I've found helpful in my quest. I'll keep this updated when I encounter something new and useful and surprising.
I hope this guide proves useful when you're looking to read about how to write instead of just sitting down and doing the deed.
Books
Story Genius - Lisa Cron: Learn how to write a riveting story using brain science - make sure to bring a pen and a notebook along for the ride!
On Writing - Stephen King: King's biographical guidebook to his craft.
Bird by Bird - Anne Lamott: The best advice you'll get about life and writing.
Zen in the Art of Writing - Ray Bradbury: How to delight in the joy of BEING ALIVE and also write about it.
Draft No. 4 - John McPhee: The master of creative nonfiction gives you a glimpse behind the curtain, and it's mostly 3x5 note cards and some strange vintage word processing software.
The Elements of Style - Strunk and White: Don't throw this out after high school English. It's tiny. Keep it in the bathroom. Don't tell anyone.
Podcasts
Ask the Bards - Delilah S. Dawson and Kevin Hearne: A weekly Twitter Q+A with best buddies and writing partners. You'll want to be friends with them.
Launch - John August: What happens when a famous screenwriter and podcaster decides to write a middle grade children's novel called Arlo Finch? He records a charmed six-part podcast about the process of finding an agent, signing a deal, editing, visiting the book-binding factory, and then going on book-tour.
Scriptnotes - John August and Craig Mazin: "A podcast about screenwriting and things that are interesting to screenwriters." This isn't exactly about writing books, but who cares. It's my favorite weekly podcast about an industry I don't work in. And also, "One Cool Thing."
Articles
- 25 Steps to Being a Traditionally Published Author: Lazy Bastard Edition - Delilah S. Dawson: If you're looking for a hilarious and possibly NSFW roadmap to seeing your book in an airport bookstore, look no further.
Newsletters
- The Perils of the Overworld - Robin Sloan: What happens when an engineer-author-olive-oil-maker makes a video game? He's not sure either.

"Write, you fools!" he cried, and was gone.
Notes on Nike Missile Site SF-88L
Many, many days ago, when humans could still roam the Earth for non-essential activities, our little crew visited Nike Missile Site SF-88L as another destination in our sixth grade class-trip whistle-stop tour of nerdy places in the Bay Area.
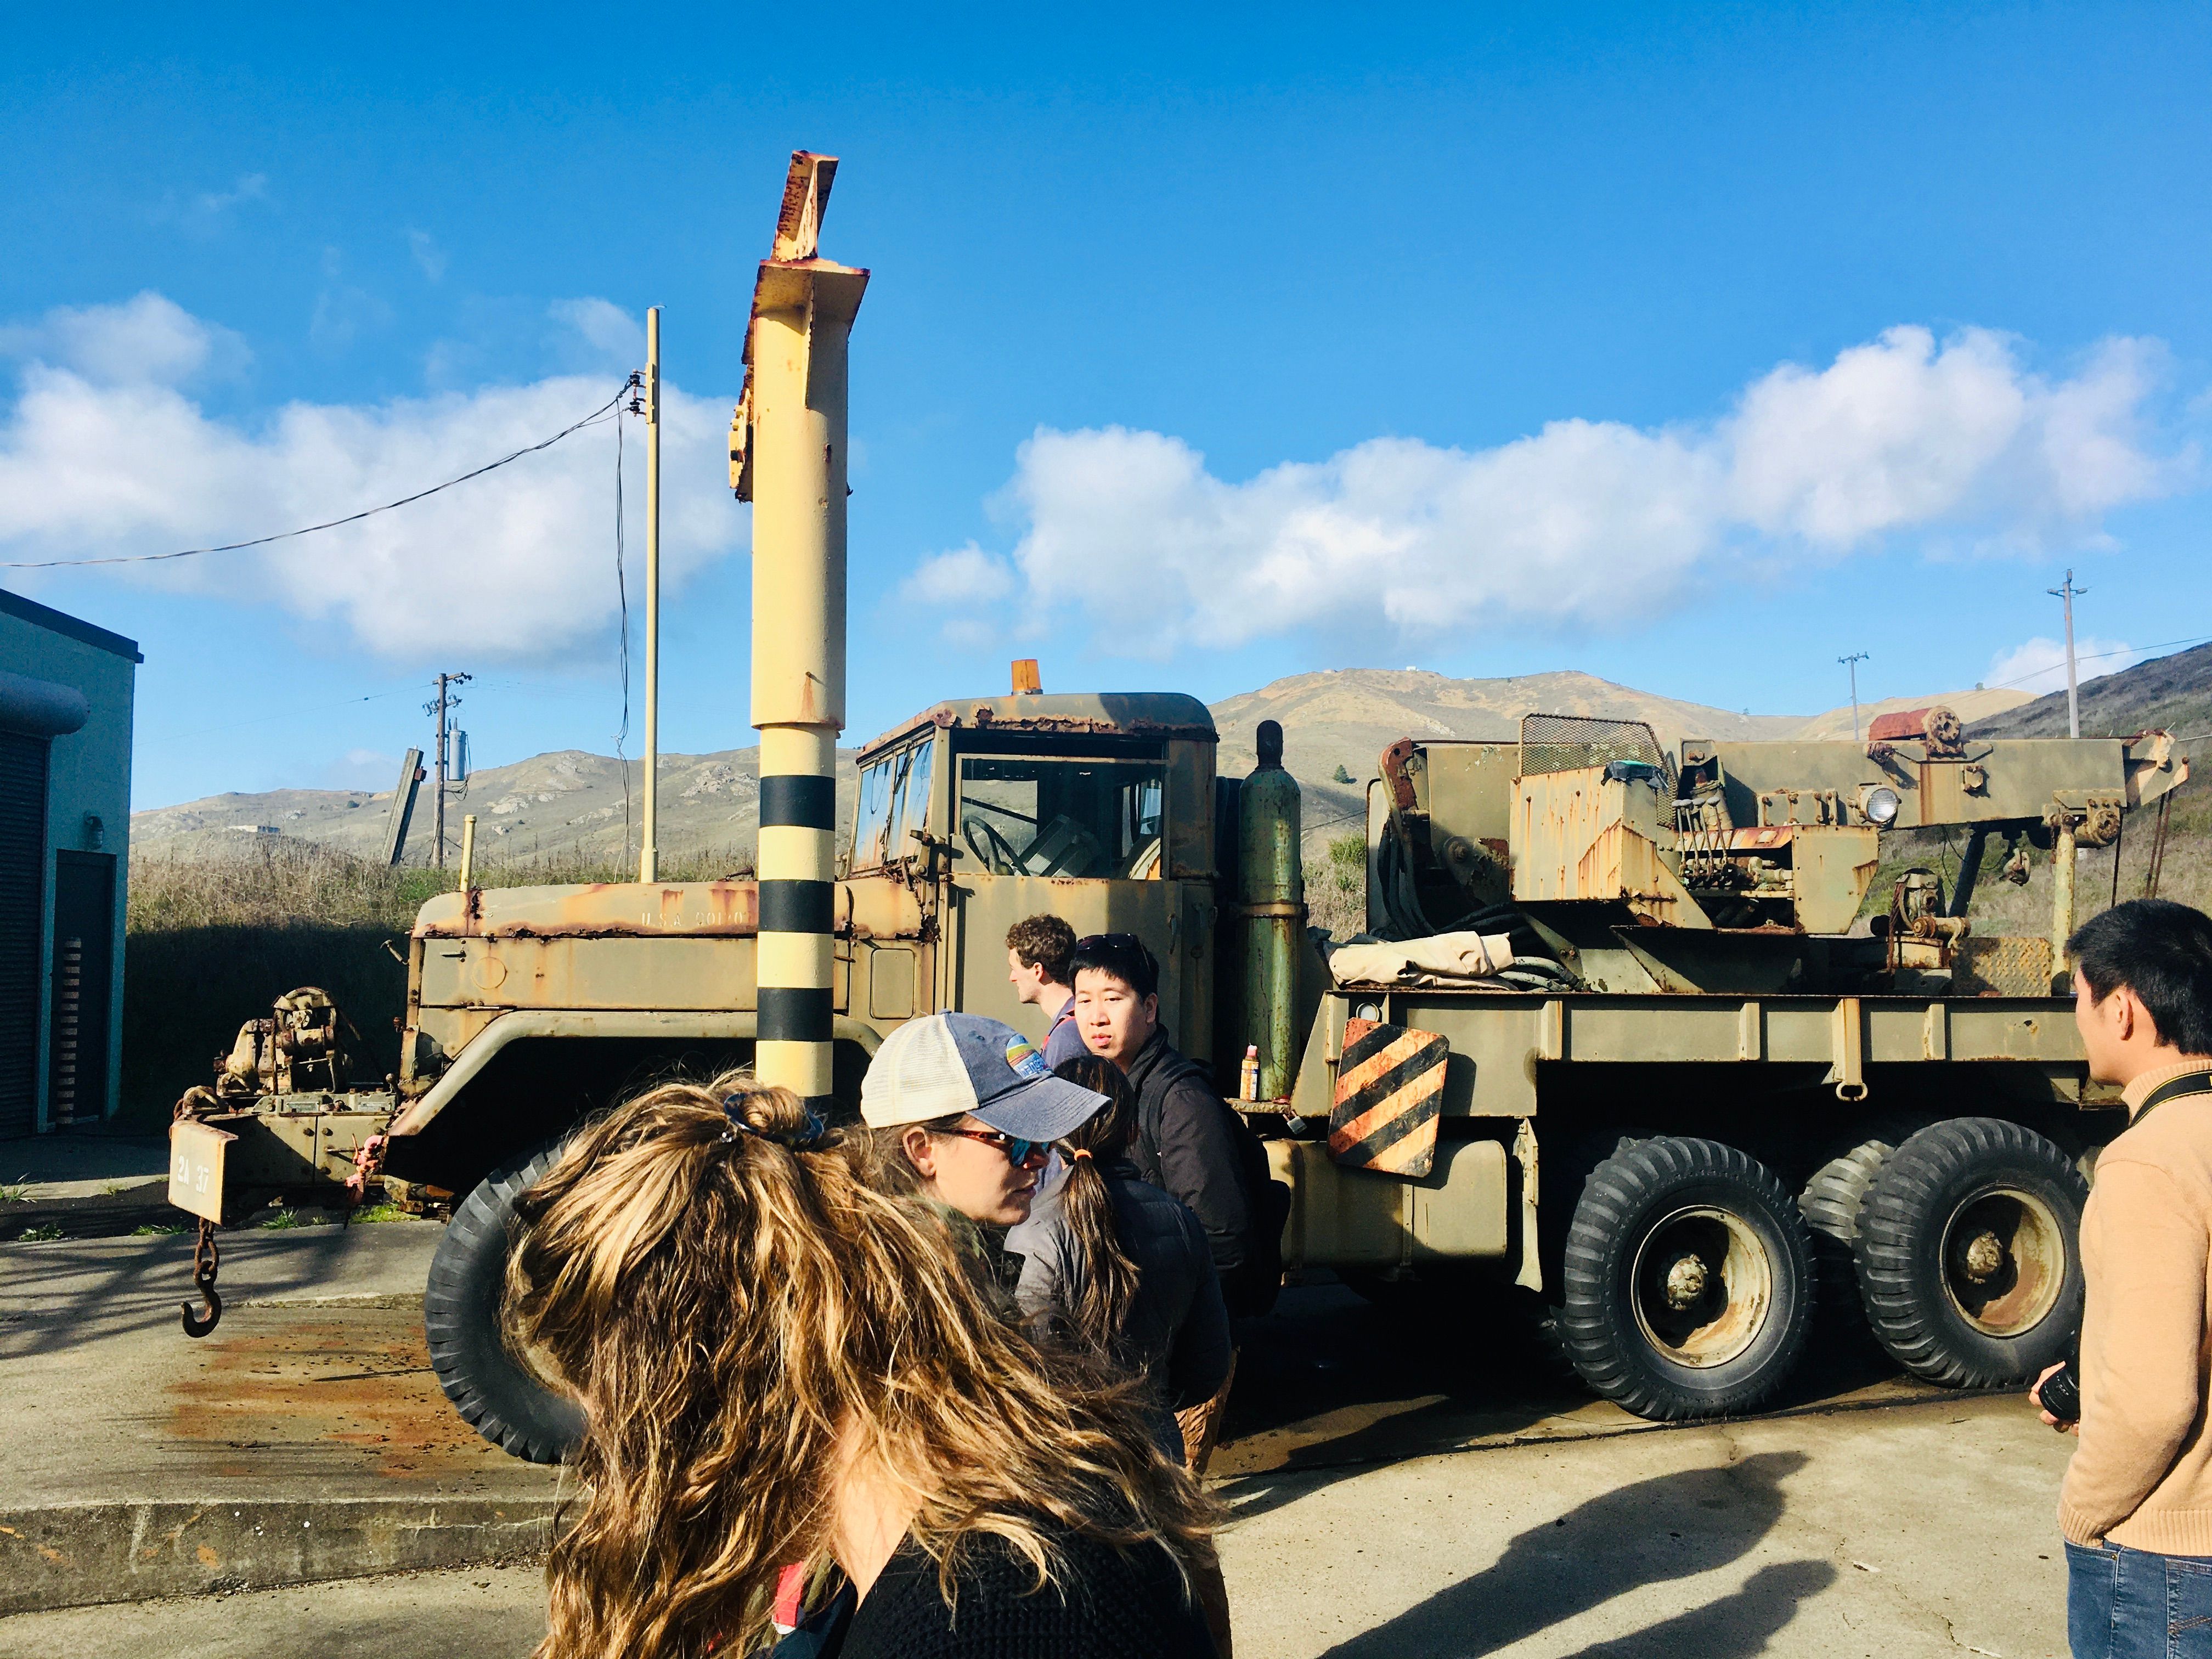
Nike Missile Site SF 88-L is just over the Golden Gate Bridge in the Marin headlands (essentially behind Hawk Hill), so it's a short drive or hike or bike ride away from the city.

Check out its National Park Service website for its operating hours and tour times. As you might expect, it looks like the site is closed for the time being. If you're lucky (and can plan ahead), try to go on the first Saturday of the month, when its staffed by volunteer veterans who worked at various Nike sites around the country.
We got lucky, and the veterans were both hilarious and super interesting. Added bonus: they were also able to operate some of the terrifying machinery and raise one of the missiles.
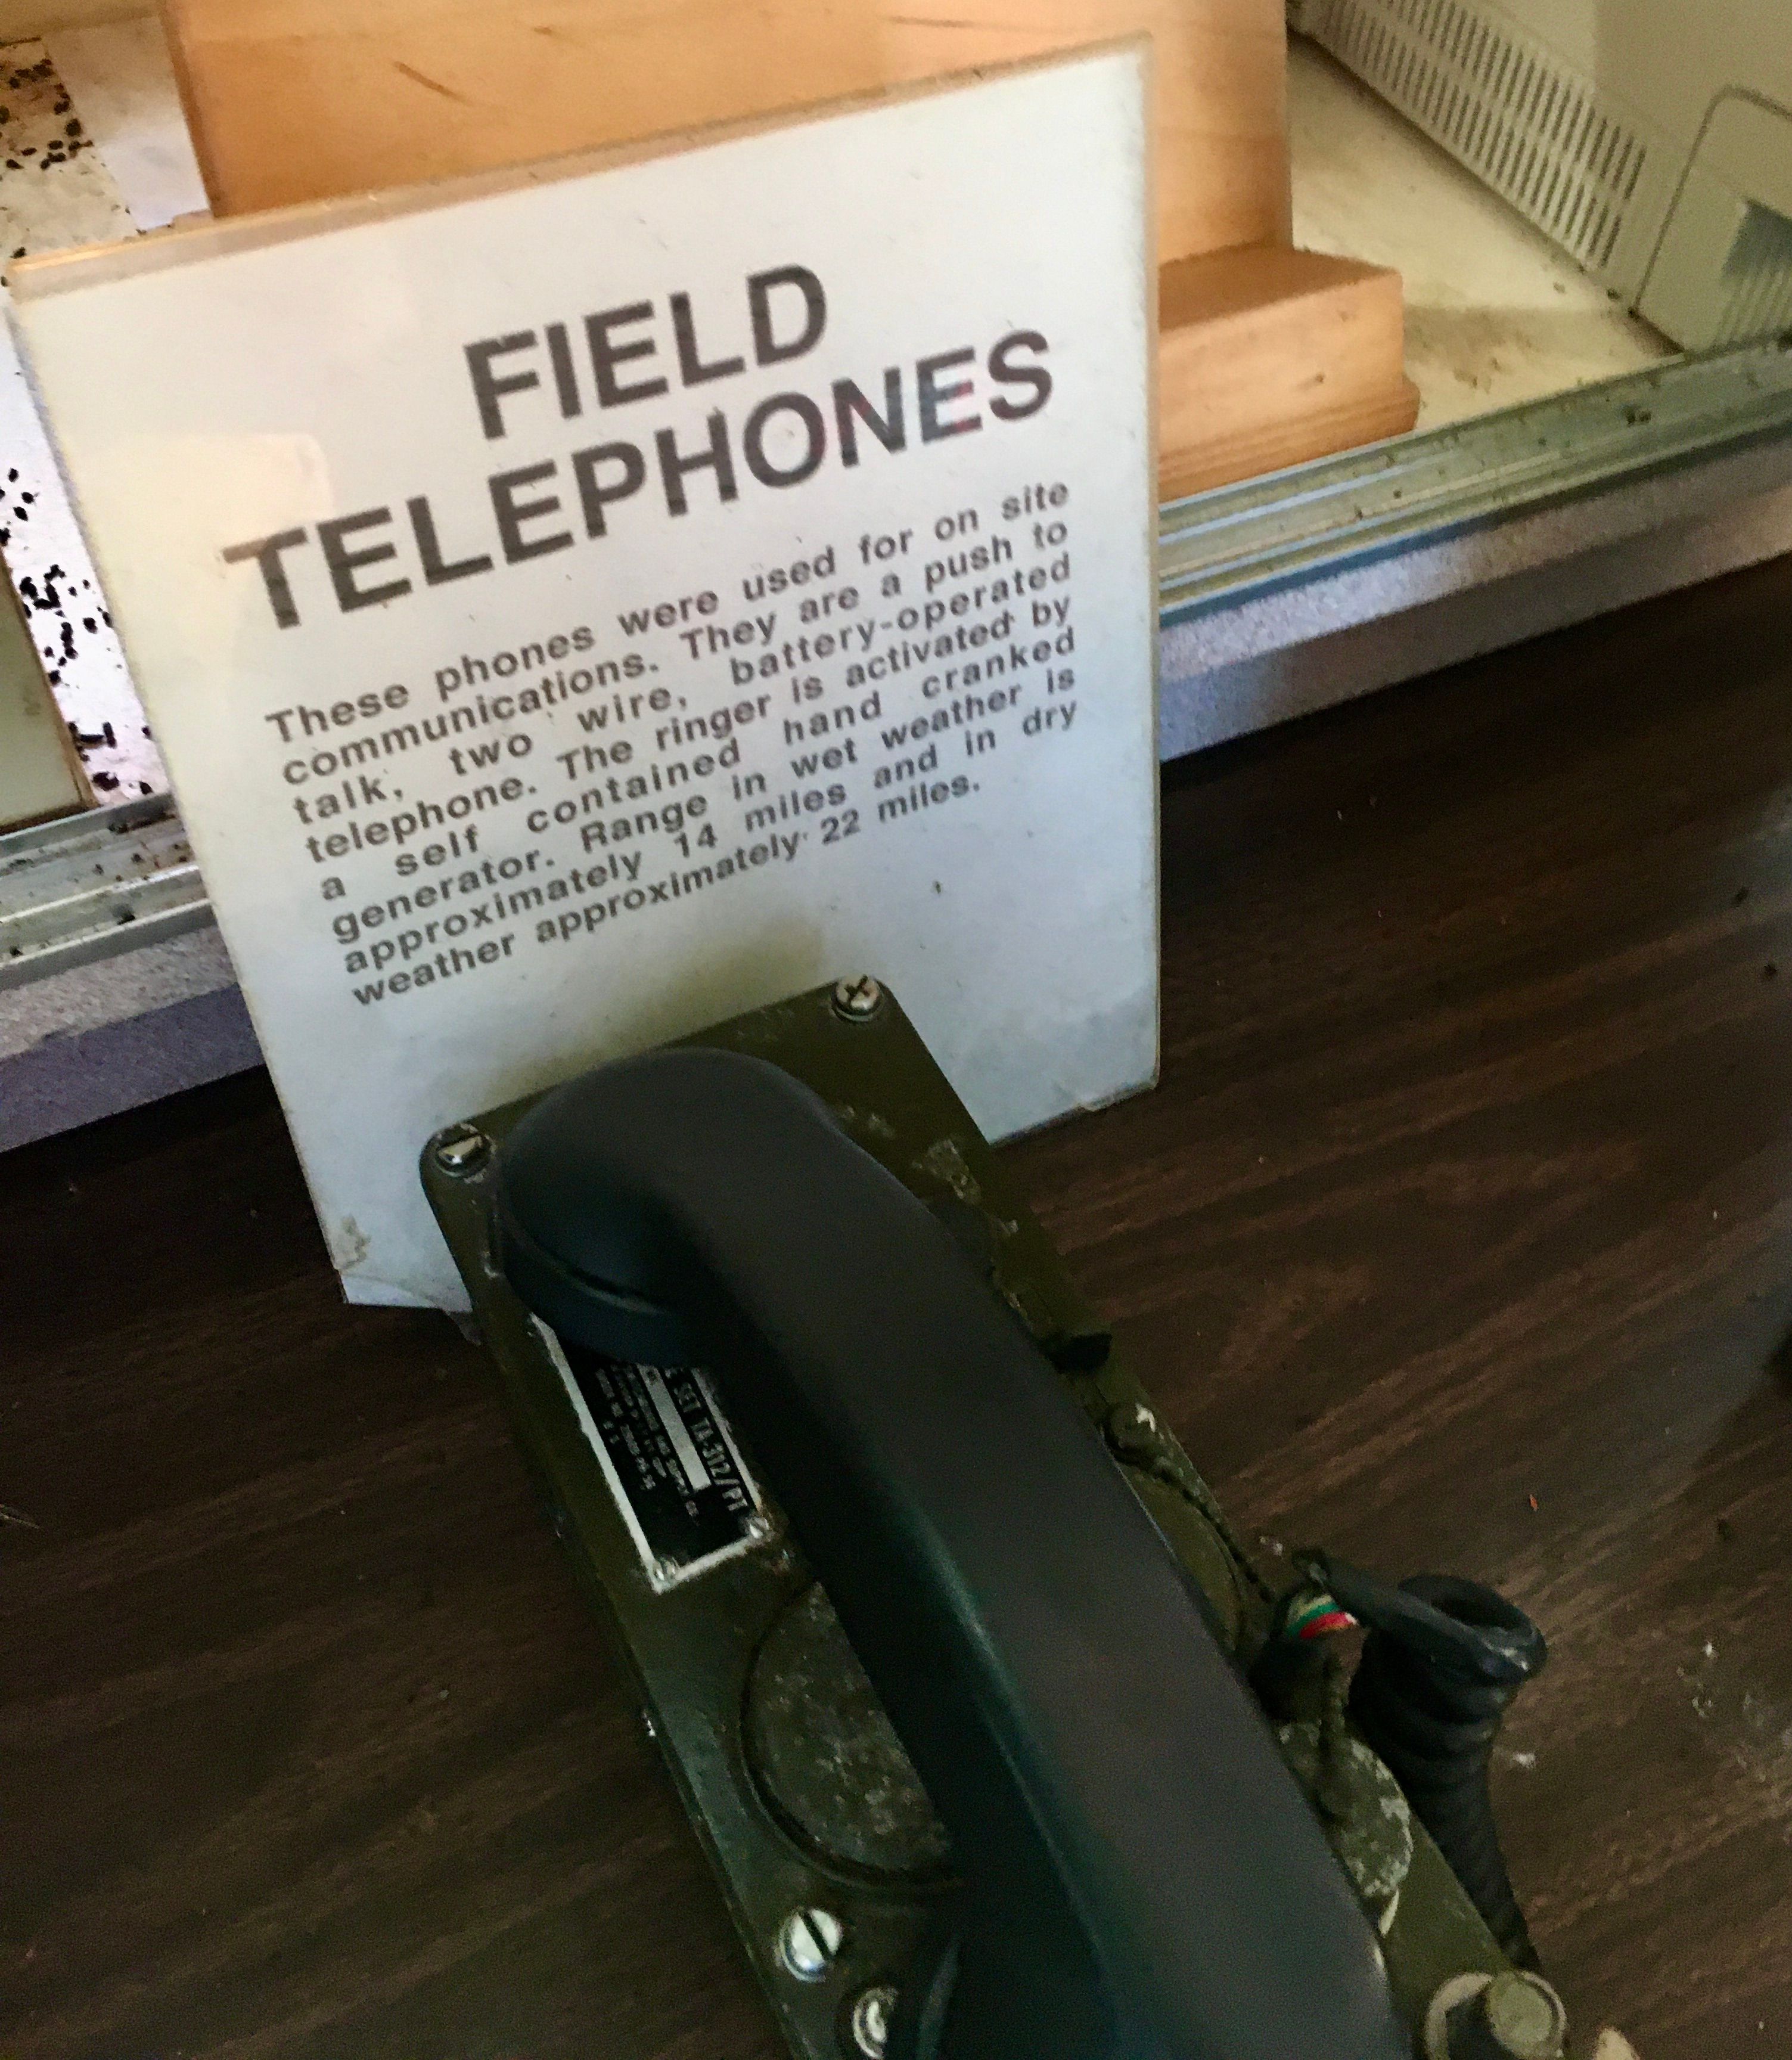
I brought along my little notebook and took copious notes while they were talking (which I've reproduced below).

But first I wanted to share a favorite moment.
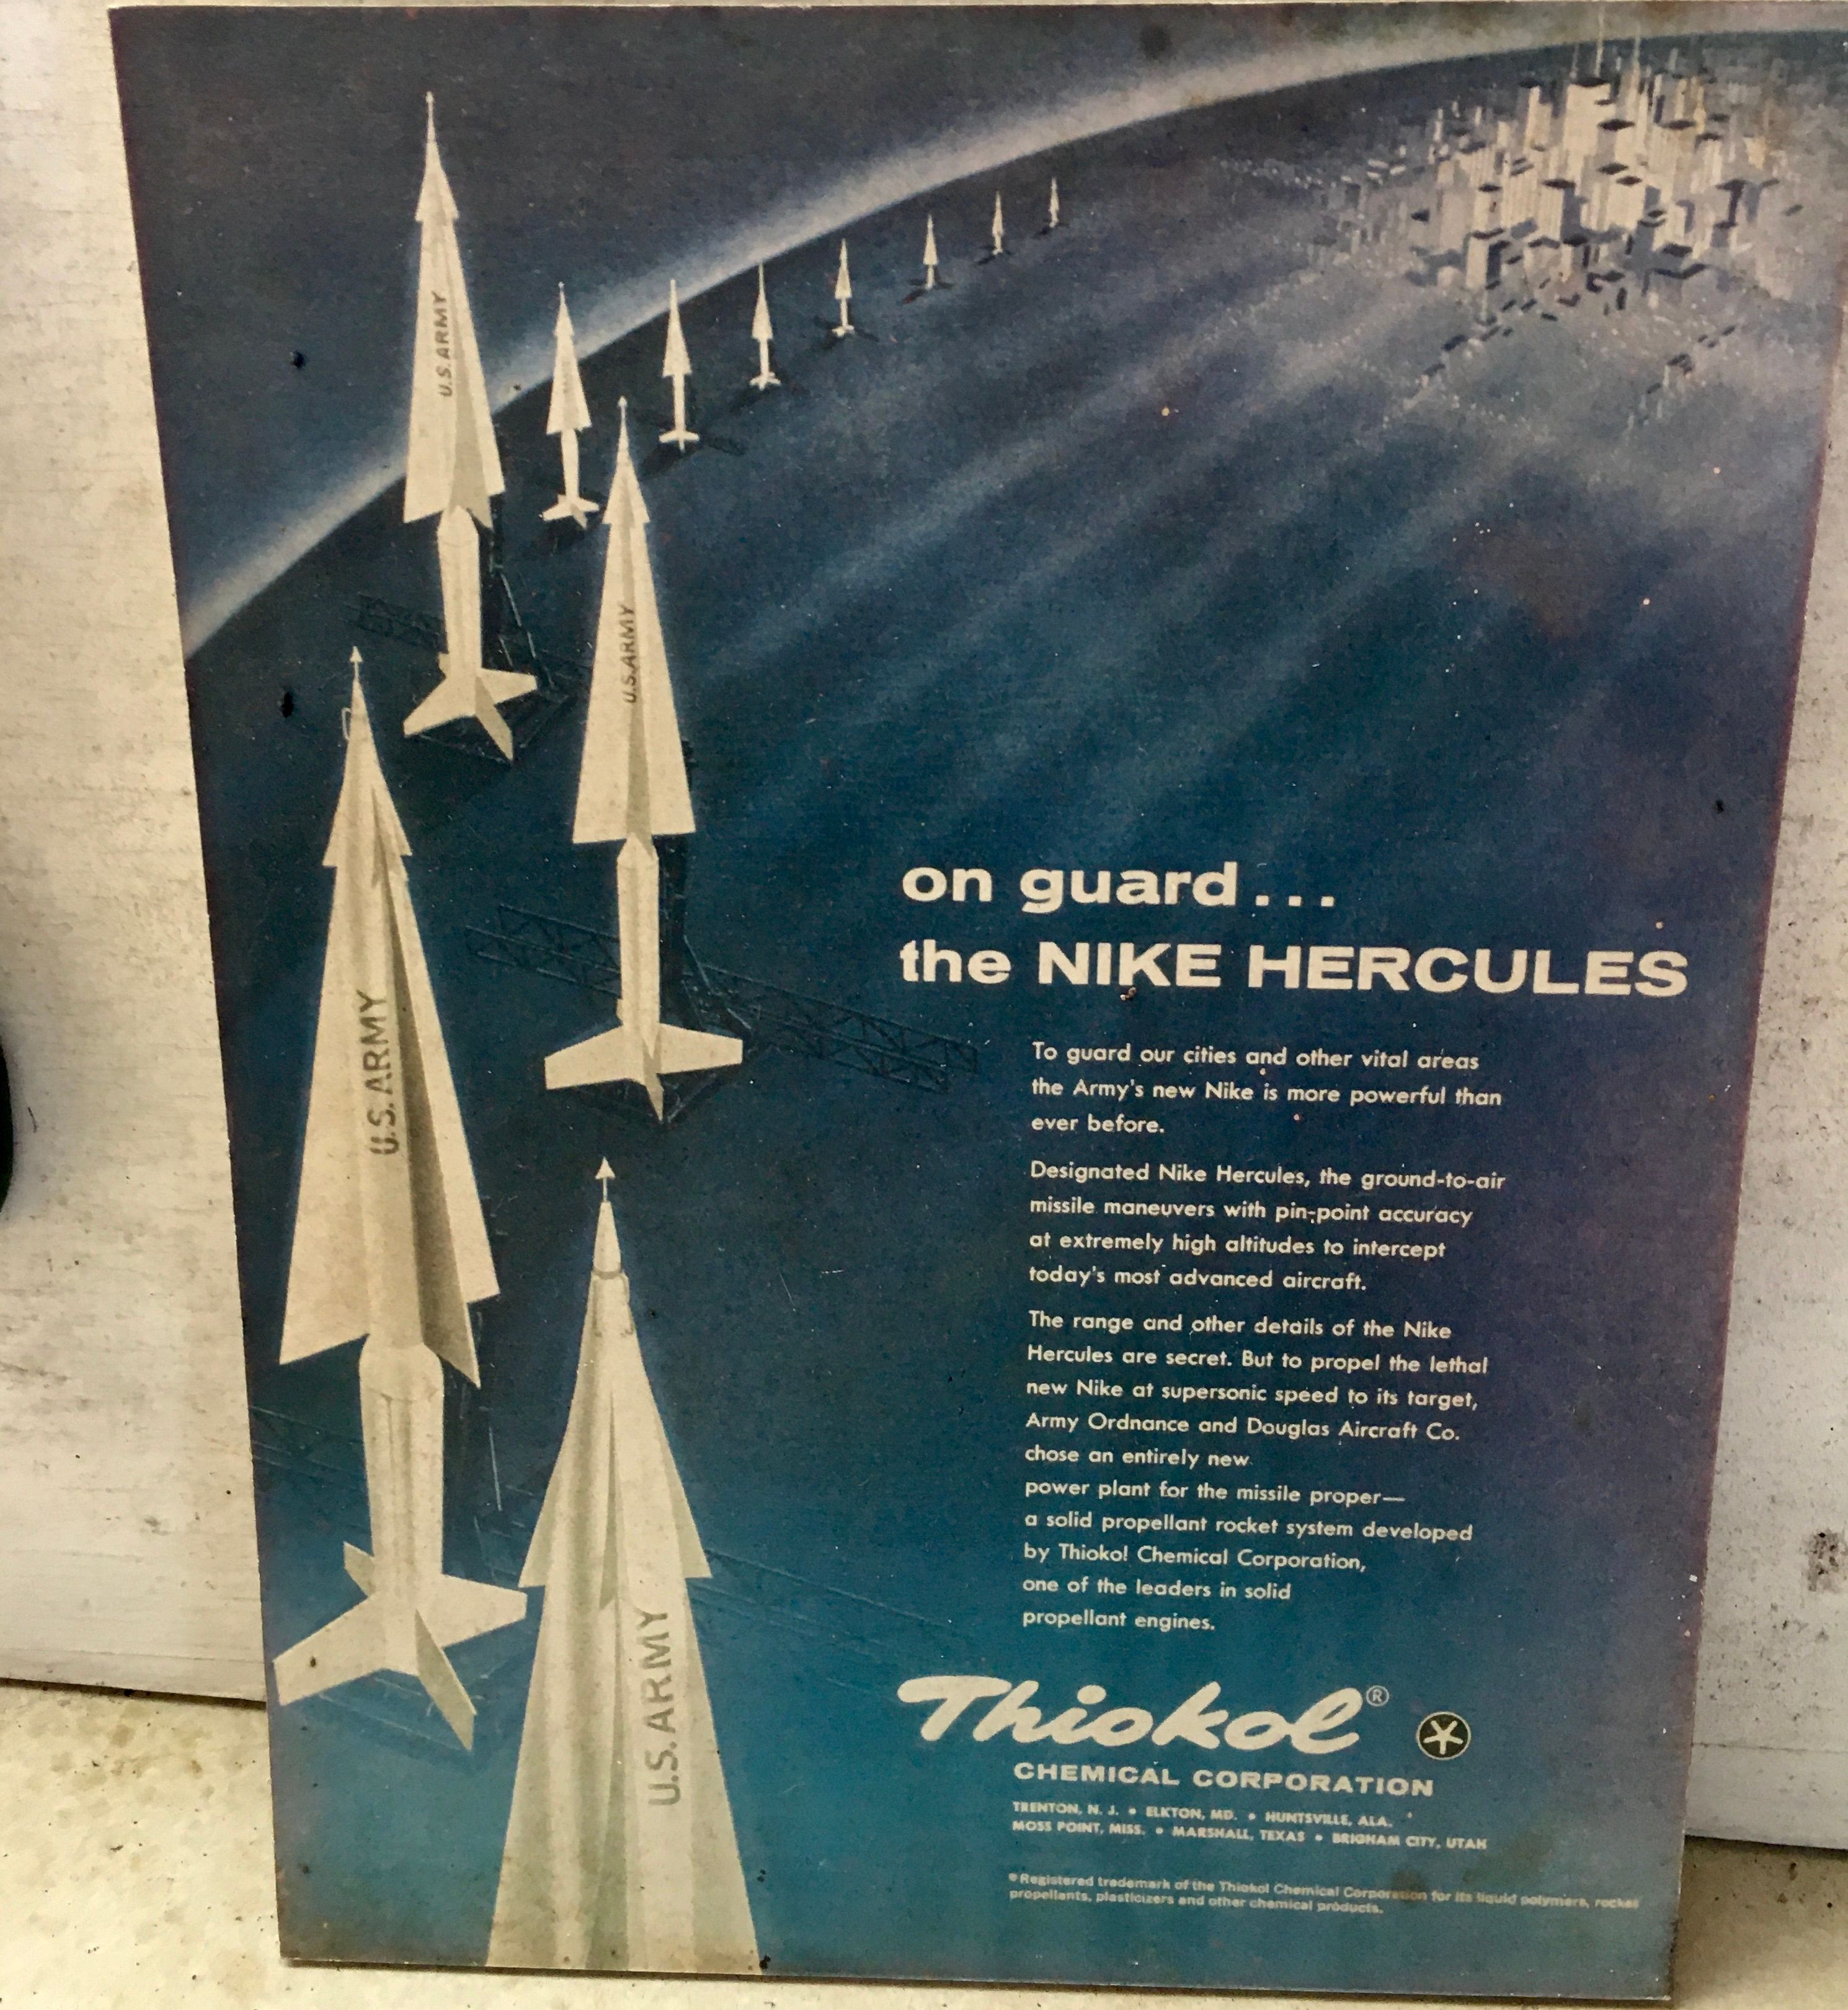
Near the end of the tour, we were led underground to where they kept the Nike Hercules missiles. Then, one of the veterans pressed a giant yellow button, which opened a metal hatch and began to lift one of the missiles above ground. This was a common procedure for the soldiers - they'd have to run through drills constantly, at a moment's notice.
Meanwhile, as we're watching this gigantic warhead move skyward a hydraulic lift, I can't help but be distracted: Where have I heard these sounds before?
That's when the veteran asked, "Anyone ever seen Star Wars?"
My hand burst into the air like Hermoine's.
Apparently, George Lucas visited the Nike missile site before filming A New Hope, and he found some inspiration for this scene:

This experience now lends more credence to the apocryphal story of how those Oakland shipping container lift thingies became proto AT-ATs for a day-dreaming Lucas.
Anyway, as mentioned, here's what I scribbled down during the tour:
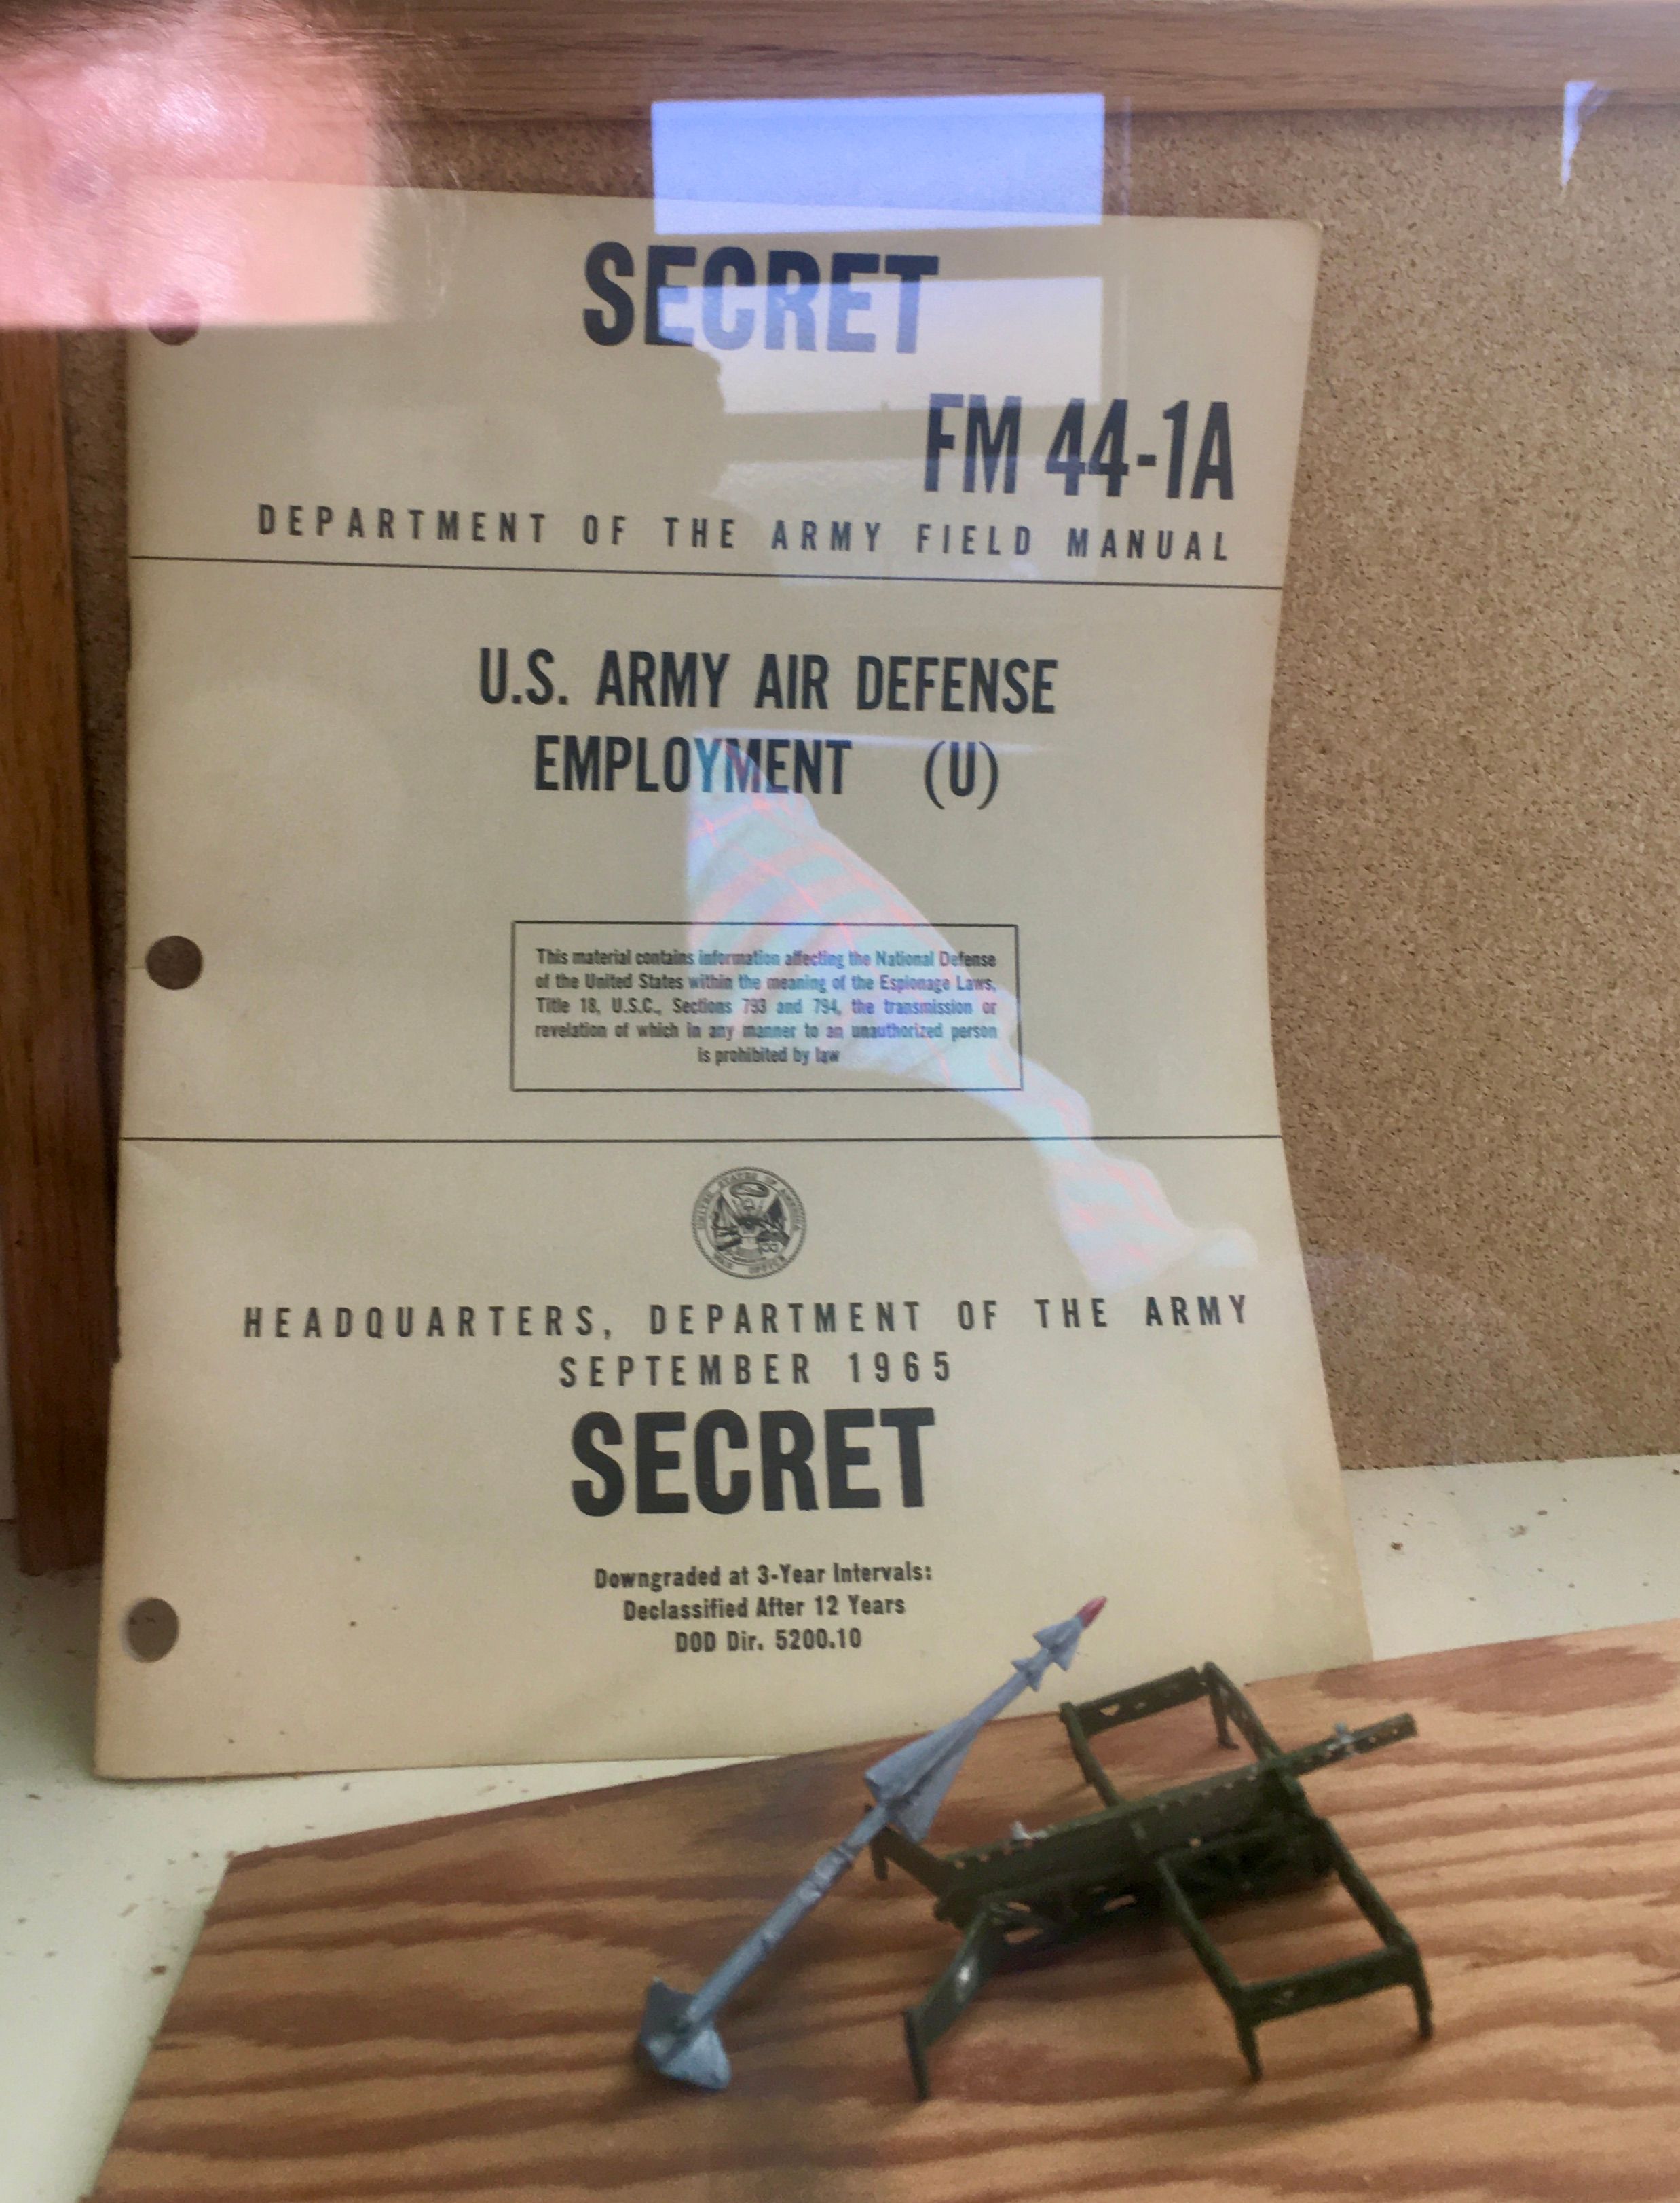
- Nike is the "goddess of victory"
- Nike Missile Program
- 1954 - 1974
- 233 sites across the USA
- Billions were spent
- Obsoleted by ICBMs (inter-continental ballistic missiles)
- Two types of missiles:
- (1) Ajax: liquid fuel, very dangerous to handle
- (2) Hercules: nuclear version
- Many of the Army operators were ~19 years: "We were kids."
- Missiles were radar operated
- No Nike missiles were ever "officially launched" at any enemy
- Each site had three radars:
- (1) Friend or Foe?
- (2) Foe tracker
- (3) Missile tracker
- The U.S. strategy for defending our coasts was:
- (1) Navy will try first,
- (2) Then the Air Force,
- (3) Finally, the Army with Nike missiles as a last resort
- Control operators had five words they could send to an in-flight missile:
- (1) PITCH
- (2) YAW
- (3) ROLL
- (4) SELF-DESTRUCT
- (5) EXPLODE (they had to tell the missiles to explode!)
- Operators went to annual training in New Mexico where they actually fired unarmed missiles
- Hercules had a 35 mile "kill" diameter
- There is an electromagnetic pulse during a nuclear explosion, which is why analog radar communication works (vs. digital)
And here are some of the better photos from my phone. If you like old control panels for old computers (like me), then this place is your kind of place!


'Escaping Web' Season One Retrospective
My friend Oz Nova and I started a podcast last year called Escaping Web. With a million and one podcasts out there, you might be wondering about our catchy tagline? Our special hook? Our unique... perspective?
Escaping Web is a show celebrating software engineers who've found their calling beyond routine web development.
The idea for the podcast began with the observation that most engineers who "break into tech" (read: bootcamp grads or "non-traditional" aka non-CS degree backgrounds) typically begin their careers with web development roles (👋 hi!), and that these engineers often find themselves in a rut after a year or two. Bored at work. Feeling unfulfilled. Looking for something more... (name your favorite Disney or Pixar "I want..." song).
As the head of Bradfield School of Computer Science (an online school for working software engineers "seeking mastery"), Oz meets lots of interesting characters who fit this mold -- and many who've broken out... into fields like graphics, quantum computing, database design, etc.
Our podcast interviews these engineers to learn what makes the tick, and more importantly, how they found something that they're passionate about at work. Was it a six-month sabbatical to intensely study computer architecture or discrete mathemathics? Or something else?
Mostly, Escaping Web is a podcast about learning how to learn how to learn.
We recorded six episodes last year with six amazing individuals. You can find more details and links to the audio below, along with the voluminous shownotes (which grew and grew with each episode).
We recently decided to put the show on indefinite hiatus (don't worry, I'm calling it Season One), and I'll use the next section of this post to go through some of my own learnings about starting a podcast in 2019.
Starting a podcast
It's easy! Everyone says that, and I pretty much agree. Here's a simple list of the things you need to do to release your own podcast:
- Record one or two episodes of audio
- Edit them (optional)
- Upload them somewhere on the internet that is publically accessible
- Generate an RSS feed that can tell podcast directories where to find your audio files
- Tell the podcast directories (e.g. iTunes, Google Play, Spotify) the URL of your RSS feed
- Line up sponsorships with Squarespace, Linode, and a subscription coffee service (also optional, unfortunately)
But that's it! Podcasting is still an open medium. There are also services that can take care of some of these steps for you. I'll run through my experiences with each step now.
1. Recording audio
This one should be easy, you'd think. But it's not. In fact, this one is the primary reason that we went on hiatus. Given the format of our show (bi-weekly interviews with guests), we had a large scheduling onus to coordinate between ourselves and our guest-of-the-week. I think this challenge alone put the pin in "season one" and I think I'll need to do a better job with coordinating schedules if we resume the show. One thought, which I'm only thinking of now and wish I'd thought of earlier, would be a Calendly link for guests to sign up on.
Even if you're not doing a guest-of-the-week format, there's still a mental hurdle to clear of "coming up with something interesting to say" on each episode. That's where your show theme and host chemistry can really make or break you. Shows like The Flop House really nail this combo: not only are they individually and collectively hilarious, the "bad-movie-recap-of-the-week" format keeps things interesting and fun every single episode. Similarly, the Apple-oriented Accidental Tech Podcast has become less about Apple news for me, and more about the trials, tribulations, and just-plain-fun quirks of each of the hosts. This is where podcasts have this dangerous turn as a replacement for human-interaction. When I'm thinking to myself, "Oh, Casey, it's time to get a new computer," I know that ATP has me hooked. I'm happily hooked, but hooked nonetheless.
If you do give Escaping Web a listen, you might agree with me that I think we missed the mark on developing host chemistry. We don't really have any Siracusan "follow-up" segment to provide weekly continuity (and highlight the strange things in our personalities that keep us up at night). There's also no regular cadence on what "Oz and Charlie are up to."
I still think we went the right way with the interview format for our show, but I'd love to strike a better balance in the future. A show like John Gruber's The Talk Show does this incredibly well. It's an interview show with a short rotating cast of characters, which makes it feel contiguous. For example, I know that John has a stack of like 400 bundles of firewood in his garage because of an accidental Amazon overpurchase. It's this kind of magic that you seek.
Weren't we supposed to be talking about recording audio? Oh, right. There are two formats for this, one of which should be ignored given our current collective quarantining:
- In-person, each with an individual mic and headphones
- Over Skype, using Skype Call Recorder (and Piezo as a backup)
The goal here is to get separate tracks for each speaker so that you can mix and edit them separately. In the case of Escaping Web, we went with an unfortunate third option:
- In-person, sharing one mic with no headphones (and occasionally over Skype with Charlie and Oz sharing one mic)
Why? Why, oh why, did we go this route?
Mostly because Oz already had this big ol' Blue Yeti mic, and we didn't want to invest more in a more expensive rig. This was probably (definitely) a mistake, which you can hear in some of the episodes like Grant's (sorry, Grant!). When you have one mic, even if it's a "good one", it's impossible to get the voices right.
I, for one, am extremely loud. Oz, not so much. Our guests, somewhere in between. Can't you just fix this on the editing floor? Maybe... if you know what you're doing (I don't). Take this advice: like The Beatles discovered in the '60s, magic can happen in the studio edits when you've got multiple tracks to record on.
I've gone on quite a bit already, and we're still in section one, but I should mention something about the Skype recording experience. It's great! I always hear podcast hosts grumbling something or other about Skype, so I was happy to discover that the experience of recording with Skype Call Recorder was seamless. It automatically splits your call into multiple tracks. I also fired up Piezo as a backup. We didn't go the full-redundancy route of having each person record their own audio and send it back to me, and we never got burned by this. But I can understand why this important. Also, we didn't go the route of ensuring that our remote guests had any sort of quality mics or anything like that. Maybe this is why Terry Gross has her guests go into a radio studio for their interviews. In our case, it was hard enough to align schedules that sending over recording equipment to our guests would have been a clear no-go.
2. Editing audio
This can be another rabbit hole time-warp. But it's also not that bad, and maybe even fun.
Our shows ran about an hour or so, which meant we had about 90 minutes of audio, give-or-take. My goal was always to try to edit the show the same night that we recorded it. I wanted to just get it done. This worked the first few times, but less so after a while after the excitement of the first few episodes wore off. The edits became a looming thing on my to-do list for the next few days. One of those to-do's that's not that that hard... um, to do, but you've just got to sit down and do it. And ain't that just the challenge of all to-do lists?
So, what is editing? I'm not totally sure. Here's what I tried to do:
- Remove weird loud noises and pops
- Remove background hum (the Bradfield office had an nice air conditioner thrumming at all times)
- Equalize and condense the tracks
- Make a funny intro segment (with music!)
My tools were the free and awesome Audacity (I'm not sure if this works just yet on MacOS Catalina) and Apple Logic (although you could use the free GarageBand just as easily). I watched a few YouTube videos on editing podcasts, plunked around and did my best. The sound quality is pretty bad on some of the episodes. Someone with real editing chops could have made them sound better, but I think the real culprit was the lack of quality mic-ing of our voices.
Admittedly, the thing I looked forward to most about the edits was coming up a variation on our intro music theme that I "composed" with the on-screen keyboard in Logic. I like to make weird little songs on Logic/Garageband while on flights, and this was too good an opportunity not to get a little musical and a little weird. Each episode is different. I hope you like them!
3-4. Hosting files and generating RSS feed
Now we're into what "folks in the biz" call "podcast hosting." I combined items 3 and 4 because these tend to go hand-in-hand.
There are many podcast hosting companies out there. If you're following along, time was our biggest constraint in this entire endeavor, so we decided to outsource this part of the process rather than whip something together ourselves.
I chose Transistor.FM for our podcast host. I listen to their maker podcast Build Your SASS, and I've loved following along with Justin and Jon as they document their challenges and wins and concerns as they build Transistor from the ground up. In addition to making it really easy to upload your audio and generate your RSS feed, Transistor also provides (1) an automatic website generater for your show and (2) a listener analytic dashboard. They also provided fantastic customer support when I had a few questions about the process. Definitely worth the $20 a month for our young, growing show.
Unfortunately, now that we've gone on hiatus and we don't know when we'll record our next episode, we decided to cancel our subscription. I've finally done the work of hacking together a simple solution to maintain an RSS feed for our show using public GitHub Pages repos to host our RSS feed and audio files. I think this will work fine, unless we suddenly get a ton of listeners out of the blue. But given what I saw in the Transistor analytics, I think we'll be okay for now.
5. Adding your RSS feed to the directories
One slight bummer is that, even with a podcast hosting service, you still need to submit your show to all the different providers separately. These are places like iTunes, Spotify, and Google. There's a few more, too. Stitcher is one. I don't know all of them off of the top of my head, but there are definitely a few more places that you can share your show. Still, the iTunes directory, Spotify, and Google are the big three that "matter."
This is mainly a bummer in that, if you've made it this far, you're ready for your show to hit the world by storm! Don't forget to allocate enough time for your podcast to be (1) approved by iTunes and (2) appear in iTunes. If you're somebody who's expecting a big "launch day", be aware that this can take something like a week or so.
To take the other side of this, I've actually now found it to be an advantage to have a direct relationship with each of the podcast directories, because I've been able to easily update the URL of our RSS feed to my new GitHub pages solution.
Oh! Also, your show needs show art. Here's what I sketched up for Escaping Web, and Oz (for some strange reason) loved it, too.
Our spider has a Nand gate on its back. Cute.
6. Finding sponsors!
Whoops. We never did this one. This is especially unfortunate, because I think I'd do a great ad-read.
Promotion is hard, in general. Not just for podcasts. Maybe obscure cream can rise to the top amid the noise vortex (mixed metaphor?), and I think we were at least semi-creamy, and now I've lost my train of thought. But... yeah, we didn't focus on promotion and I think we could have done a better job at this. I give us a thumbs-down on this effort.
We did set up a Twitter account for the show (@escapingweb), and Transistor helped by auto-tweeting each new episode as soon it went live. I also tried to get the companies of our guests to re-tweet us, but this was only semi-successful. Like I said (did I say this?), content marketing is hard. We just wanted to talk to interesting people and put our show out there to the world for people to hear it. And we achieved that, so that's nice.
In fact, I wanted to share some of the things that folks Tweeted about our show that make me happy:
Highly recommend the @EscapingWeb podcast for any programmers out there
— Clifford Fajardo (@CliffordFajard0) September 5, 2019
Lots of great stories from folks who entered the field untraditional and are killing it 💪🏼#100DaysOfCode #coding #webDev https://t.co/eolaWhEl4U
Agreed. @EscapingWeb is one of my favorite podcasts. Excited to listen to the latest episode! https://t.co/h9xIyZ0klz
— Madison Kanna (@Madisonkanna) September 5, 2019
Great episode, but it was really difficult to hear Grant
— Vegard Stikbakke (@vegardstikbakke) November 21, 2019
Yes, I know, I know. The audio on the Grant episode is the worst. I'm sorry, world. But thank you to everyone who tweeted about the show and shared with their friends.
Also, everyone says that leaving ratings on iTunes is "super-helpful", and I encouraged some folks to do that. We got thirteen 5-star reviews. Is that good? Probably not. But at least they were all fives! Two of my close friends even left a nice written review, and also one person I don't recognize at the moment (but probably also know personally).
Still, these tweets and these ratings and the personal texts we both received meant a lot to me and Oz. So, thank you!
What I learned from season one of Escaping Web (other than how to make a podcast)
Interviewing is challenging. Duh. But I really thought that I'd be pretty good at this right away, and I wasn't. It's a craft that demands practice. I hope to do more of it in the future, if you'll allow.
Take to time to explore things deeply. This is critical to finding your path at work, in life, in the woods, wherever. And, yet, it's so hard to do this if you have a Nintendo Switch (that's why I still only have a Super Nintendo). Our guests found this time in many different ways (from sabbaticals to switching teams at work to taking online courses).
Find a friend who's way smarter than you and spend time with them. This is me talking about Oz, by the way. Every time I hang out with Oz, I learn something about computers or education or whatever that blows my mind and leaves with an even bigger backlog reading list. Thanks for season one, Oz!
And, with that, the retrospective is complete! Onto the shownotes and audio. There are links to amazing things below, and I hope you find them useful in your travels. Here's a short preview of the ones that kept coming up again and again, which probably means something that I'll leave to the reader as an exercise:
- You and Your Research - Richard Hamming
- How to Solve It - George Polya
- SICP
- Nand2Tetris
- Flow: The Pyschology of Optimal Experience by Mihaly Csikszentmihalyi
Shownotes and audio for Escaping Web
1: A Quantum of Sad Things Happening To Felix Tripier of IonQ
Felix Tripier is a software engineer at a quantum computing company. He's also eating cold lasagna out of a coffee mug.
Find out how Felix Tripier went from high-school and college dropout (watch out Silicon Valley, he's a double-dropout) to working as web developer at several Bay Area startups to presenting his open-source research at a quantum computing conference, leading to his current gig as a software engineer at IonQ, a quantum computing company. Charlie and Oz dig into Felix's study habits and learning goals, briefly dip into theoretical computing topics before coming up for air, and altogether forget to introduce themselves, Felix, or the podcast itself.
Links and resources:
- Grave of the Fireflies
- Richard Hamming, "You And Your Research"
- Q-Bug: Felix's open source, web-based visual debugger for Quil quantum programs
- Felix Tripier on Twitter
2: Epic Slacking with Roo Harrigan of Slack
Roo Harrigan is the Strategic Engineering Projects Lead at Slack. She’s also the self-proclaimed Mentor Queen.
Find out how Roo Harrigan went from an all-around generalist (product manager, project manager, sales demo'er, customer support agent) to a software engineer on the platform team at Slack, and now the Strategic Engineering Projects Lead reporting to Slack's CTO. Charlie and Oz dig into about Roo's tips for finding mentors, achieving flow state, and onboarding engineers. We also learn that Oz has never worked in the food services industry. Oh, and they remember to introduce themselves and Roo at the beginning. Progress!
Links and resources:
- Roo's 2015 blog post about becoming an engineer
- Front St. Trattoria, Red Bank, New Jersey
- Hackbright Academy
- Slack Reminders: Roo's first project at Slack
- Flow: The Pyschology of Optimal Experience by Mihaly Csikszentmihalyi
- Roo Harrigan on Twitter
3: Getting Time Serious with Richie Artoul of Uber
Richie Artoul is a software engineer on Uber's Observability infrastructure team. He also really likes distributed timeseries databases, like a lot.
Find out how Richie Artoul went from bootcamp grad to infrastructure engineer at Uber, where he's now building their open source metrics platform M3 and their open source distributed timeseries database M3DB. Charlie and Oz dive into Richie's tips for side projects, reading programming textbooks, finding mentors at work, and navigating large engineering orgs like Uber. We also learn that Richie recently took up Jiu-Jitsu (just like Oz) - and now Charlie's hoping for a Vader / Obi Wan style "roll" in their future.
Links and resources:
- Optimizing MS: How Uber Halved Our Metrics Ingestion Latency by (Briefly) Forking the Go Compiler (Richie's post on the Uber engineering blog)
- M3 & M3DB
- Nand2Tetris
- Rubber duck debugging
- DynamoDB paper
- FoundationDB
- Write a brag document - Julia Evans
- Richie Artoul on Twitter
4: A Graphic(s) Conversation with Lauren Budorick of Figma
Lauren Budorick is Graphics Software Engineer at Figma. She’s also read the 1989a .gif spec, yet still refuses to pronounce them as "JIFs."
Find out how Lauren went from bootcamp grad to Graphics Software Engineer, first at Mapbox and now at Figma, where she's building their prototyping rendering engine. Charlie and Oz dig into Lauren's tips for learning linear algebra, how to see everything in the world as a triangle, and navigating a company without managers. Charlie and Oz also each try to recount stories of "achieving the impossible", and both painfully fail to remember the exact details of their anecdotes.
Links and resources:
- Lauren’s 😢.gif tweet
- The 1989 .gif spec (which is still the latest release!)
- Demo of the 1989 .gif spec (as rendered by a modern browser)
- Demo of the 1989 .gif spec (as it was intended, in all its feature-laden glory)
- The hottest chap app for teens is... Google Docs - by Taylor Lorenz
- The Story of the SuperFX Chip: The chip that made Star Fox on the Super Nintendo possible
- The Soul of a New Machine
- Lauren’s talk at Nordic.js (The Matrix is Everywhere: A primer on projections in Web Graphics)
- 3Blue1Brown Linear Algebra YouTube series
- Figma
- Figma's Engineering blog
- Mapbox
- Hackbright Academy
- Masters of Doom
- Lauren Budorick on Twitter
5: Learning Your Stripes with Grant Wu of Stripe
Grant Wu is a Software Engineer at Stripe on the Ruby Application Infrastructure team. He also hates scary movies, but still can’t stop himself from reading their IMDB synopses.
Charlie and Oz dig into Grant’s study habits for self-guided learning (like building a toy kernel and toy compiler) — and how those low-level projects influenced his path to Stripe. The gang gets into it over bootcamps, baking bread, and learning to play music — all with the broader theme of exploring what it means to be creative. To top it off, we learn that Oz has a joint degree in math(s) and the (Australian) law?!
Links and resources:
- Stripe
- Sorbet: Ruby Static Type Checker
- Stripe’s Increment Magazine
- The Dream Machine, Stripe Press
- IT by Stephen King
- teachyourselfcs.com
- Matt O’Ree (Charlie’s guitar teacher in 8th grade and winner of the 2006 Guitar Center King of The Blues)
- Flow: The Psychology of Optimal Experience by Mihaly Csikszentmihalyi (second time that Oz recommended this book!)
- What happens when you use Excel for your genetics papers
- Hack Reactor
- SICP
- Grant Wu on GitHub
- Grant Wu on LinkedIn
6: Algorithmically Speaking with Elliott Jin of Triplebyte
Elliott Jin is the Interview Team Tech Lead at Triplebyte. You're gonna hear a lot about Project Euler in this one.
Charlie and Oz explore Elliott's path down the various intellectual rabbit holes (mostly Project Euler) that led him to software engineering at Dropbox, teaching the Algorithms course at Bradfield, and now leading Triplebyte's Interview tech team. Elliott also reveals the correct way to read a textbook (of which Charlie hadn't the foggiest), and Oz and Elliott try to explain to Charlie how they motivate students in their classes through "guided struggle."
Links and resources:
- Project Euler
- K&R C book
- Gorillas - QBasic
- Windows 3.1
- Drugwars (TI-83)
- Space Trader
- Computer Science Principles: Table of Contents tweet
- Teaching Number Theory from Sophie Germain's Manuscripts: syllabus by David Pengelly
- How to Solve It - George Polya
- Silicon Zeroes game
- The Diamond Age - Neal Stephenson
- Computability and Logic
- Elements of Programming
- SICP
- Augmenting Long-term Memory: Michael Nielsen
- A Mind at Play (Claude Shannon biography) - Jimmy Soni and Rob Goodman
- The Bit Player (Claude Shannon movie)
- Shannon's ultimate machine
- Dropbox
- Formative assessment Wikipedia article
- Triplebyte
- Elliott Jin on GitHub
- Elliott Jin on Medium
Notes on Map and Compass Navigation
Prior to the shelter-in-place quarantine, my friend Jason and I had been going on what I like to call "sixth grade classtrips" to various nerdy sites of interest in the Bay Area. First on our list was the Nike Missile site, which is right over the Golden Gate Bridge in Marin. I'll share my notes on that one soon. Our next big classtrip was scheduled to be the Stanford Linear Particle Accelerator Center in Menlo Park (maybe you've seen the signs for this on the highway and wondered...), but that's first on our list once everything's safe again.
After the Nike Missile site, we decided to take a course on map & compass navigation through REI. Here's what we learned in four brisk hours standing on a field in Palo Alto:
Maps
Using a map is about using filters to reduce your search area
Download free USGS maps! Print online with Caltopo. Best scale is 7 & 1/2 minute (there are 60 minutes in a degree)
SCOPE acronym:
- shape
- color
- orientation
- proportion (aka distance)
You don't have to go in order of the acronym!
Shape
Look for valleys, ridges, hills with flat tops, gulleys, hills in a row (e.g. 3 hills in a straight line), shape of the tree line
Hidden Valley Ranch Salad Dressing
- Another acronym. Used by the "military"
- Hills Valleys Ridges Spurs Depressions
- These are the landshapes to look for on your map and in the area
Color
green = trees, white = not trees
How to tell if you're in trees? Look up, if you see branches, you're in a green area of the map
Sometimes white areas will have scrub brushes and plantlife, don't be confused
Sometimes the tops of green hills will have white scrub / chaparral areas
red or black indicates a human-made object
trails are often not on a map. Many of the surveys were done decades ago, before these trails
Orientation
Use compass to orient the map, then place the map on the ground. This allows you to walk around the map in any direction and see the same things in real-life as the map
Maps usually point North
Proportion (Distance)
Measured as the crow flies, not on the ground
Maps have a scale on them
You can use the string of your compass to trace a trail, and then make the string straight and taut to get the distance of a trail using the map's ruler / scale
Good skill to learn: look at object in the distance and estimate the distance. Use a range and keep getting tighter (e.g. it's somewhere between 10 ft and a mile away)
Make sure you know if your map is in miles or kilometers
Elevation
Measures vertical distance above sea level in feet
5280 feet in a mile
Contour lines have a standard elevation gap between them (e.g. 40 ft), but the land between them can fluctuate in real life as you pass through them (it's not a smooth linear ascent)
Maps have "index" contour lines that state their elevation
"Intermediate" contour lines don't state their elevation, but can be inferred from the index lines
When lines are close together = STEEP!
Fun experiment: slice a potato to measure contour lines! Note I did this when I got home, as you can see here:
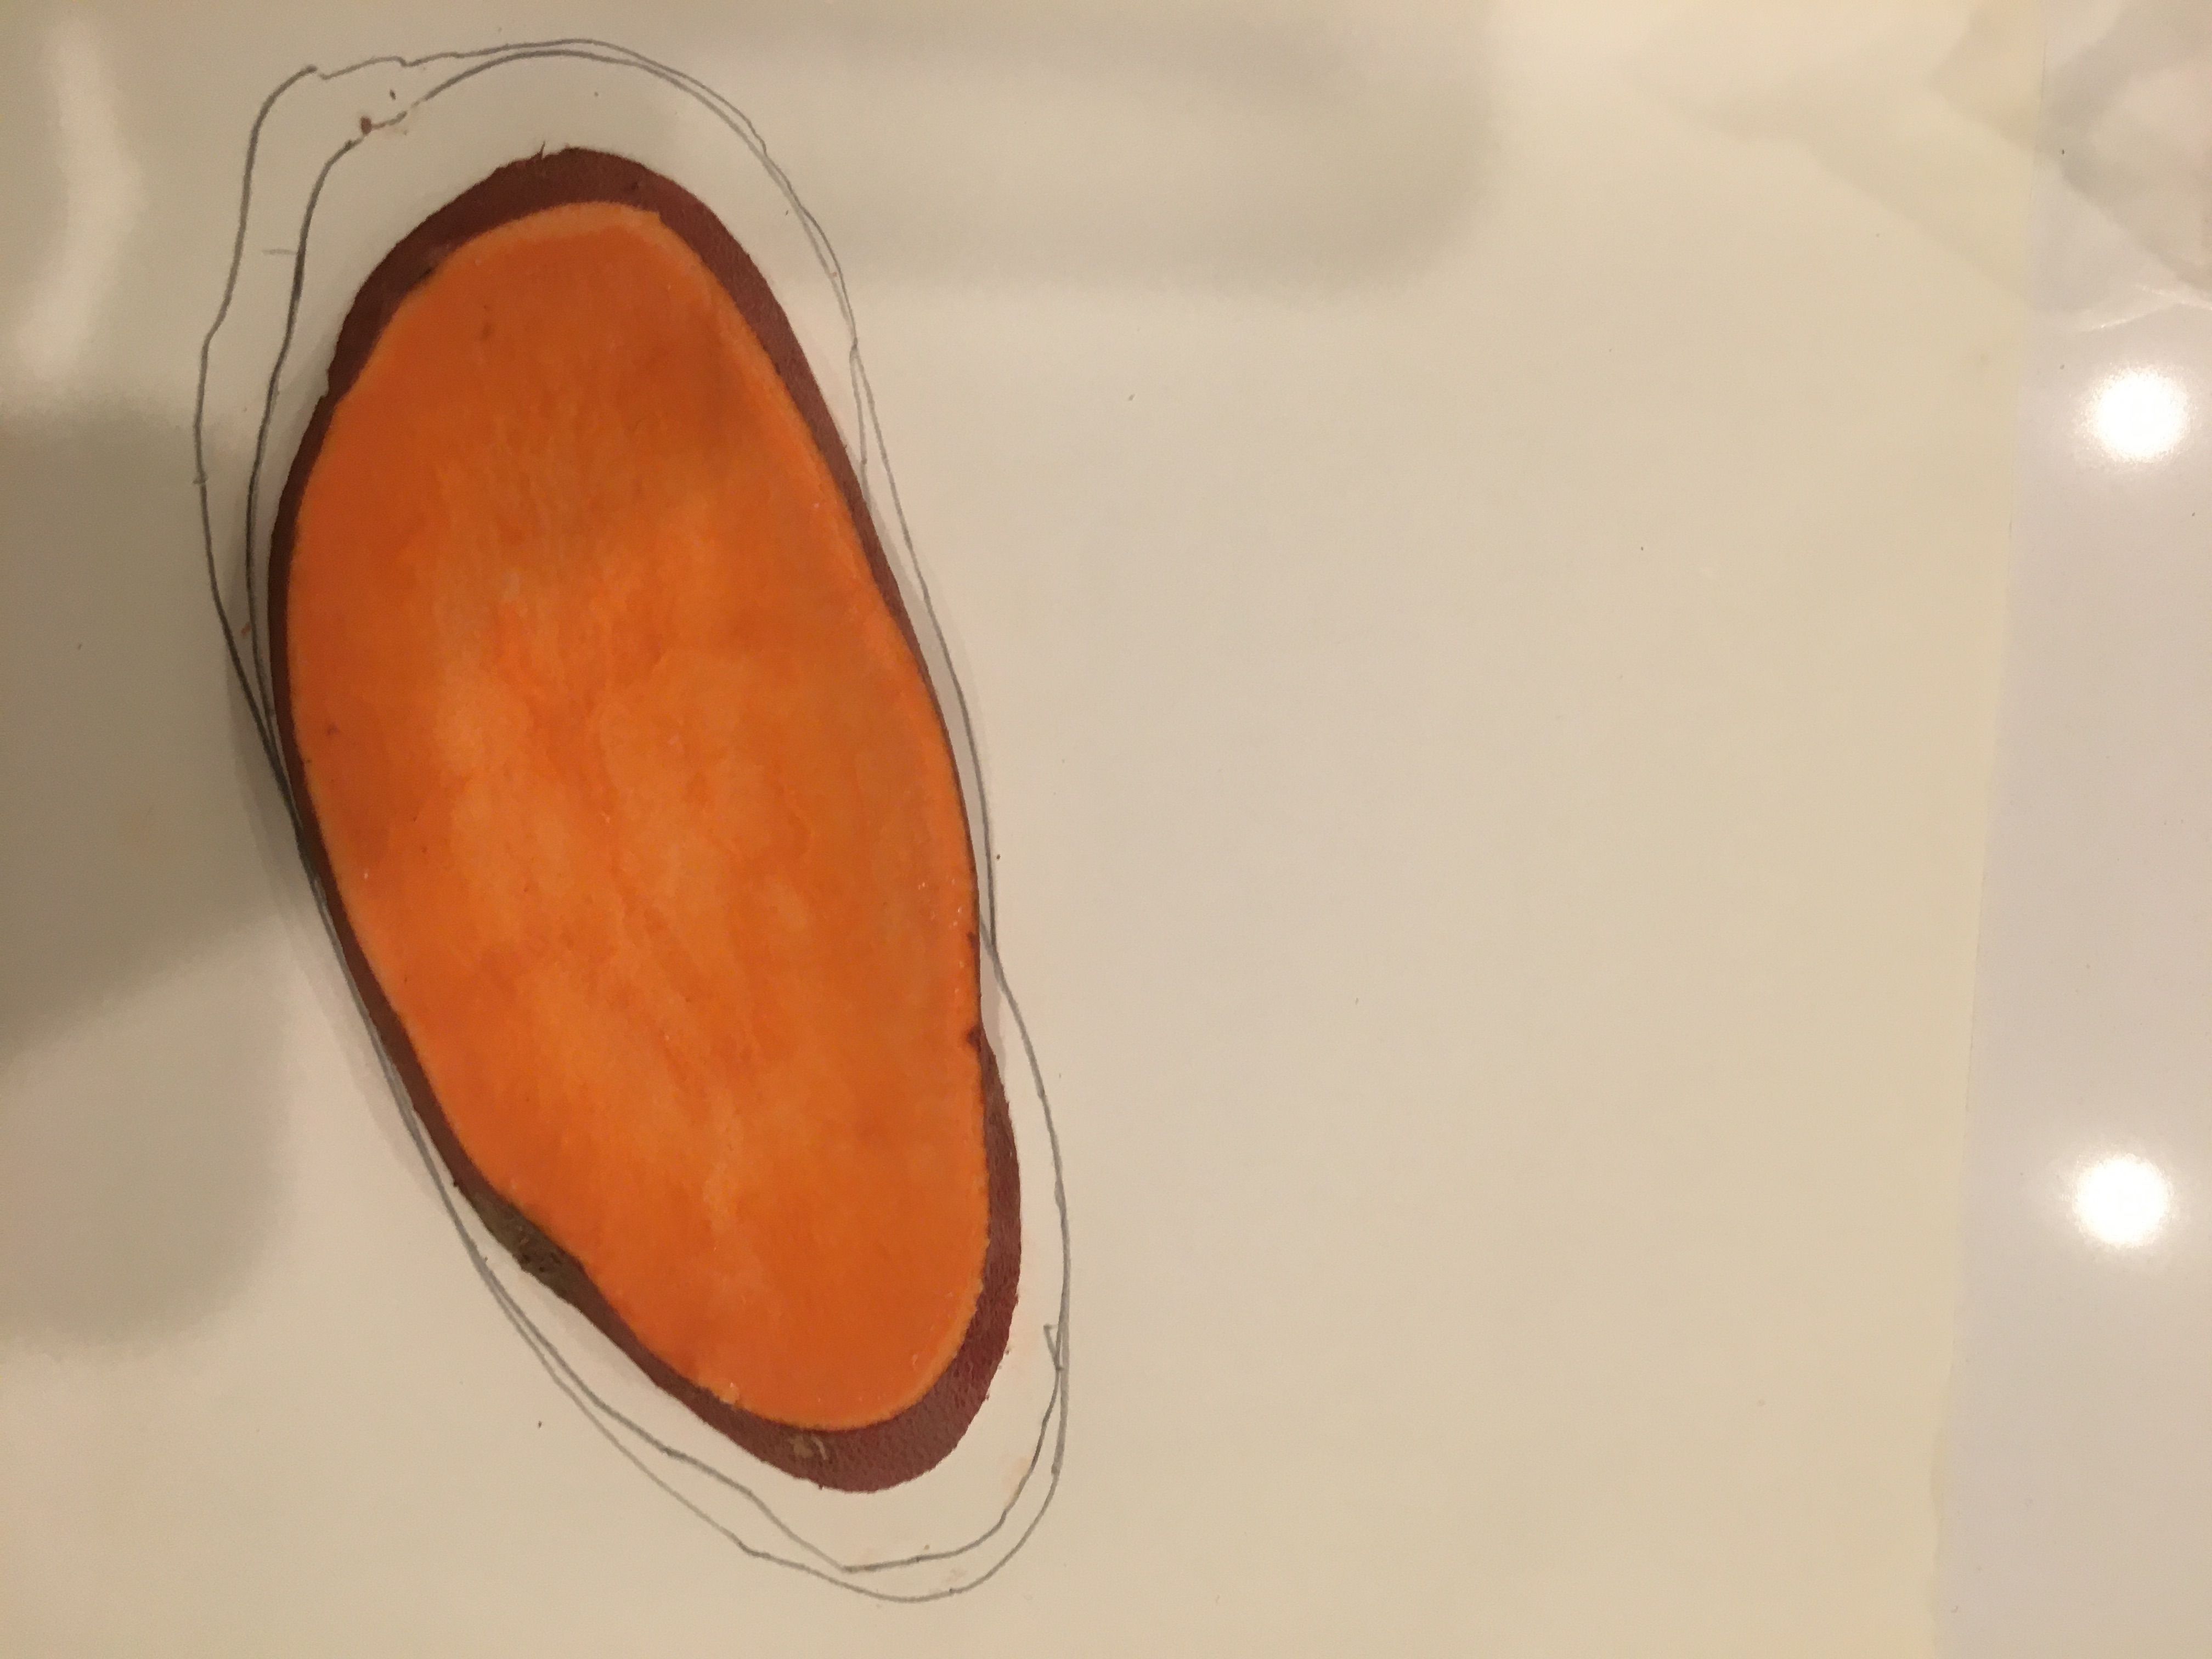

- Contour lines are shaped like upside down V when there is a small creek valley. The V points uphill, away from the water direction
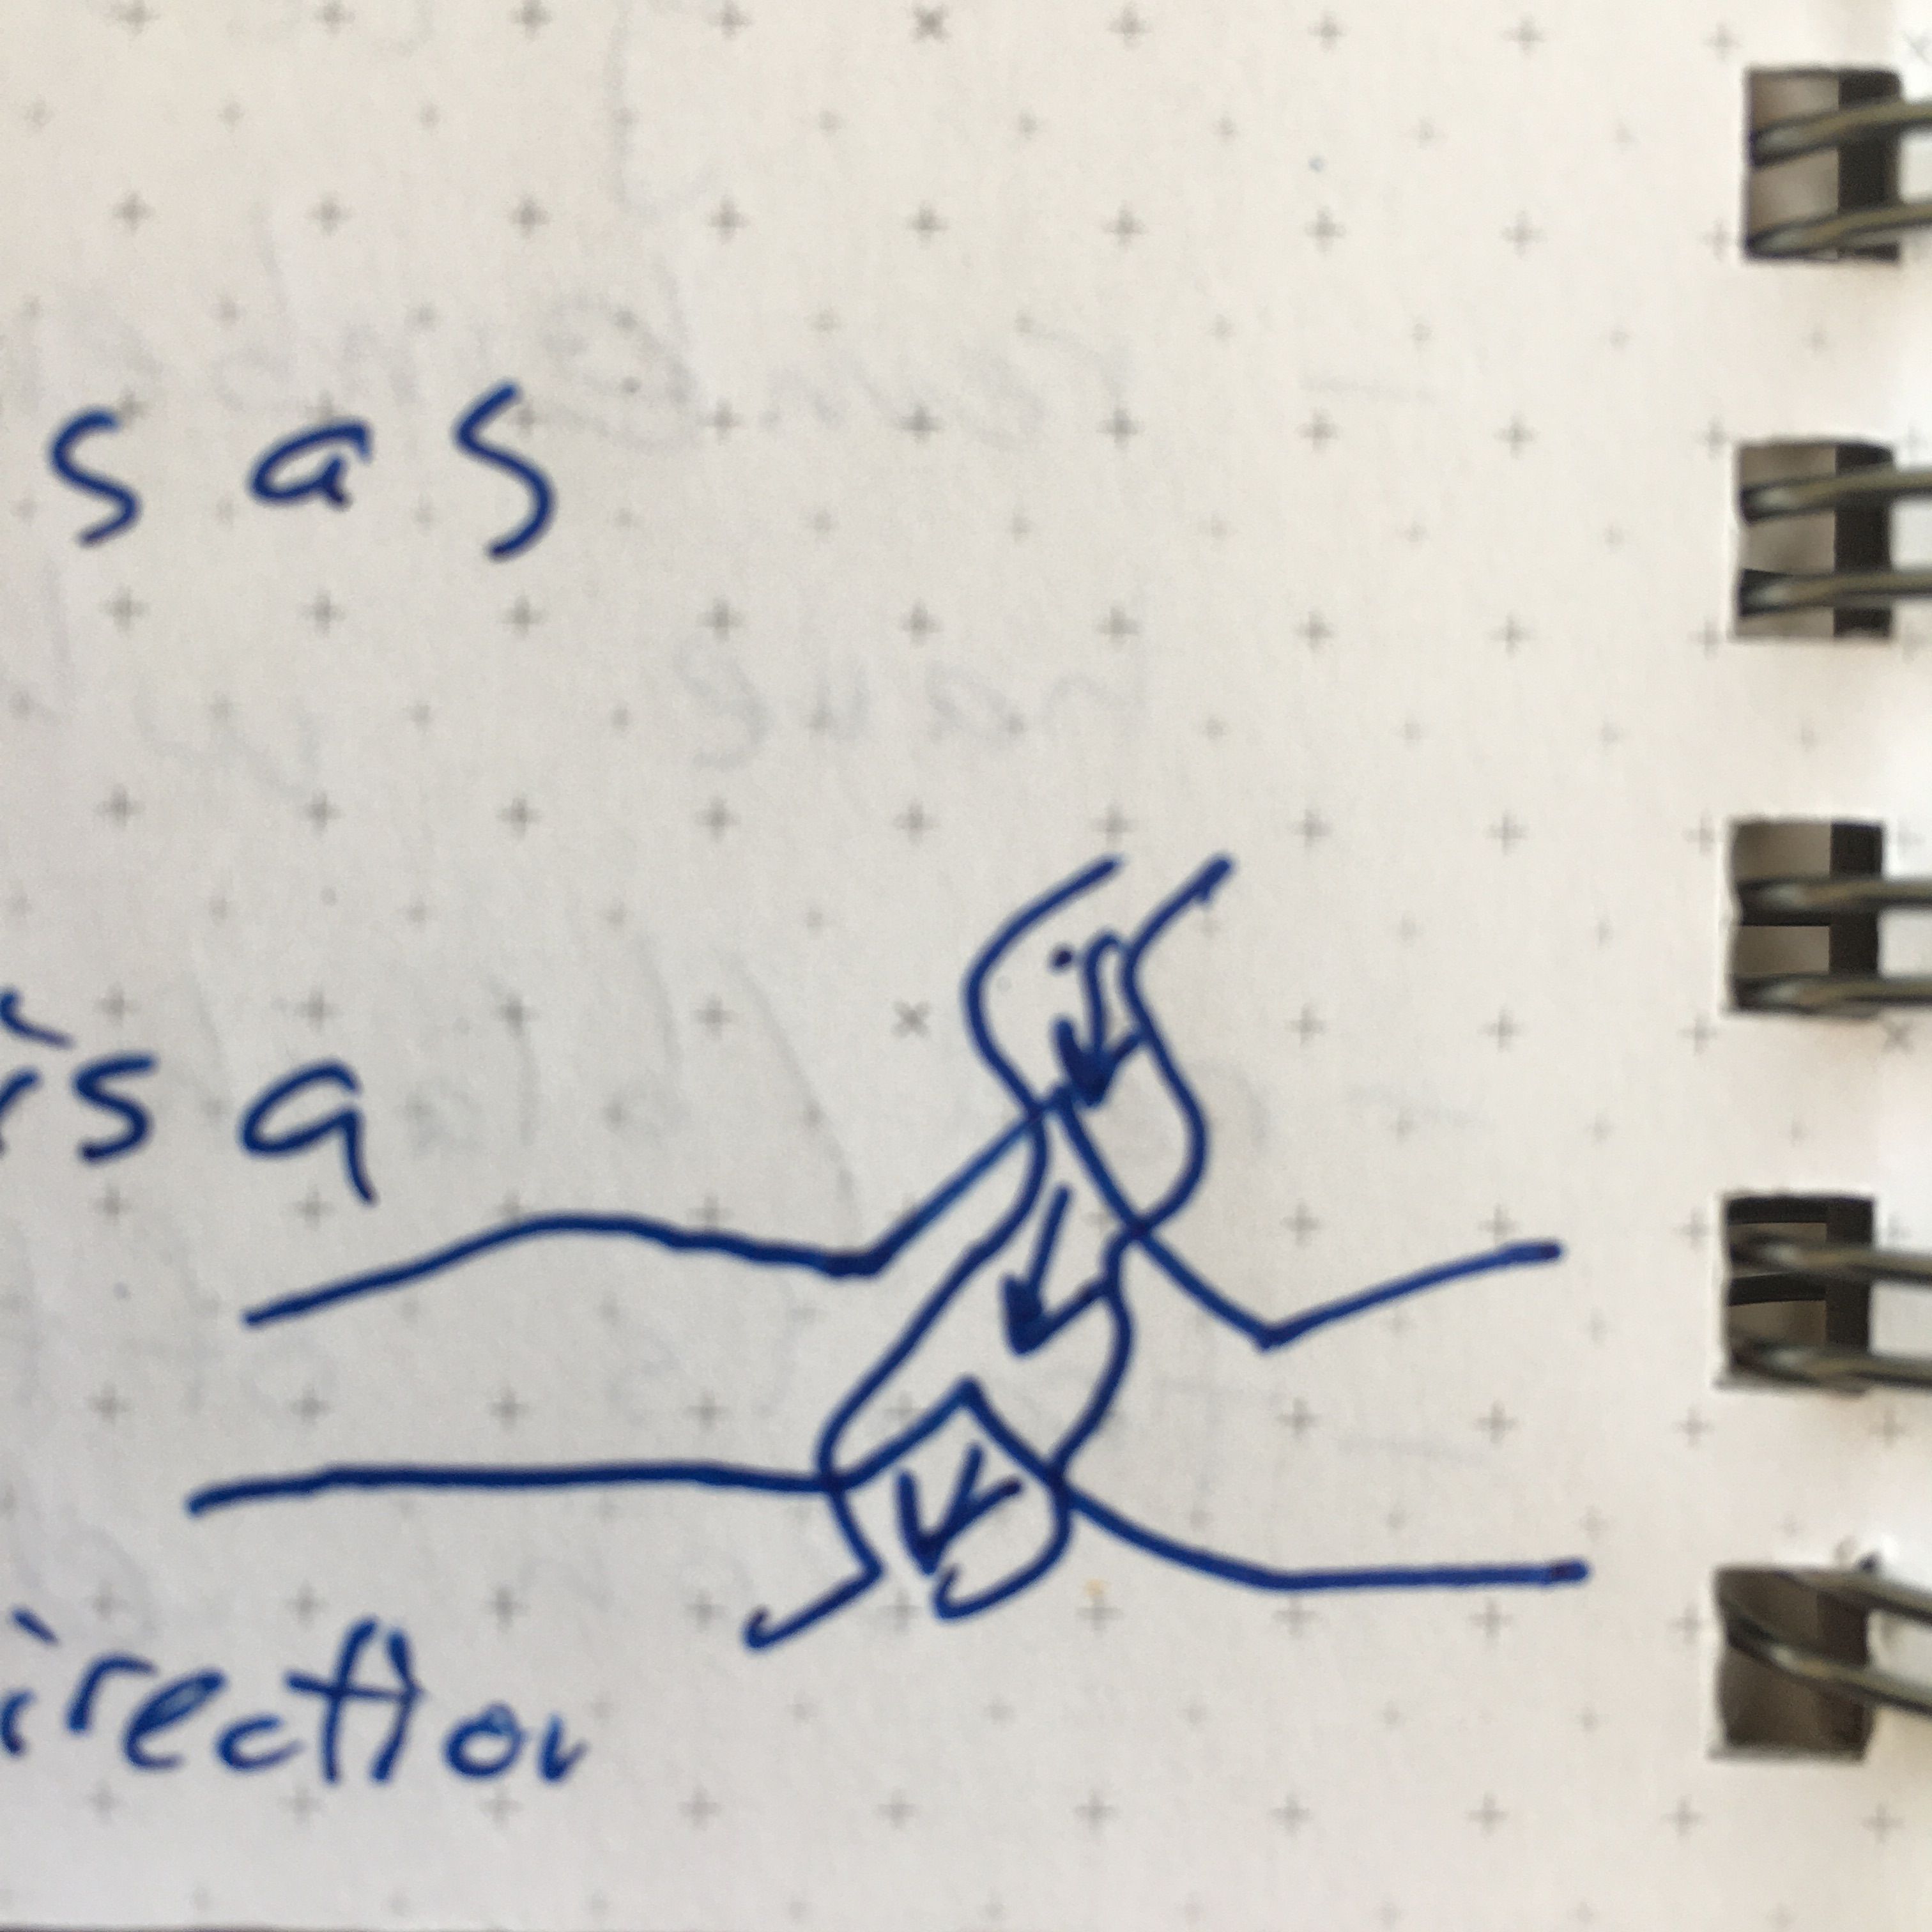
- Spurs look like shallow U shapes
Compass
Four skills to learn:
Real World
- (1) Follow a field bearing
- (2) Take a bearing of an object
"Map World"
- (3) Find object on map and measure angle
- (4) Start with angle and draw on the map
Angles are always measured clockwise
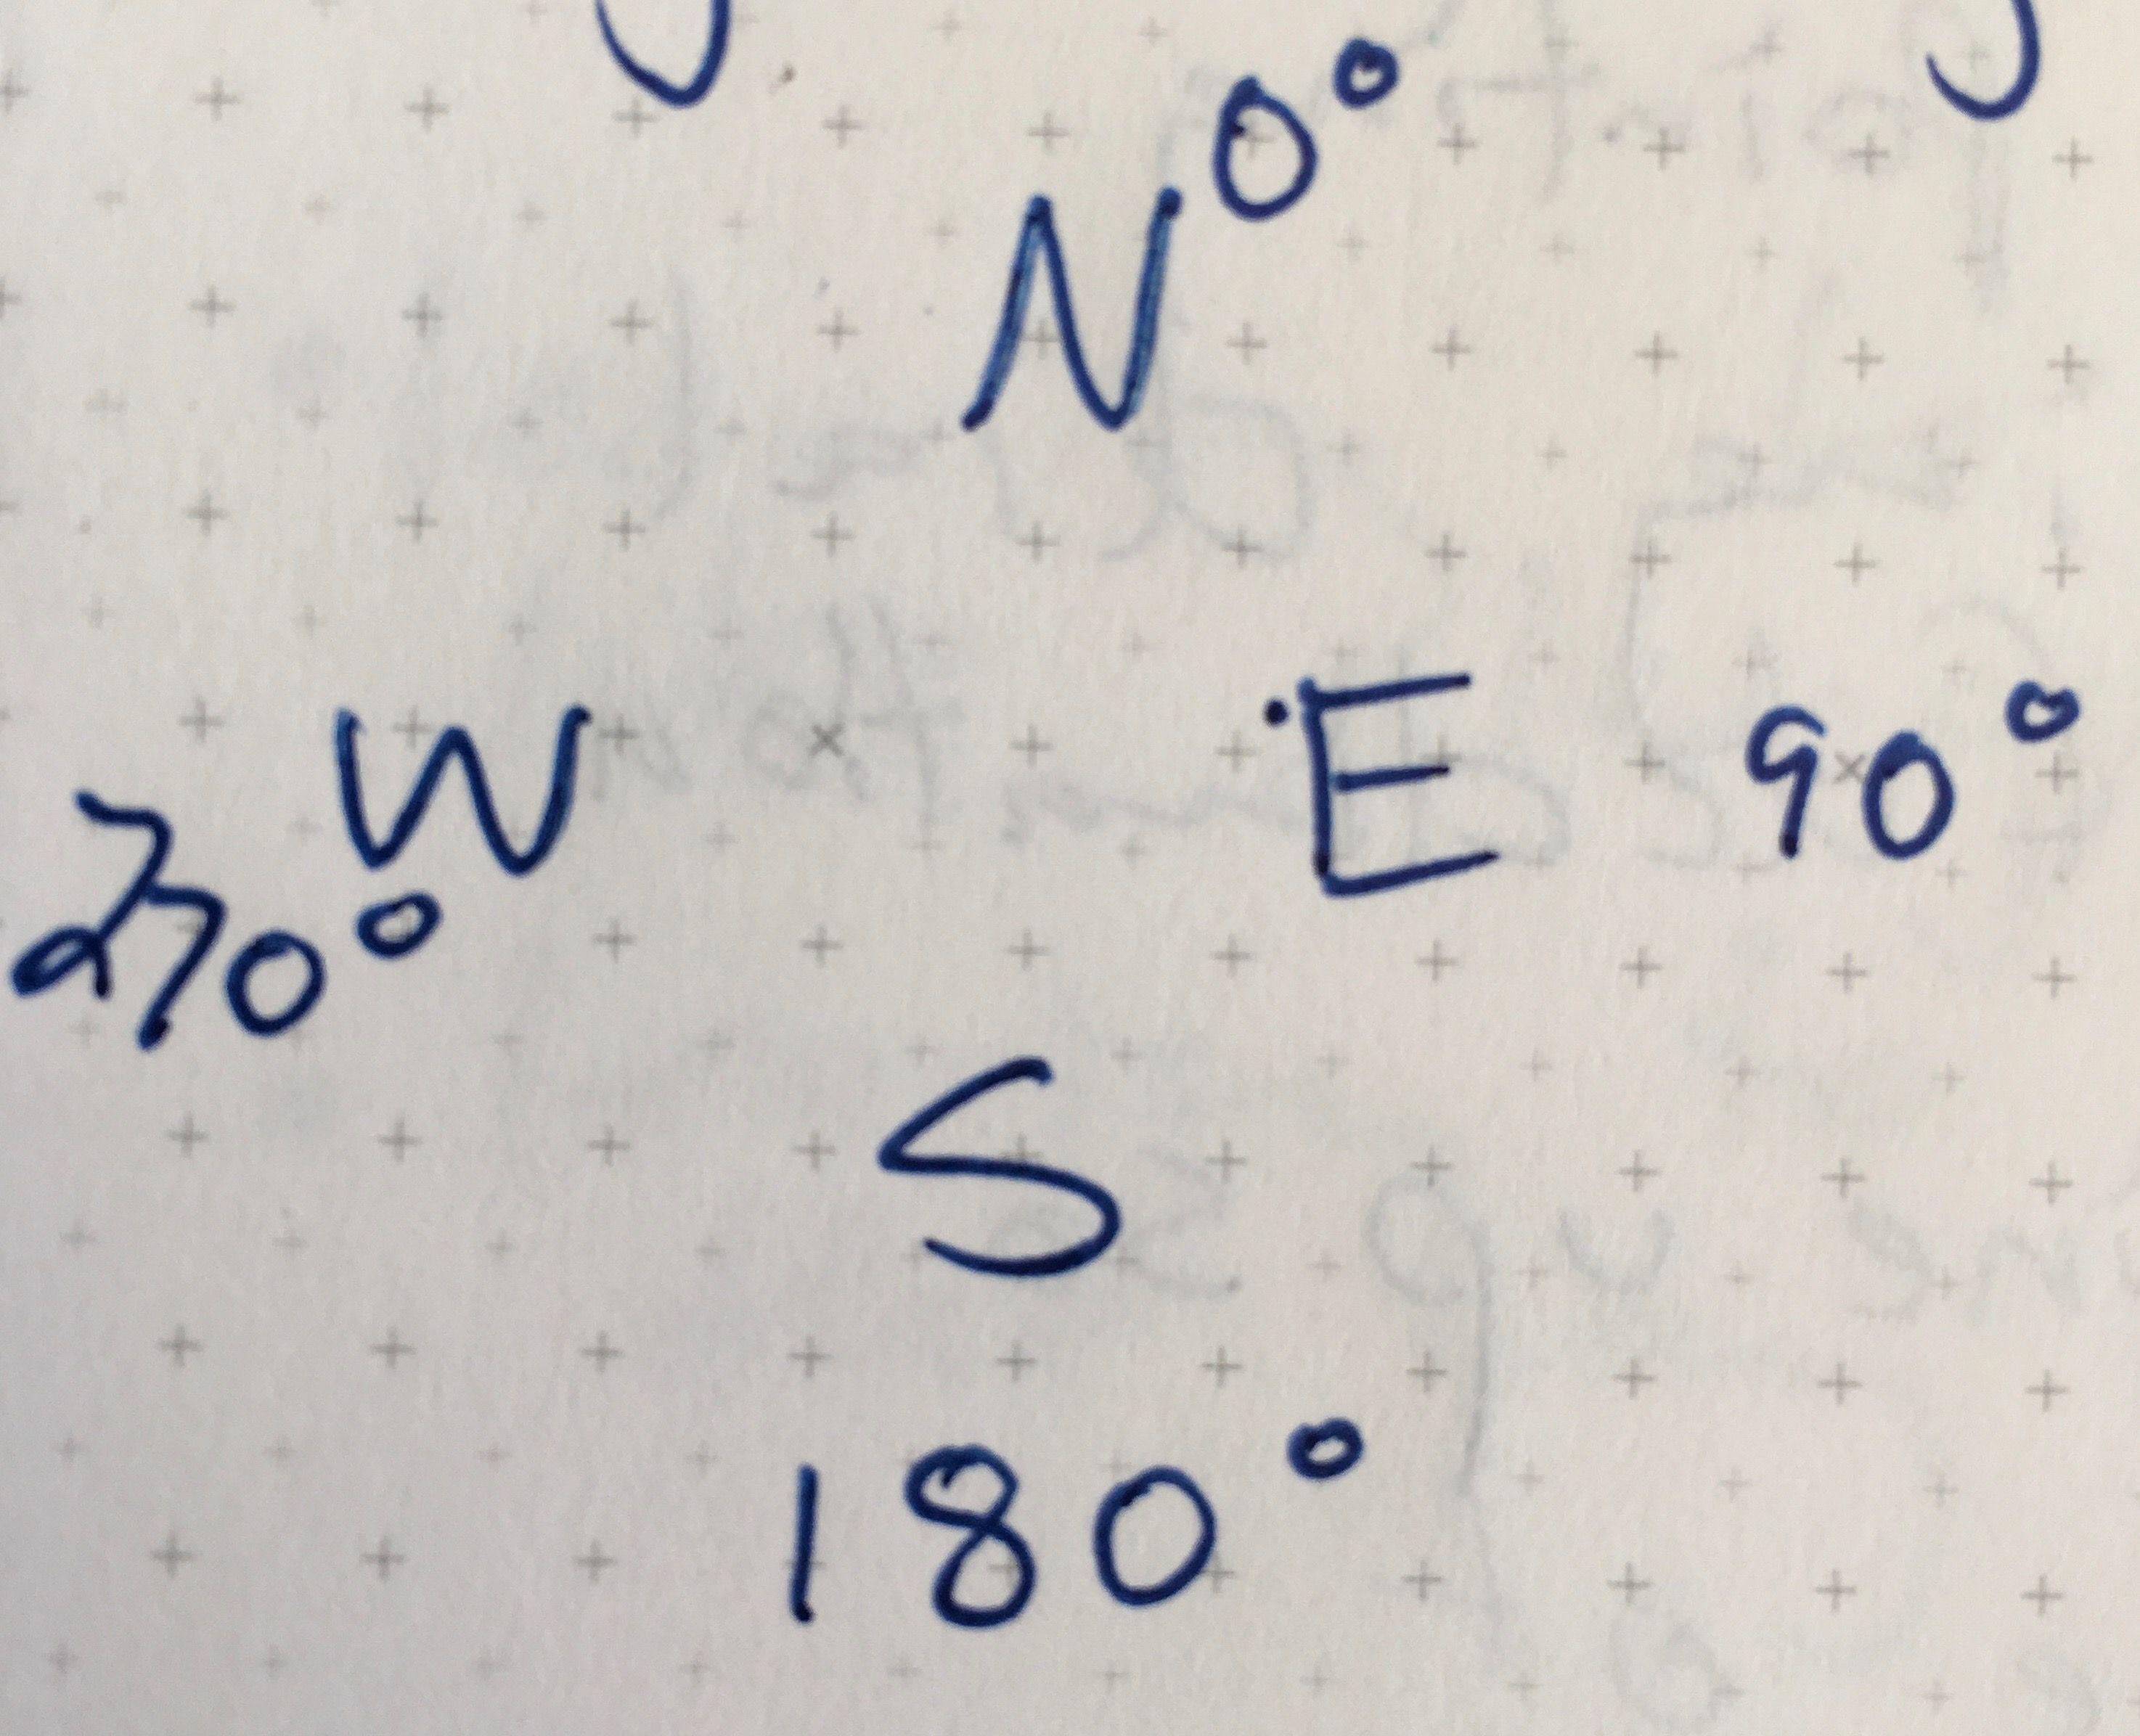
If you forget the compass directions, it spells "WE" left to right.
True north (north pole) vs Magnetic North (which can move around!)
Declination is number of angles from true north to magnetic north
Always keep your moving needle on the declination
Angle of declination needs to be known for your area (look this up!)

Angle of declination grows larger as you move north
A compass in the Southern hemisphere isn't going to work very well
North Star does point to true North (only object in sky that doesn't move as the Earth rotates)
Triangulation (my favorite part of the class!)
Brings it all together! This helps you "locate" yourself on a map.
General overview: Finding your location a map by taking three field bearings, making their angles, and then putting compass on the map and drawing a straight line with their angles
You definitely need to know exactly where the objects of interest are on the map for this to work (e.g. a mountaintop, a water-tower, etc)
Steps:
- Take bearing of an object by pointing compass at object and moving the dial until the needed is at the angle of declination
- Move compass to map and line it up so that it is pointing to angle of declination (but don't change anything on your compass dial!)
- Draw a straight line
- Repeat 2 - 3 times with different objects
At this point, you should have created a "triangle" where you are likely somewhere inside!
Dean of Discipline
When I first got to Red Bank Catholic High School, I’d hear some manner of the following all the time:
“Your dad is the best”
“Your dad is so scary”
“Your dad is the MAN”
I’d nod along, because often these comments were from some of the more notorious characters at school. But eventually, I cracked:
“Yeah, he is! But wait til you meet him. Because Mr. Harrington isn't my dad - he's my UNCLE!”
Yes, I will finally admit here that Uncle Dennis gave me a bit of a head start at RBC. But only by throwing me alongside the summer detention kids as part of the St. James / RBC Maintenance Crew in the summers before freshman, sophomore, and junior years.
To this day, it was the best job I’ve ever had. We smashed walls with a sledgehammer, we scraped gum off carpets with Gum-Freez (and sprayed each other in the arms with it, too), we changed the codes on every single locker. And we got a paycheck for it! One day we were told that there were 3 pigeons on the 4th floor. That was our mission. Good luck!
I learned a lot about my uncle from his other charges in summer detention. Even though this man was their ostensible gate-keeper, they respected and adored him. When I told them that my internment was voluntary, they nodded. They understood.
In my dad’s side of the family, the men are commanding, stubborn, strong, and loyal. (No offense, mom’s side). Grandpa Corn, his brothers Willie, Mike, and Dan, my dad.
Uncle Dennis, Mr. Harrington, is no exception. He breaks the mold.
Perhaps this comes from growing up in 1950s and 60s Keansburg - a place that is in my mind a combination of THE WONDER YEARS, A CHRISTMAS STORY, LEAVE IT TO BEAVER, and, of course, DENNIS THE MENACE.
Getting a HARRINGTON in your morning homeroom wasn’t a curse - it was a blessing. You were invited into that inner sanctum of the cafeteria, that little pod with him and Mr. Mont, and you had your chance to make your stuttering case for the uniform violation or whatnot. But what it really was was a chance to get advice from the paragon of what Red Bank Catholic represents: learning, forgiveness, respect for others, self-dignity, community.
Ask just about any RBC student and they’ll agree.
For the last sixteen years, I’ve received countless out-of-the-blue messages from fellow students about Uncle Dennis.
This is what they say:
“Your uncle is the best.”
“Your uncle saved my life”
“Your uncle is the MAN.”