Reading List
The most recent articles from a list of feeds I subscribe to.
gokrazy is really cool
When you deal with Linux, you end up hearing about "distributions" as different "flavors" of Linux combined with a bunch of other tools. This is mostly true, but it's slightly missing the forest for the trees.
Consider this famous and often misunderstood quote by Richard Stallman:
I'd just like to interject for a moment. What you're referring to as Linux is in fact, GNU/Linux, or as I've recently taken to calling it, GNU plus Linux.Linux is not an operating system unto itself, but rather another free component of a fully functioning GNU system made useful by the GNU corelibs, shell utilities and vital system components comprising a full OS as defined by POSIX.

Many pages of ink have been spilled over analyzing this quote, and a lot of them fall short of really getting at the heart of the matter. What this actually means is something like this:
By itself, Linux is useless. It does boot the system, it does interface with hardware, but without a bunch of other tools, it's not very useful. It's like a car without a steering wheel, or a boat without a rudder. It does something, but it's not very useful. The real value of things like the GNU project, systemd, openrc and other tools in that vein is that they make Linux useful. They make it into a complete system that you can use to do things. They are the proverbial steering wheel and rudder in the metaphor.

Most Linux systems on the face of the planet are built with GNU tools and utilities. In order to compile the Linux kernel, you need to use GCC. In order to run ls to list files in the current directory, you need to use GNU coreutils. Every dynamically linked program uses glibc for performing basic system interactions like writing to files or opening network sockets. Everything is built on top of the GNU toolset. This is why Stallman is so adamant about calling it GNU/Linux. It's not that he's trying to take credit for Linux, it's that he's trying to give credit to the GNU project for making Linux useful.
However, there's a lot of room for nuance here. For example, Alpine Linux is a Linux distribution that uses musl libc instead of glibc and busybox instead of GNU coreutils. It's still a Linux distribution, but it doesn't use the GNU toolset. It's still a Linux distribution, but it's not GNU/Linux.
So, what is a Linux distribution? It's a collection of tools that make Linux useful. It's a collection of tools that make Linux into a complete system. It's not a "flavor" of Linux (though this conceptually can exist with alternative kernels like the Zen kernel patchset), it's a system that just so happens to make Linux useful.
As a counter-argument, consider the reason why Linux runs on more devices worldwide than there are people: Android. Android does use the Linux kernel, but it doesn't use any GNU tools in the stack at all. You can't take programs that are compiled against other Linux distributions and run them on Android. You can't take programs that are compiled against Android and run them on other Linux distributions.

I'm going to argue that Android is not a Linux distribution unto itself. Android is a Linux implementation. It uses the Linux kernel, but that's where the similarities with the rest of the ecosystem end. Android is its own little world where there's just enough system tools to get the system running, but once you get into the UI, it's a completely different world. It's a completely different ecosystem. It's a completely different operating system.

/bin/sh, it's a Linux distribution.gokrazy
gokrazy is a Linux implementation that I've used off and on for a few years now. It's a very interesting project because everything on the system is written in Go save the kernel. The init process is in Go (and even listens over HTTP to handle updates!), every userland process is written in Go, and even the core system services are written in Go.
Out of the box a gokrazy install comes with these basic tools:
- The
initprocess that is mandated to be the parent of all userland processes by the Linux kernel. - A DHCP client that automatically configures the network interface.
- A NTP client that automatically sets the system clock.
- A little tool to save randomness from the kernel to a file so that it can be used to seed the random number generator on boot (because the Raspberry Pi doesn't have a robust hardware random number generator)
That's it. Everything else from the web UI to A/B update logic is written in Go. It boots in literal seconds, uses an insanely small amount of RAM out of the box, and runs with nearly zero overhead. When you configure your gokrazy install to run additional software, you do so by adding the Go command path to a configuration file and then updating to trigger a reboot into the new version.
Here's an example of what my gokrazy virtual machine's file tree looks like:
/ # tree etc gokrazy user
etc
├── breakglass.authorized_keys
├── gokr-pw.txt
├── gokrazy
│   └── sbom.json
├── hostname
├── hosts
├── http-port.txt
├── https-port.txt
├── localtime
├── machine-id
├── resolv.conf -> /tmp/resolv.conf
└── ssl
    └── ca-bundle.pem

gokrazy
├── dhcp
├── heartbeat
├── init
├── ntp
└── randomd

user
├── breakglass
├── fbstatus
├── qemu-guest-kragent
├── serial-busybox
├── tailscale
├── tailscaled
└── waifud-gok-agent
That is the entire system. It's all stripped down to these few programs, configuration files, and one symlink for DNS resolution. This is a very minimal system, and it's all you need to run statically linked Go programs. It's very easy to deploy your own services to it too. It's probably the easiest platform I know of that lets you just deploy a Go binary and have it run as a service, automatically restarting when it crashes.
The tooling
When I used gokrazy back in the day, you had to use a command line called gokr-packer that you passed a bunch of command line flags to with information about all the Go programs you wanted to run on the machine, configuration for those programs, and any other meta-information like where the update tool should push the image to. It was a bit of a pain to use, but it worked. Recently the gok tool was added to the project, and this has been revolutionary when it comes to using and administrating gokrazy installs.
Essentially, gok is a wrapper around the existing gokr-packer logic with a JSON file to store your configuration details. It's a lot easier to use, understand, and automate. You don't have to remember command line flags or maintain unwieldy scripts. You just edit a JSON file and push updates with gok update. It's amazingly simple.
Setting up a gokrazy machine
As an example, I'm going to show you how to install a bunch of tailnet addons to a gokrazy machine. I'm also going to assume that you don't have a gokrazy install set up yet, so we'll need to install it. To do this, we'll need to do a few simple things:
- Install the
goktool. - Create your
gokconfiguration. - Install Tailscale on the machine.
- Create your "seed" image with
gok overwrite. - Boot it on your Raspberry Pi or VM.
- Push any updates to the image to the machine with
gok update.
First, let's install the gok tool. In order to do this, you need to have the Go toolchain installed. Once you have that, you can run go install to install the gok tool:
go install github.com/gokrazy/tools/cmd/gok@main
~/go/bin is in your $PATH variable so that you can run it by the name gok instead of ~/go/bin/gok.Next, create a new gokrazy configuration with gok new:
gok new -i casa
This will create a configuration named casa (cf: Spanish for "house") in ~/gokrazy/casa. This is where all of your configuration files will live. You can edit the configuration file with gok edit:
gok edit -i casa
If you are making a virtual machine
If you are making a virtual machine, you will need to override the kernel and firmware packages. You can do this by adding the following to your configuration file:
{
  // ...
  "KernelPackage": "github.com/rtr7/kernel",
  "FirmwarePackage": "github.com/rtr7/kernel",
  // ...
}
You will need to prefix the gok overwrite and gok update commands with GOARCH=amd64 to ensure that Go builds x86_64 binaries instead of ARM binaries:
GOARCH=amd64 gok update -i casa
If you don't do this, you will get arm64 binaries being built. This may require manual recovery of your virtual machine.
Let's make our lives easier by installing Tailscale on the machine. By default, gokrazy will announce its hostname over DHCP, which usually makes most consumer routers pick it up and then lets you ping it by name. When you have MagicDNS enabled, Tailscale can take over this logic and prevent you from accessing the machine by name.
However, Tailscale is written in Go and doesn't require any of the services that most Linux distributions provide in order to function. It's a perfect fit for gokrazy. You can install it with gok add:
gok add tailscale.com/cmd/tailscaled
gok add tailscale.com/cmd/tailscale
And be sure to add the mkfs service to create a persistent partition on /perm:
gok add github.com/gokrazy/mkfs
Next, fetch an auth key from the admin console and make sure you check that it's reusable. Then, add the following to your configuration file under the PackageConfig block:
{
    // ...
    "PackageConfig": {
        // ...
        "tailscale.com/cmd/tailscale": {
            "CommandLineFlags": [
                "up",
                 // paste your key here!
                "--authkey=tskey-auth-hunter2-hunter2hunter2hunter2"
            ]
        },
        // ...
    }
    // ...
}
tailscale up flags you want here, such as --advertise-exit-node if you want to use your gokrazy machine as an exit node.This will make your machine automatically connect to Tailscale on boot.
Next, we need to create our "seed" image with gok overwrite. First, figure out what the device node for your SD card is. On Linux, you can do this with lsblk:
lsblk
And then look for the one that has the same size as your SD card. In my case, it's /dev/sdd. Once you have that, you can run gok overwrite:
gok overwrite --full /dev/sdd
However if you want to write the image to a file (such as if you are doing mass distribution or making a VM image), you need to use gok overwrite with a file instead of a device node. This will create a 16 GB image:
gok overwrite -i casa --full gokrazy.img --target_storage_bytes 17179869184
Once you have your image, you can write it to your SD card with dd (or balenaEtcher) or import it into your virtual machine hypervisor of choice.
Once you have your image written to your SD card, you can boot it on your Raspberry Pi or VM.
breakglass as a tool of last resort to modify things, but you only have a very minimal subset of busybox to work with, so it should be avoided if at all possible.Once you have your machine booted and it responds to pings over Tailscale, you can open its HTTP interface in your browser. If you called your machine casa, you can open it at http://casa. It will prompt you for a username and password. Your username is gokrazy, and the password is near the top of your config.json file. When you log in, you'll see a screen like this:
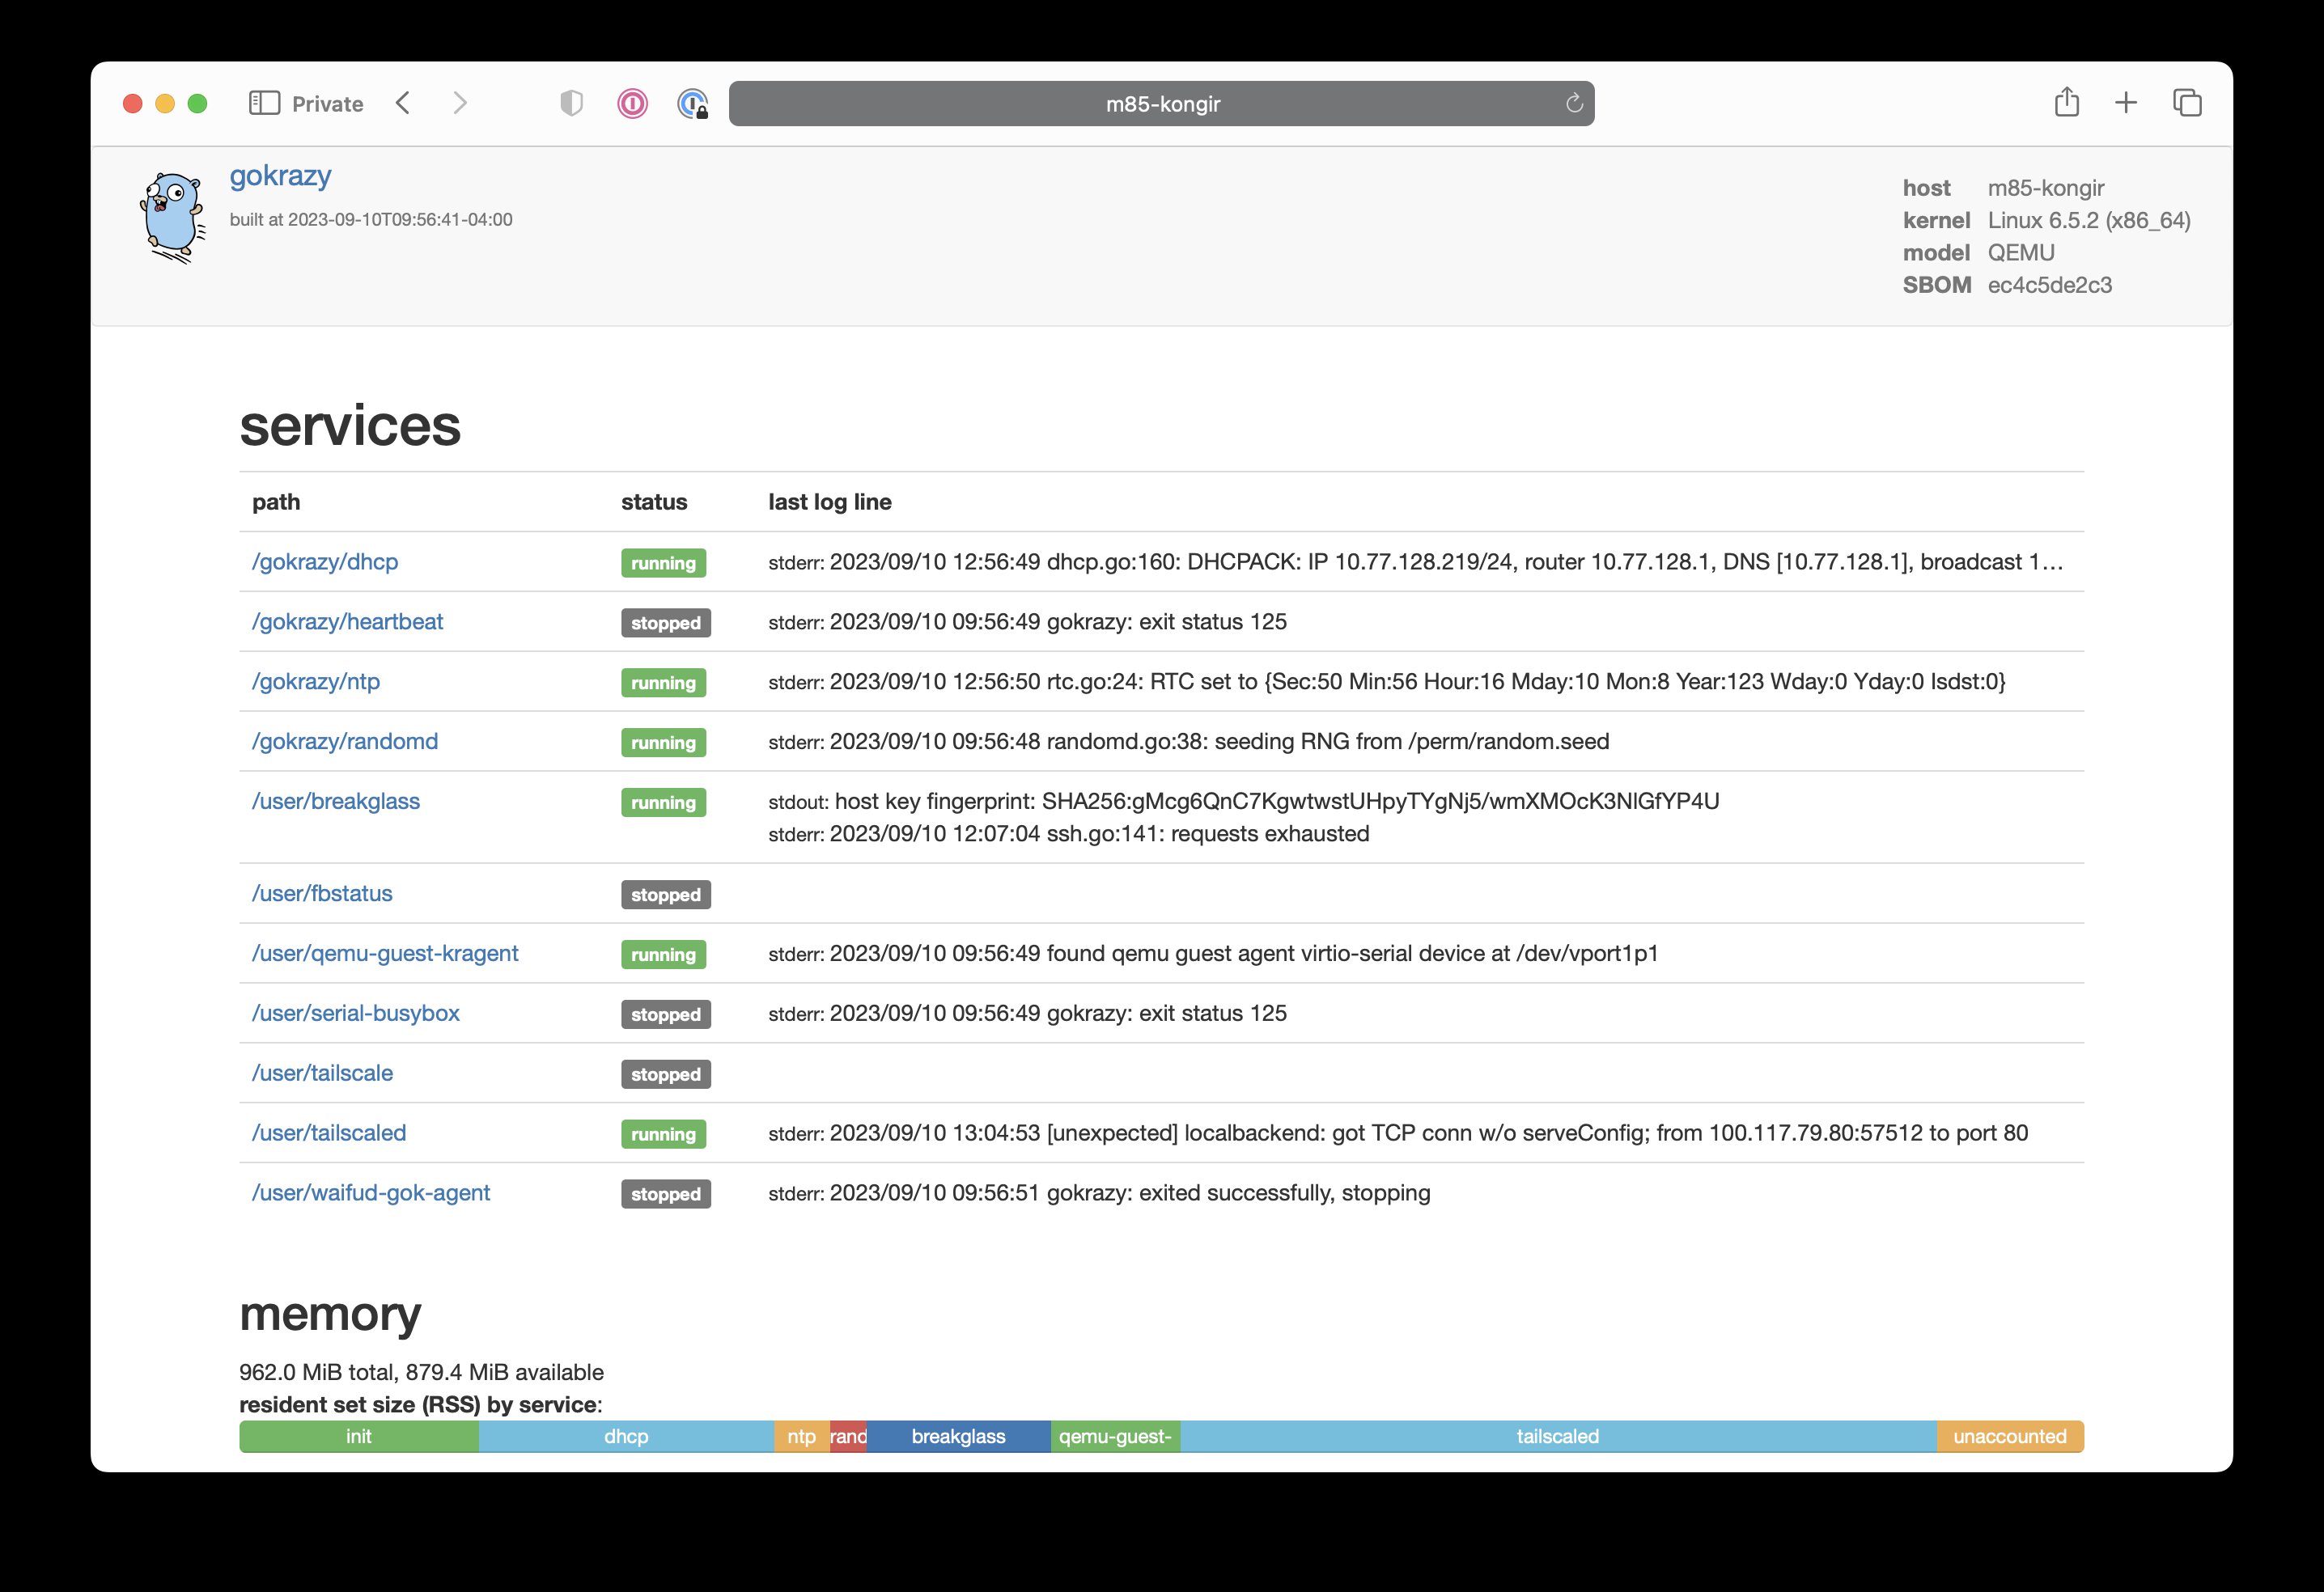
This is the gokrazy web UI. It lets you see the status of your machine and any logs that are being generated by your applications. You can also start, stop, and restart any of your applications from here. It's a very simple UI, but it's fantastic for debugging and monitoring.
Tailnet addons
Now that we have a Gokrazy system up and running, let's add some programs to it! I'm going to list a couple tailnet addons that give your tailnet superpowers. These are all written in Go, so they're a perfect fit for gokrazy.
Today I'm going to show you how to install these tools into your tailnet:
- golink - a URL shortener at
http://go - tmemes - an internal meme generator you can host at
http://memegen - tclip - a pastebin you can host at
http://paste
These tools help you augment your tailnet by giving you tools that will make you and your team's life a lot easier. A URL shortener helps you link to complicated Google Docs URLs. A meme generator gives you a new innovative way to let off steam. A pastebin lets you share text with your team without having to worry about the service you're using going offline due to no fault of your own.
golink
To install golink, we need to add the golink binary to the configuration. You can do this with gok add:
gok add github.com/tailscale/golink/cmd/golink
Then configure it with gok edit:
{
    // ...
    "PackageConfig": {
        // ...
        "github.com/tailscale/golink/cmd/golink": {
            "CommandLineFlags": [
                "--sqlitedb=/perm/home/golink/data.db"
            ],
            "Environment": [
                // the same one from before
                "TS_AUTHKEY=tskey-auth-hunter2-hunter2hunter2hunter2"
            ],
            // don't start the service until NTP catches up
            "WaitForClock": true
        },
        // ...
    }
    // ...
}
And finally push it with gok update:
gok update -i casa
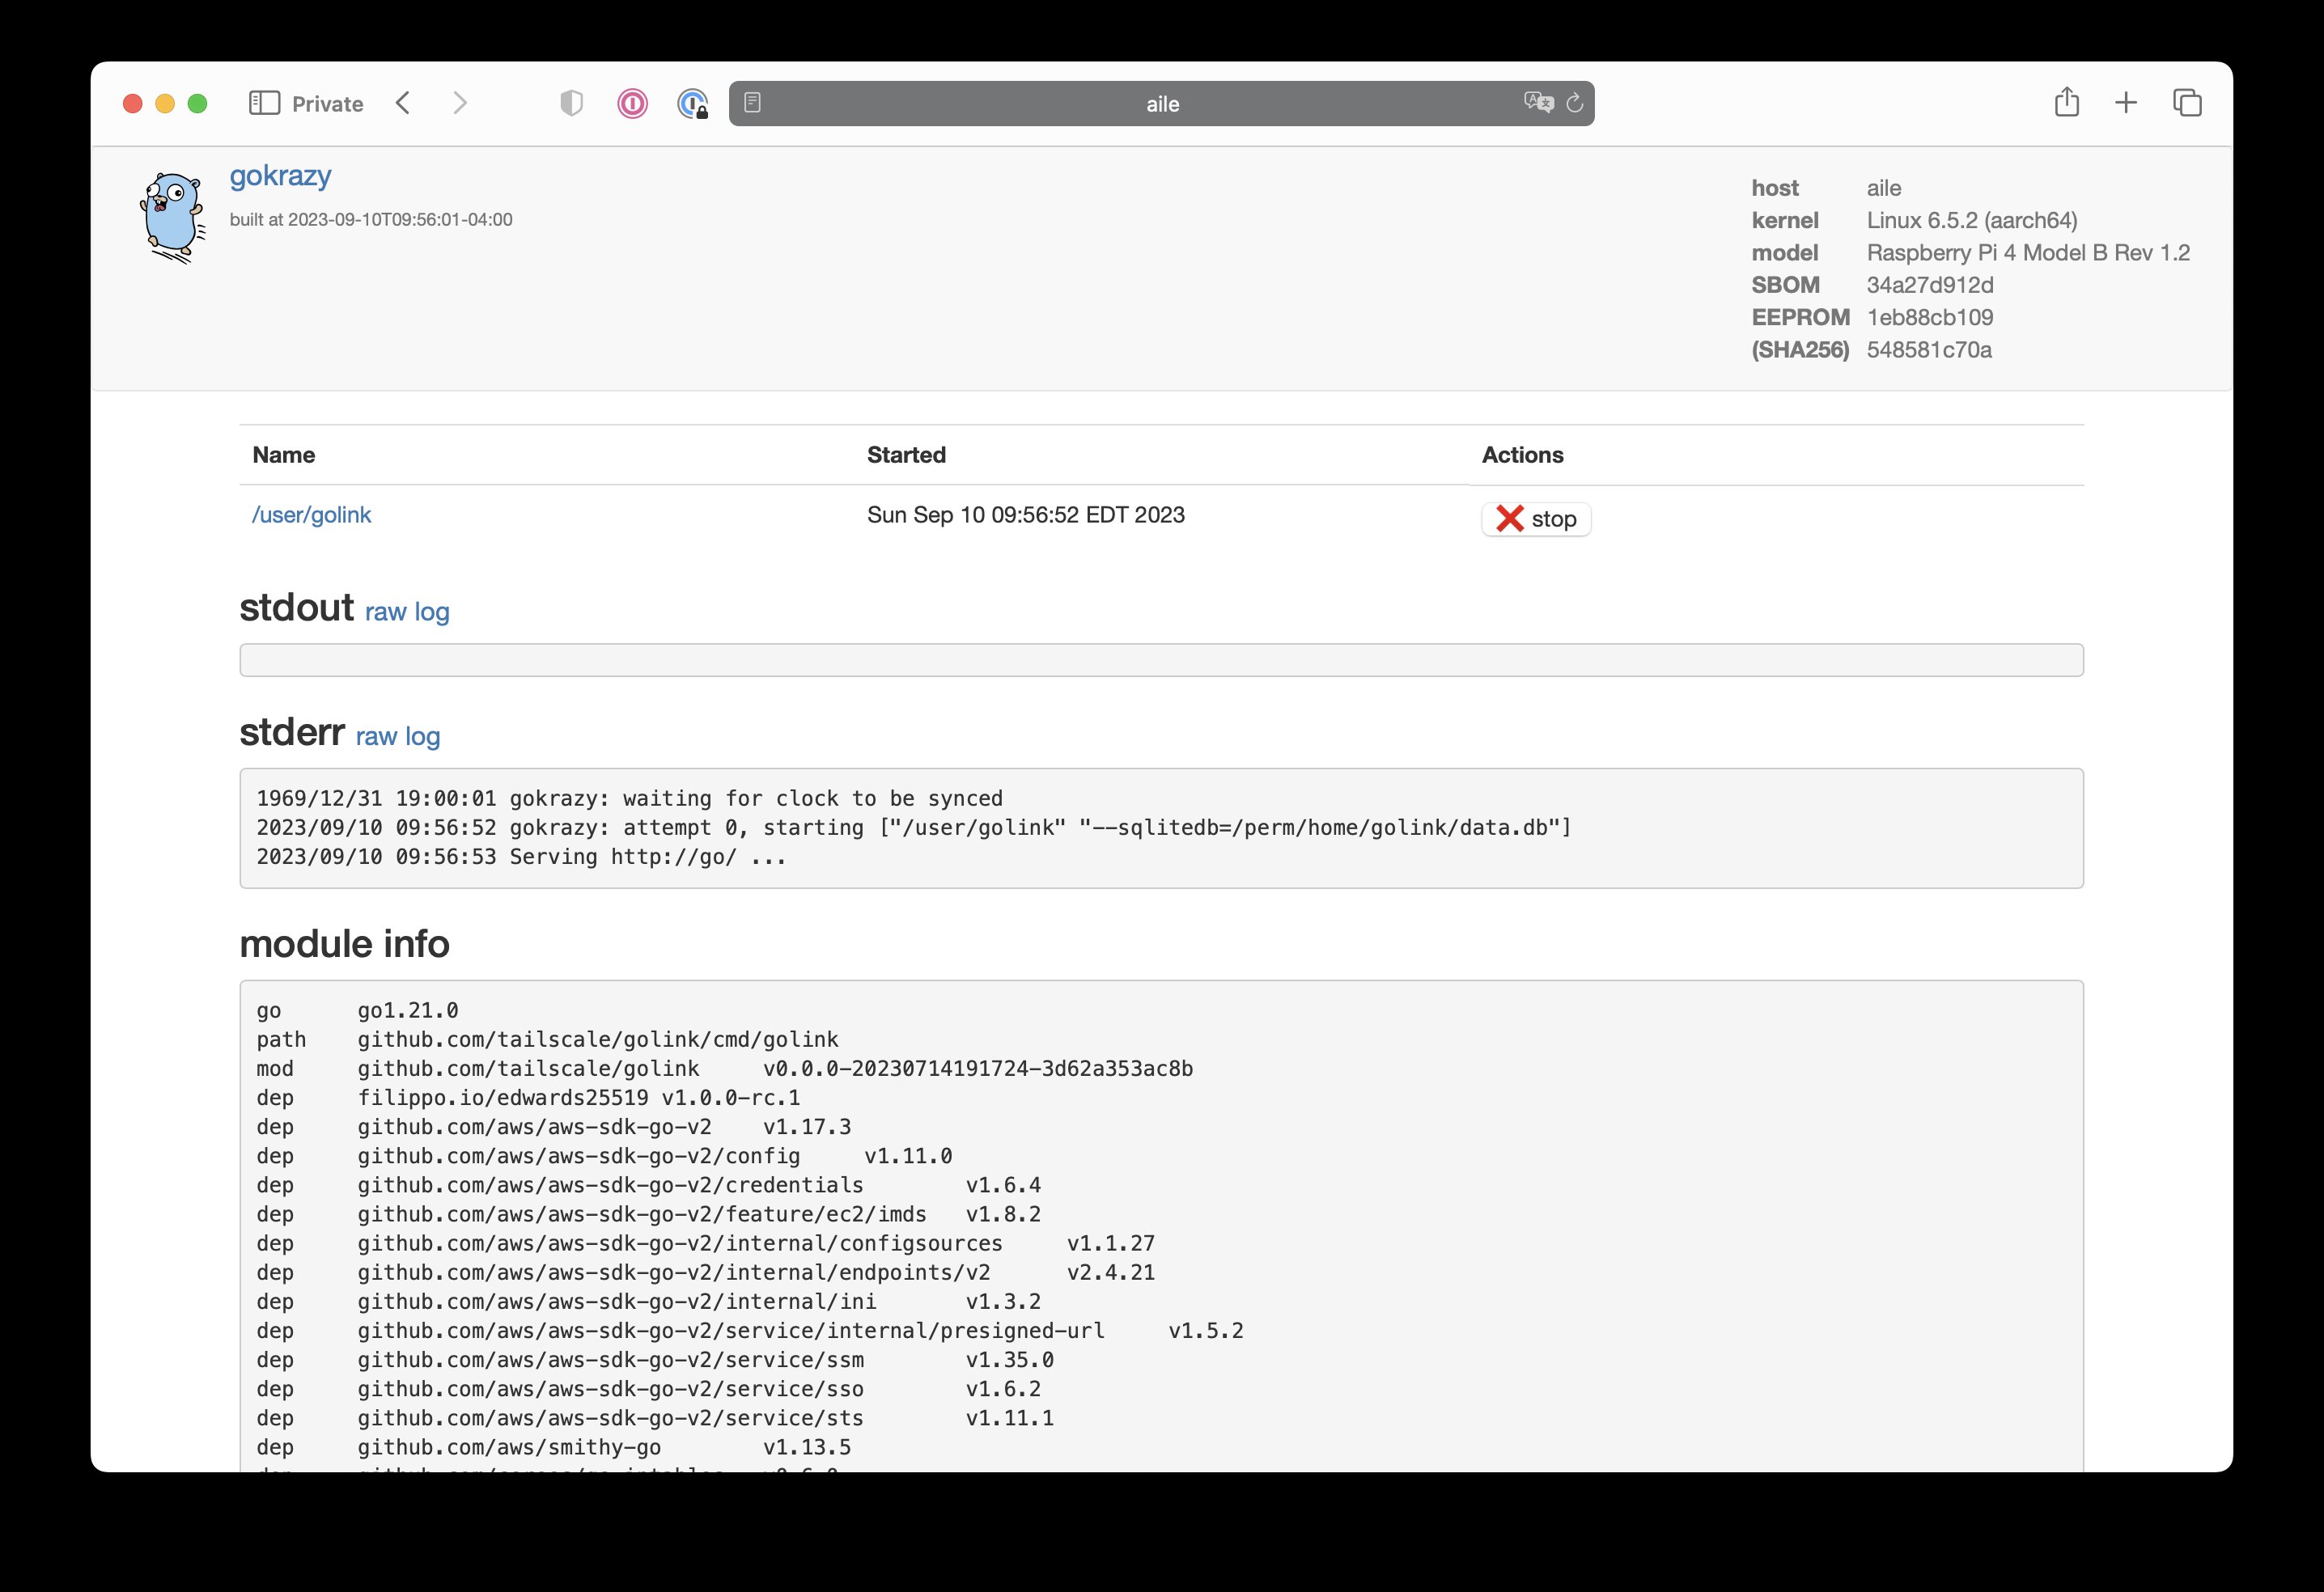
It'll build the image, push it out over Tailscale, trigger a reboot, and be back up in the span of a minute. Once it's back up, you can open the web UI again and see the status of your golink instance at http://casa/status?path=%2fuser%2fgolink:
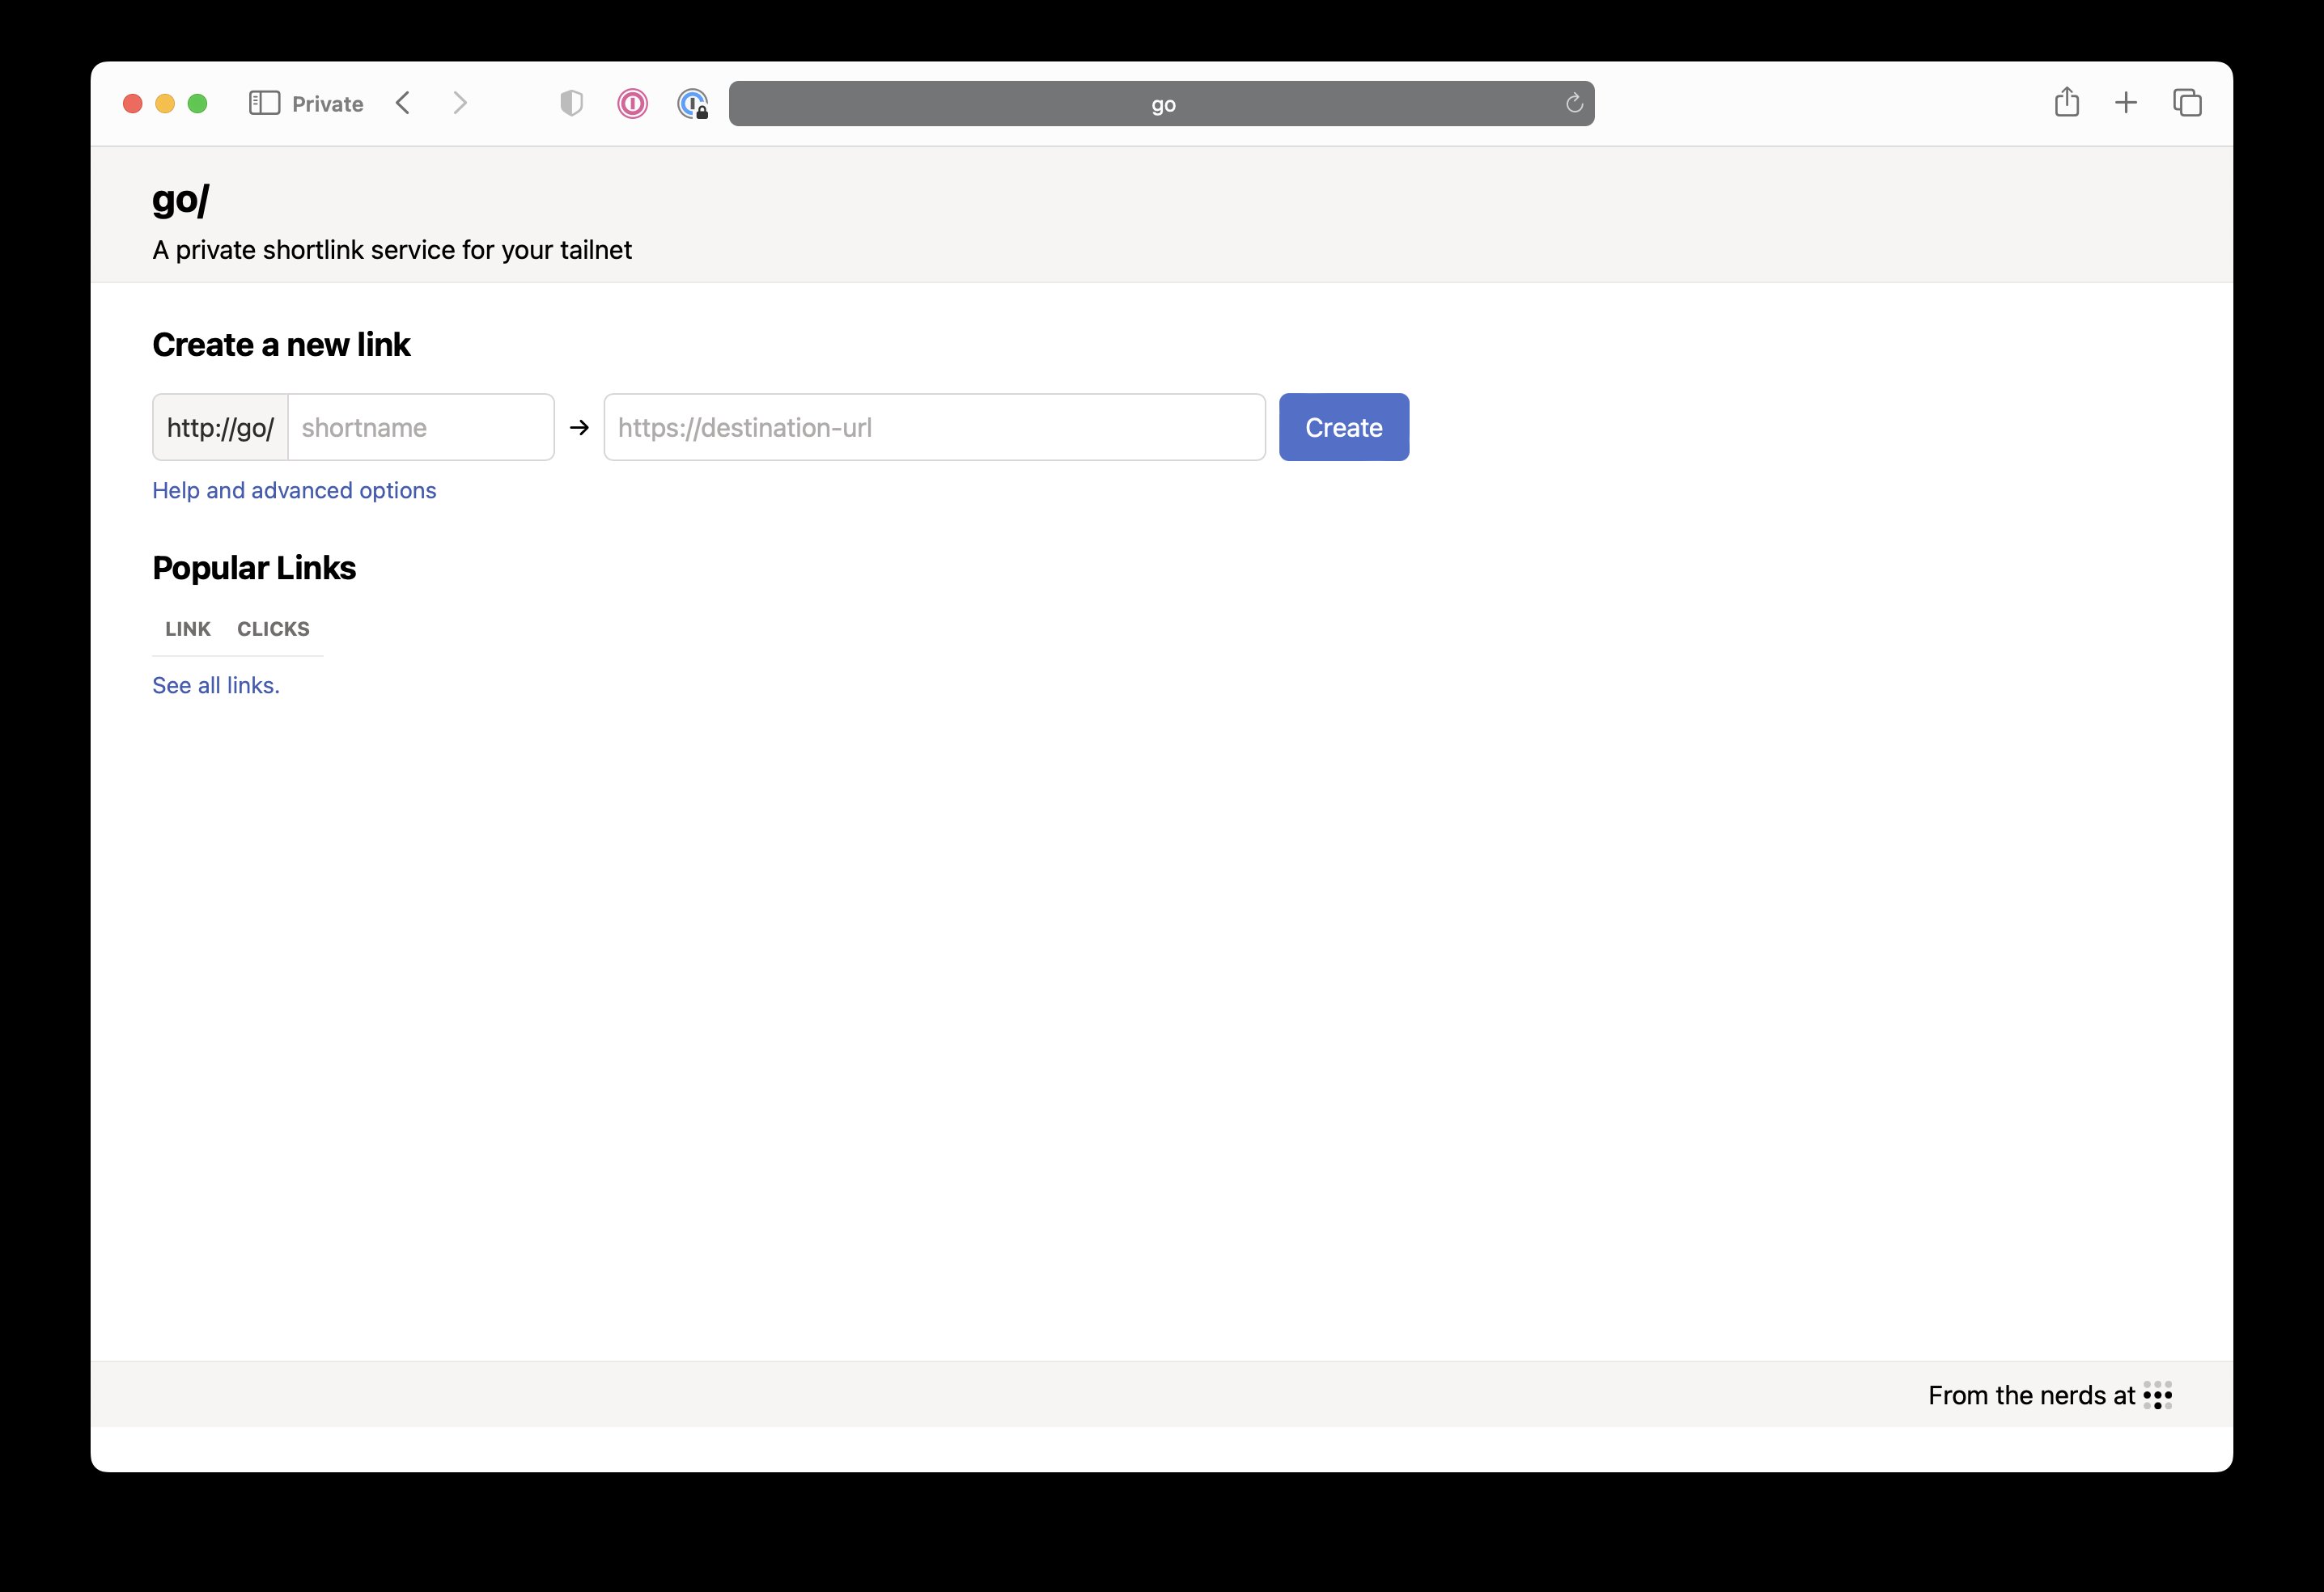
And then you can start using short URLs at http://go:
And that's it! You now have a super minimal VM running small programs that let you do useful things to you. You can add more programs to your configuration file and push them with gok update to add more functionality to your machine. You can even add your own programs to the configuration file and push them to your machine. It's a very simple system, but it's very powerful.
tmemes
Google is infamous for having an internal service named memegen. This allows Googlers to make internal-facing memes about the slings and arrows that impact them as highly paid programmers. This is an internal service inside Google that has a lot of serious investment of time and energy to make it the best possible experience it can be. It's to the point that reportedly people can keep up with how an all-hands meeting is going by the tone of the sarcastic memes that are being posted to memegen.
The main reason this is run inside Google is to avoid information leaking via memes. Yes, this is an actual threat model.
Thanks to the magic of Tailscale, you can make your own private memegen using tmemes. tmemes is a tailnet addon that lets you post image macro templates and layer wisdom over it in the form of text.
Here's an example meme:

To add tmemes to your gokrazy machine, you can use gok add:
gok add github.com/tailscale/tmemes/tmemes
Then open your config with gok edit and add the following to your PackageConfig block:
{
    // ...
    "PackageConfig": {
        // ...
        "github.com/tailscale/tmemes/tmemes": {
            "Environment": [
                "TS_AUTHKEY=tskey-auth-hunter2-hunter2hunter2hunter2"
            ],
            "CommandLineFlags": [
                // change this to your desired hostname
                "--hostname=memegen",
                // change this to your username on Tailscale
                "--admin=Xe@github",
                "--store=/perm/home/tmemes"
            ],
            "WaitForClock": true
        },
        // ...
    },
    // ...
}
And then push it with gok update:
gok update -i casa
Then you can head to http://memegen and upload a template to make your own dank memes.
If you want to integrate your own tools with tmemes, you can check out the API documentation. This should help you do whatever it is you want with a meme generator as a service.
tclip
Sometimes you just need a place to paste text and get a URL pointing to it. tclip is a tool that you can add to your tailnet and get exactly that. It's a very simple tool, but it's very useful. It's also written in Go, so it's a perfect fit for gokrazy. Their recent update to remove Cgo dependencies makes it possible to run your tclip node on a gokrazy machine.
To add tclip to your gokrazy machine, you can use gok add:
gok add github.com/tailscale-dev/tclip/cmd/tclipd
Then open your config with gok edit and add the following to your PackageConfig block:
{
    // ...
    "PackageConfig": {
        // ...
        "github.com/tailscale-dev/tclip/cmd/tclipd": {
            "CommandLineFlags": [
                "--data-location=/perm/home/tclip/"
            ],
            "WaitForClock": true,
            "Environment": [
                "TS_AUTHKEY=tskey-auth-hunter2-hunter2hunter2hunter2",
                "USE_FUNNEL=true" // Remove this if you don't want to use Funnel
            ]
        },
        // ...
    }
}
And then push it with gok update:
gok update -i casa
And then you can start using it by heading to http://paste. Install the command-line tool on your development workstation with go install:
go install github.com/tailscale-dev/tclip/cmd/tclip@latest
Here's an example tclip link if you want to see what it looks like in practice: interjection.c. It's a very simple tool, but it's very useful.
Conclusion
gokrazy is insanely cool. It's the easiest way to deploy Go services to your homelab. It integrates seamlessly with Tailscale, and is something that I'm very excited to see grow and mature. I'm very excited to see what the future holds for gokrazy, and I'm very excited to see what people do with it.
I've seen signs that they're going to be adding an automatic update process, and that has me very excited. I'm also excited to see what other services people add to the gokrazy ecosystem. I'm hoping to add a few of my own in the future, and I'm hoping to see what other people do with it.
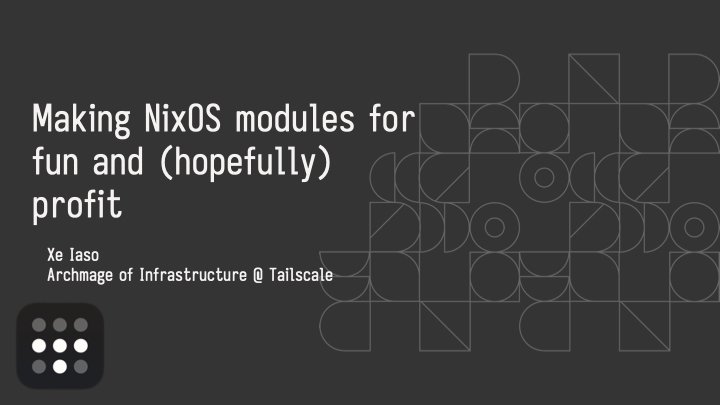
Making NixOS modules for fun and (hopefully) profit
Making NixOS modules for fun and (hopefully) profit


Good morning everyone! Say this happens to you: you've been coding nonstop on something you want to share with your friends and it works on your MacBook. You want it to stay up when your MacBook goes to sleep or you get on a plane or something, and all you have to do is the easy task of putting it into production. It's just simple, right?
Just add a Dockerfile, they say! So you do that and then you have a Docker image that you can push to your target machine and then you find out that you can't just push it from machine to machine, you have to push it to a registry.
So you make an account on the Docker hub only to find out that their rate limits are very aggressive so you have to move to something like GHCR and aggressively cache all your images there so you don't run afoul of the comically small Docker Hub rate limits which will block your attempts to deploy it to your cloud provider of choice.
So you do that and you pull this on a VM running on someone else's computer, and then you need to figure out the other fun part:
You need to configure nginx. Of course it uses its own bespoke configuration language that no other program on the planet uses (this is an unfortunately common pattern in our industry) so it's even more googling for that. But then you realize you need to configure the real final boss of the internet:
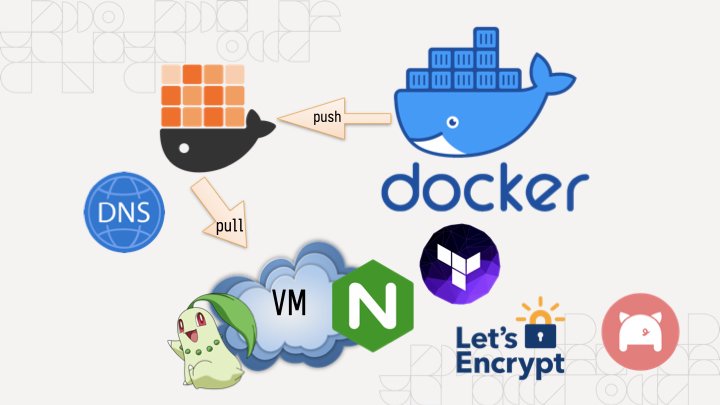
DNS. It's never DNS until it's always DNS. So you install the artist formerly known as Terraform, lego, and provision your DNS and HTTPS certificates (because of course nginx doesn't just natively have this support in anno dominium two thousand and twenty three like any sensible HTTP reverse proxy should). And then you're finally done. It's taken you an hour to hack up the service and a whole 8 hours to research and implement everything to deploy it. This is madness. Why do we have to put up with this?
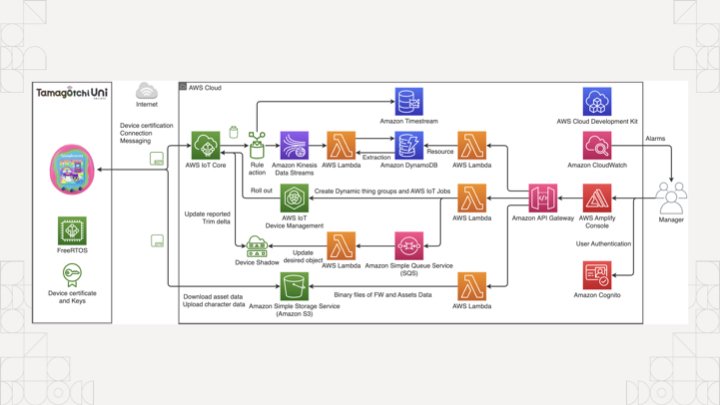
The koolaid runs deep in the cloud too, if you're not careful you'll end up accidentally making an entire event sourcing platform with an unrealistic amount of complexity to manage something as simple as a tamagochi. You're just trying to make an HTTP service show up on the internet, you don't need to know what an ALB, EKS, ECS, IAM, or PFA is.
Of course, complain about this online and a certain tangerine community funded by big YAML will decry that you should use Kubernetes to simplify all this down to "simple" and "easy to understand" things, conveniently ignoring that they use a string templating language for structured data.
There has got to be something simpler, right? What if you didn't have to deal with nearly any of that? What if you could just push and run your binary on a home server and then access it? No dealing with the cloud. No dealing with security groups or IAM or DNS or HTTPS or any of the slings and arrows of outrageous investment. What if you could just describe the state of the system you want instead of going three layers deep into a side of devops hell that you will never return from unscathed?

This is the real value of NixOS. Today I'm going to show you how to turn an arbitrary Go program into a NixOS service and then I'll expose it to the world thanks to Tailscale Funnel. This means you can link it to your group chat of friends and restore balance to the force. Or whatever it is you zoomers do in group chats.
All that said, let me introduce myself. I'm Xe Iaso, I write that one blog that you keep finding when you google Nix and NixOS stuff. I'm a writer, gamer, philosopher of chaos magick, and have a critical blogging addiction.
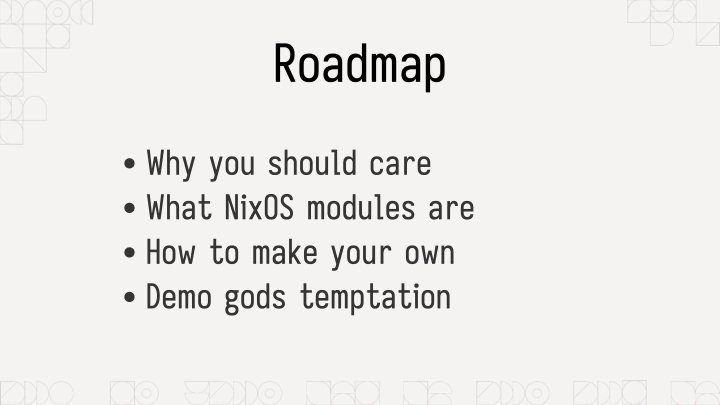
Today I'm going to cover a few core things so you can make your own NixOS modules: I'm going to cover what a NixOS module is and why you should care, the parts of one, how to make your own, and then I'm going to tempt the demo gods by doing a live deployment to a virtual machine on my MacBook.
Before I get started though, let's get some exercise in. Raise your hand if this is your first exposure to Nix and/or NixOS.
(About half the room raises their hands)
Alright, thanks.
Raise your hand if you've ever used it before.
(The other half of the room raises their hands)
That's about what I expected.
How about if you have it installed on a server at home?
(The same people raise their hands)
Okay, okay, I see.
How about if you're one of the lucky few where your employer uses it in production?
(Only a few of those people raise their hands)
Oh, wow, okay. That makes sense. You can lower your hands now.
Just so we're on the same page, Nix is a package manager that lets you declare all of the inputs for a program and get the same output from the build process.
func Build(
  inputs []Package,
  steps BuildInfo,
) (
  output Package,
  err Error,
)
One of the main ways that Nix stands out from the crowd is the idea that package builds are functions. They effectively take in inputs, use them against some instructions, and then either return a package or the build fails due to an error. Because there were no other options at the time, Nix uses its own programming language also named Nix to define packages.
Remember, Nix was the result of lamentations at the state of software and this was the result.
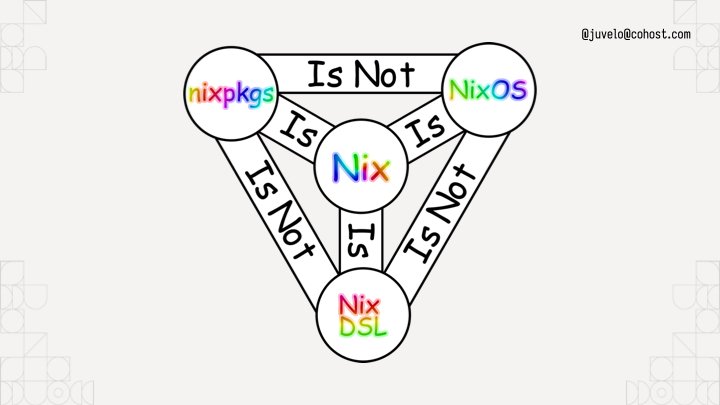
To help you understand, I've put up this helpful diagram. It uses rainbow comic sans so you know it's legit. Nixpkgs the standard library uses Nix the language, but it is not NixOS the operating system. I like to think about NixOS like this:
NixOS is the natural consequence of using Nix to build Linux systems. You can think about NixOS as a bunch of prebaked snippets of configuration that you can combine info a running system that does what you want. Each of those snippets is called a module. Nixpkgs (the standard library in Nix land) ships with a bunch of them that do things from compiling systemd to configuring Tailscale for you. Here's a simple NixOS module from my homelab:
{ config, pkgs, ... }:

{
  services.prometheus.exporters.node.enable = true;
}
A NixOS module is a function that takes the current state of the world and returns things to change in it. The module I'm showing here is from my homelab, specifically the part that enables the prometheus node exporter so that I can report when machines suddenly go offline or their hard drives are going bad. This is a very simple example. When you import it, it always takes effect. There's no flags to enable it or disable it. This is fine for my usecase however, because I want my homelab cluster to always be monitored. Things get a lot more fun when you add options into the mix:
{ lib, config, pkgs, ... }:

with lib;

let cfg = config.within.vim;
in {
  options.within.vim.enable = mkEnableOption "Enables Within's vim config";

  config = mkIf cfg.enable {
    home.packages = [ pkgs.vim ];
    home.file.".vimrc".source = ./vimrc;
  };
}
Compare it to this module, this is a dot file management module that sets up my vimrc on my machines. I have the option within.vim.enable, and if that is set to true, the vim configuration is dropped in place. If it's not set to true, it won't put the vim configuration in the system. NixOS modules have options and configuration outputs. Options let you customize the configuration to meet your spacebar heating needs.
{ ... }:

{
    imports = [ ./vim ];
    within.vim.enable = true;
}
To use this, you'd add the path to the file to an imports output of the module, then add a within.vim.enable = true statement inside your home-manager configuration.
The state of the world is the input, and any new changes are the outputs. This lets you build a Linux system exactly the way you want to. It's just a new and interesting way to write a function.
services.nginx.virtualHosts."xeiaso.net" = {
  locations."/" = {
    proxyPass = "http://unix:${toString cfg.sockPath}";
    proxyWebsockets = true;
  };
  forceSSL = cfg.useACME;
  useACMEHost = "xeiaso.net";
  extraConfig = ''
    access_log /var/log/nginx/xesite.access.log;
  '';
};
Above all else: you can configure programs like nginx directly in your NixOS configuration without having to learn how to write nginx config, saving you from having to configure every single program on your system in its own bespoke ways.
(Pause)

Of course, things become a lot more fun when you can build your own NixOS modules that have your own programs running on your own machines. Let's do that with an example program that shows quotes from the legendary British science fiction author Douglas Adams.
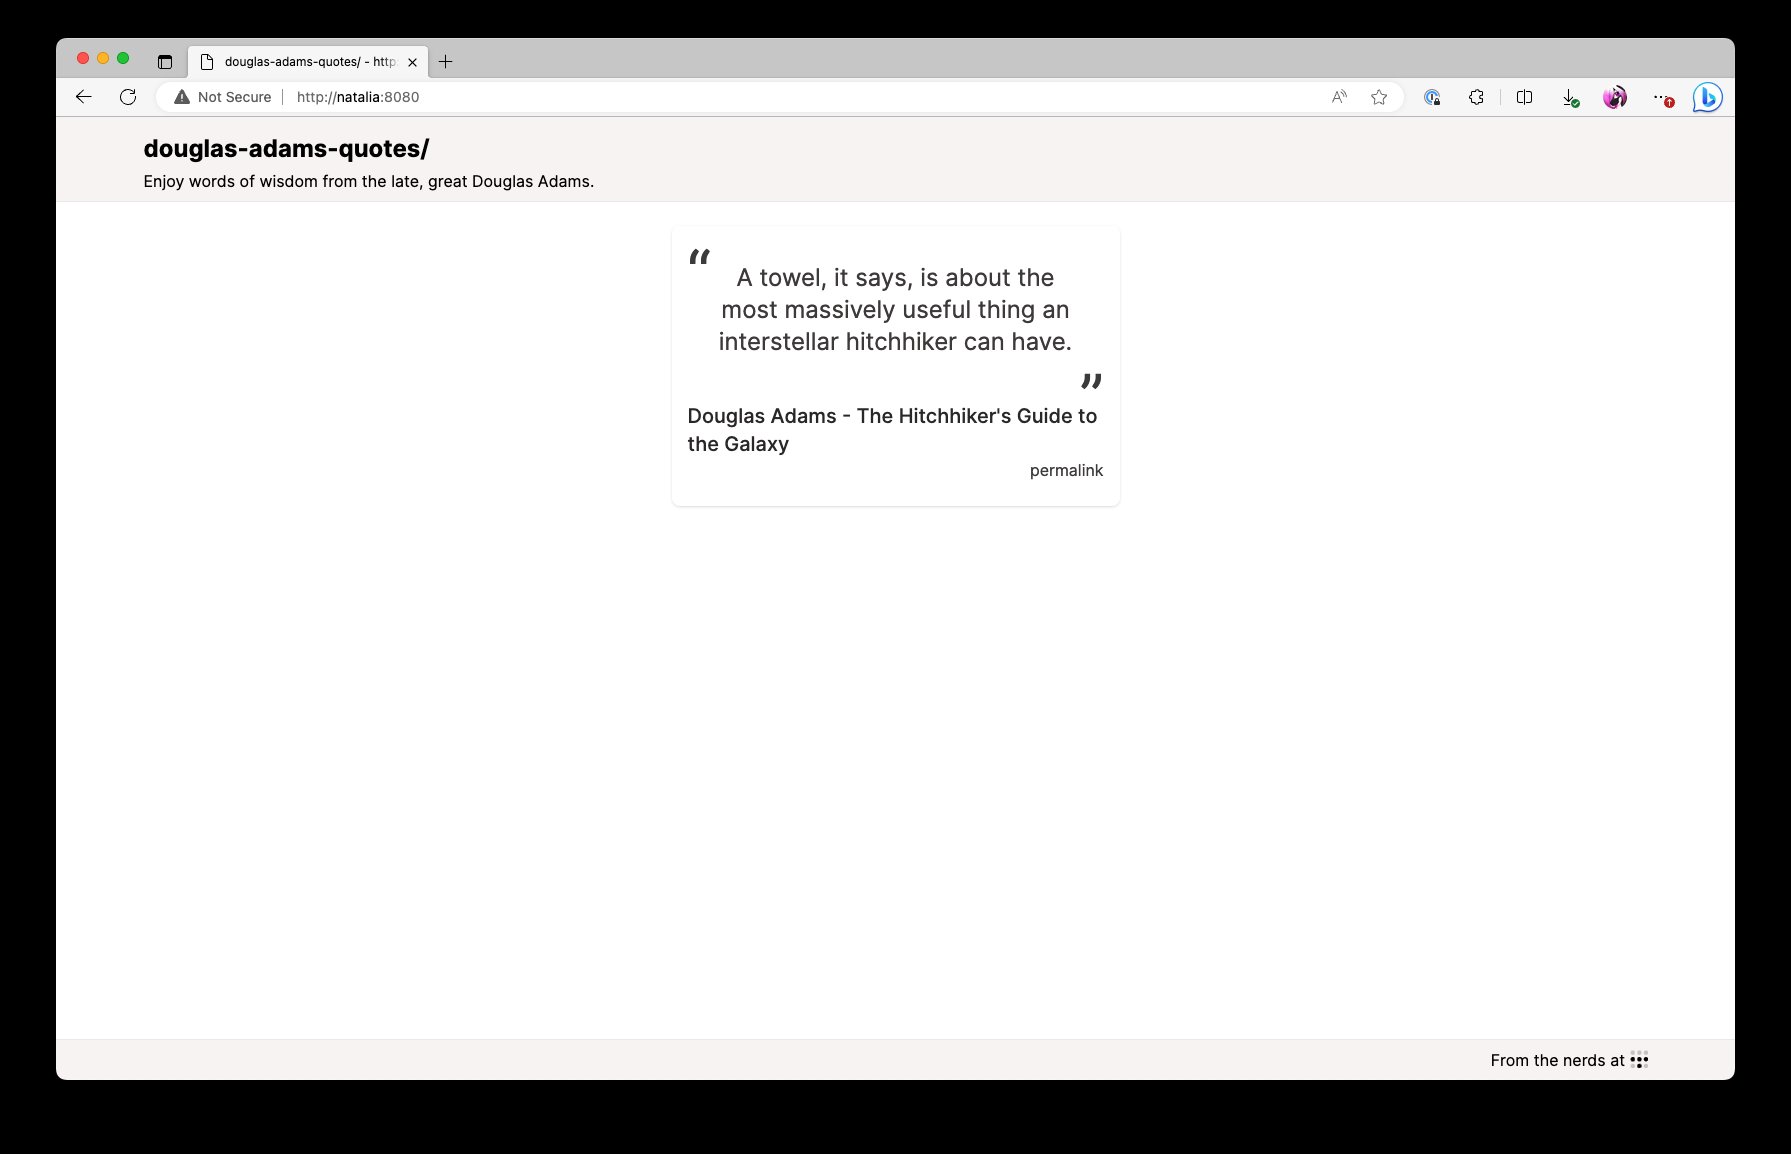
This is what the end result will look like. It'll be the quotes on a screen that refreshes every time you press F5. This will let you spread the undeniable wisdom of the late and great Douglas Adams, author of the five part trilogy The Hitchhiker's Guide to the Galaxy.

So overall, the infrastructure setup will look like this: my MacBook and the VM are both connected to each other with Tailscale. When I enable Tailscale Funnel, the VM is going to have its HTTPS port opened up to the public internet so that you can visit this service running on a VM, on my MacBook, on conference Wi-Fi. Let's hope the demo gods are in our favour!
By the way, Tailscale's gonna take care of the DNS and Let's Encrypt problems for us. No having to figure that out in the conference!
{
  description = "Douglas Adams quotes";

  # Nixpkgs / NixOS version to use.
  inputs.nixpkgs.url = "nixpkgs/nixos-unstable";

  outputs = { self, nixpkgs }:
  let # ...
  in
  {
    packages = ...;
    nixosModules.default = ...;
    devShell = ...;
    checks.x86_64-linux = ...;
  }
}
I've opened a VS Code session with an "empty" flake configuration. Nix flakes let you create a set of packages, development environments, NixOS modules, and even end to end integration tests. To start, this flake will import nixpkgs:
# Nixpkgs / NixOS version to use.
inputs.nixpkgs.url = "nixpkgs/nixos-unstable";
And then it declares a devShell for all of the developer dependencies:
devShell = forAllSystems (system:
  let pkgs = nixpkgsFor.${system};
  in with pkgs;
  mkShell {
    buildInputs =
      [ go_1_21 gotools go-tools gopls nixpkgs-fmt nodejs yarn ];
  });
This is relevant because I want you to imagine a world where your compilers aren't in your shell by default. This devShell configuration adds the packages relevant to the project to the development environment. This is a Go project with some CSS managed by Tailwind, so it's got the Go compiler, some Go development tools, npm, and yarn. A pretty normal set of things really.
To enter the development environment, run nix develop. I'm going to run yarn start:css in another shell to rebuild when any of the template files change.
Now that we have that, let's see how we would add a package to the flake. One of the flake output kinds is Nix packages, so we make an output named packages and paste in some boilerplate to get a Go package working:
packages = forAllSystems (system:
  let
    pkgs = nixpkgsFor.${system};
  in
  {
    default = pkgs.buildGo121Module {
      pname = "douglas-adams-quotes";
      inherit version;
      src = ./.;
      vendorSha256 = null;
    };
  });
The package would look something like this. This forAllSystems / nixpkgsFor hack is something you can work around with flake-utils, but for right now I'm doing everything manually. This is basically a bunch of predefined copies of nixpkgs for all the supported architectures, much like there's a devshell for every supported architecture. Either way, we get a Go module built into a package, and we define the dependency hash as null because this is only using the standard library. It's called default in the flake because it's best practice to name your package that.
Just to test it, you can run nix build to build the default package in that flake.nix file:
nix build
Perfect! It builds! The binary is in ./result/bin/ and we can run it wherever we want.
$ ./result/bin/douglas-adams-quotes --help
Usage of ./result/bin/douglas-adams-quotes:
  -addr string
        listen address (default ":8080")
  -slog-level string
        log level (default "INFO")
If it didn't work we wouldn't get this far!
nixosModules.default = { config, lib, pkgs, ... }:
with lib;
let
    cfg = config.xe.services.douglas-adams-quotes;
in
{
    options.xe.services.douglas-adams-quotes = {
        enable = mkEnableOption "Enable the Douglas Adams quotes service";

        logLevel = mkOption {
            type = with types; enum [ "DEBUG" "INFO" "ERROR" ];
            example = "DEBUG";
            default = "INFO";
            description = "log level for this application";
        };

        port = mkOption {
            type = types.port;
            default = 8080;
            description = "port to listen on";
        };

        package = mkOption {
            type = types.package;
            default = self.packages.${pkgs.system}.default;
            description = "package to use for this service (defaults to the one in the flake)";
        };
    };

    config = mkIf cfg.enable {
        systemd.services.douglas-adams-quotes = {
            description = "Douglas Adams quotes";
            wantedBy = [ "multi-user.target" ];

            serviceConfig = {
            DynamicUser = "yes";
            ExecStart = "${cfg.package}/bin/douglas-adams-quotes --slog-level=${cfg.logLevel} --addr=:${toString cfg.port}";
            Restart = "on-failure";
            RestartSec = "5s";
            };
        };
    };
};
We defined the devShell to build the program development. We defined the package to build the software, and now we'll define the module to tell NixOS how to run the software. This is a basic NixOS module. It's defined inline to the flake for now, moving it to its own file is an exercise for the reader.
Like I said before, a NixOS module is a function that takes in the state of the world and returns new additions to the state of the world. This NixOS module provides some options under xe.services.douglas-adams-quotes and then if the module is enabled, it creates a new systemd service to run it in. We're in the future, so we can use fancy things like DynamicUser to avoid having to run this service as root.
options.xe.services.douglas-adams-quotes = {
    enable = mkEnableOption "Enable the Douglas Adams quotes service";
    logLevel = ...;
    port = ...;
    package = ...;
};
The real fun part comes when you define options for the service. Every one of these options correlates to CLI flags so you can change various options on the fly. It's good practice to map any non-secret configuration settings to options so that users can have easy escape hatches for changing things like the HTTP bind port or log level to get debug output. Secrets are a more complicated thing due to how Nix works, so we're not going to talk about those today.
So we have everything we need now. We have development environment configuration, a package build, and finally a NixOS module to get the service running. The last step is to push it into prod. I have a NixOS virtual machine set up for this on my MacBook, but you may want to run this somewhere else, such as in Hyper-V on your gaming tower. Or maybe the cloud, I won't judge!
Now we get to the fun part, enabling the NixOS module. I'm going to use the VS Code Tailscale extension to SSH in and open up the files in my VM, so lemme do that real quick.
Let's peer into my VM's deployment flake and see what we can do to deploy it. This is a brand new, never opened VM, the only thing I did was set up a flake in /etc/nixos/flake.nix that imports the autogenerated configuration from the installer. This allows us to import things like the Douglas Adams Quotes service into the VM.
{
  inputs.nixpkgs.url = "github:NixOS/nixpkgs/nixos-unstable";

  outputs = { self, nixpkgs, ... }: {
    nixosConfigurations.douglas-adams = nixpkgs.lib.nixosSystem {
      system = "aarch64-linux";
      modules = [
        ./configuration.nix
      ];
    };
  };
}
Here's what the file looks like. I import nixos unstable, and then I create a nixos configuration for a machine named douglas-adams. This "modules" block has a list of NixOS module filenames or literal expressions. This lets you import NixOS modules from other flakes and define your own NixOS modules on the fly.
{
  inputs.nixpkgs.url = "github:NixOS/nixpkgs/nixos-unstable";
  inputs.daquotes = {
    url = "github:Xe/douglas-adams-quotes";
    inputs.nixpkgs.follows = "nixpkgs";
  };

  outputs = { self, nixpkgs, daquotes, ... }: {
    nixosConfigurations.douglas-adams = nixpkgs.lib.nixosSystem {
      system = "aarch64-linux";
      modules = [
        daquotes.nixosModules.default
        ./configuration.nix
        ({ pkgs, ... }: {
          xe.services.douglas-adams-quotes = {
            enable = true;
          };
        })
      ];
    };
  };
}
To make it import this, first we add a new input that points to the Douglas Adams quotes flake. This then gets threaded into the outputs function, we import the module, and finally enable it on the system.
(Pause)
That's it. That's how you enable the service on the VM. Now all that's left is SSHing in and running a nixos-rebuild to enable it.
I just right-click on the douglas-adams node, ssh in with Tailscale handling the auth, and then run the magic nixos-rebuild command: nixos-rebuild switch --flake /etc/nixos and hit enter.
And now the source code gets pulled, the package gets built, the service gets created and then we can see that the process is running. Let's prove that it's working:
[root@douglas-adams:/]# curl http://localhost:8080/quote.json | jq
{
    "quote":"The story so far: In the beginning the Universe was created. This has made a lot of people very angry and been widely regarded as a bad move.",
    "person":"Douglas Adams",
    "source":"The Restaurant at the End of the Universe",
    "id":2
}
Et voila. But, we aren't stopping there. I also enabled serving it with Tailscale Funnel so that you can see it on your phones:
tailscale serve https / http://localhost:8080
tailscale funnel 443 on
Get your phones out, I'm gonna be showing a QR Code:
Scan this QR code. You can trust me, right? It's not gonna be a Rick Roll. I'm not that mean. When you do, you'll connect to my VM on my laptop on the conference wifi, yet still exposed to the public internet.
(Pause for audience to discover that it does in fact work, applause)

In conclusion, NixOS modules aren't hard. It's just options to configure systemd or nginx or even Tailscale. It's a function that takes in the state of the world and returns new parts to add to the whole. This gives you a nearly infinite level of composition and logistical freedom to implement whatever you want. Every systemd option is exposed as a NixOS flag. Your programs can become services trivially. It's just that easy. I promise.
But, now you know how to make your own NixOS modules for fun and (hopefully) profit!
Before we get this talk wrapped up, I just want to thank everyone on this list for helping me make this talk shine. Thanks everyone!
(Pause for applause)
And with that, I've been Xe! Thank you so much for coming to this talk. I hope you've had a good conference and I'll be wandering around in case you have any questions. I've posted a summary of the code samples on my blog at xeiaso.net so you can look into my code some more.
Oh by the way, if you're looking, Tailscale is hiring. I know it's probably rare to see someone like this at a Linux conference but if you're a Windows expert please let me know. That role has been so hard to fill.
I try to answer every question I can, but if I don't get to you, please email dynamicuser at xeserv dot us and I'll reply to your questions as soon as I can.
Thanks again to the All Systems Go organizers for having me here and I hope you continue having a good day. Be well!
There was a question about encrypted secrets in NixOS. I suggest using agenix to have age-encrypted secrets in your NixOS configs. It has you encrypt things against SSH host public keys for your machines. It's a bit of a hack, but it works well enough that it's what I use in prod for my own stuff. This really needs to be solved upstream with proper handling of secret values at the Nix level.

/nix/store is world-readable. Depending on your threat model and if your NixOS configs are open source, this can be fine. If your threat model includes public NixOS configs, this becomes less fine; especially when CI is brought into the mix. You wouldn't want someone to figure out what your secrets are in your CI flow and then exfiltrate Tailscale authkeys or something, that could be bad!How to use Tailwind CSS in your Go programs

When I work on some of my smaller projects, I end up hitting a point where I need more than minimal CSS configuration. I don't want to totally change my development flow to bring in a bunch of complicated toolkits or totally rewrite my frontend in React or something, I just want to make things not look like garbage. Working with CSS by itself can be annoying.


Remember: ignorance is the default state.
I've found a way to make working with CSS a lot easier for me. I've been starting to use Tailwind in my personal and professional projects. Tailwind is a CSS framework that makes nearly every CSS behavior its own utility class. This means that you can make your HTML and CSS the same file, minimizing context switching between your HTML and CSS files. It also means that you can build your own components out of these utility classes. Here's an example of what it ends up looking like in practice:
<div class="bg-blue-500 text-white font-bold py-2 px-4 rounded">Button</div>
This is a button that has a blue background, white text, is bold, has a padding of 2, and has a rounded border. This looks like a lot of CSS to write for a button, but it's all in one place and can be customized for every button. This is a lot easier to work with than having to context switch between your HTML and CSS files.
px-2, it's padding on the X axis by two what?
One of the biggest downsides is that Tailwind's compiler is written in JavaScript and distributed over npm. This is okay for people that are experienced JavaScript Touchers, but I am not one of them. Usually when I see that something requires me to use npm, I just close the tab and move on. Thankfully, Tailwind is actually a lot easier to use than you'd think. You really just have to install the compiler (either with npm or as a Nix package) and then run it. You can even set up a watcher to automatically rebuild your CSS file when you change your HTML templates. It's a lot less overhead than you think.
Assumptions
To make our lives easier, I'm going to assume the following things about your project:
- It is written in Go.
- You are using
html/templatefor your HTML templates. - You have a
staticfolder that has your existing static assets (eg: https://alpinejs.dev for interactive components).

Setup
If you are using Nix or NixOS
Add the tailwindcss package to your flake.nix's devShell:
{
  inputs.nixpkgs.url = "github:NixOS/nixpkgs/nixos-unstable";
  outputs = { self, nixpkgs }: {
    devShell = nixpkgs.mkShell {
      nativeBuildInputs = [ self.nixpkgs.tailwindcss ];
    };
  };
}
Then you should be able to use the tailwindcss command in your shell. Ignore the parts about installing tailwindcss with npm, but you may want to use npm as a script runner or to install other tools. Any time I tell you to use npx tailwindcss, just mentally replace that with tailwindcss.
First you need to install Tailwind's CLI tool. Make sure you have npm/nodejs installed from the official website.
Then create a package.json file with npm init:
npm init
Once you finish answering the questions (realistically, none of the answers matter here), you can install Tailwind:
npm install --dev --save tailwindcss
Now you need to set up some scripts in your package.json file. You can do this by hand, or you can use npm's built-in script runner to do it for you. This lets you build your website's CSS with commands like npm run build or make your CSS automatically rebuild with npm run watch. To do this, you need to add the following to your package.json file:
{
  // other contents here, make sure to add a trailing comma.
  "scripts": {
    "build": "tailwindcss build -o static/css/tailwind.css",
    "watch": "tailwindcss build -o static/css/tailwind.css --watch"
  }
}
npm run watch in another terminal while you're working on your website. This will automatically rebuild your CSS file when you change your HTML templates.Next you need to make a tailwind.config.js file. This will configure Tailwind with your HTML teplate locations as well as let you set any other options. You can do this by hand, or you can use Tailwind's built-in config generator:
npx tailwindcss init
Then open it up and configure it to your liking. Here's an example of what it looks like when using Iosevka Iaso:
/** @type {import('tailwindcss').Config} */
module.exports = {
  content: ["./tmpl/*.html"], // This is where your HTML templates / JSX files are located
  theme: {
    extend: {
      fontFamily: {
        sans: ["Iosevka Aile Iaso", "sans-serif"],
        mono: ["Iosevka Curly Iaso", "monospace"],
        serif: ["Iosevka Etoile Iaso", "serif"],
      },
    },
  },
  plugins: [],
};
<link rel="stylesheet" href="https://cdn.xeiaso.net/static/pkg/iosevka/family.css" />
If you aren't serving your static assets in your Go program already, you can use Go's standard library HTTP server and go:embed:
//go:embed static
var static embed.FS

// assuming you have a net/http#ServeMux called `mux`
mux.Handle("/static/", http.FileServer(http.FS(static)))
This will bake your static assets into your Go binary, which is nice for deployment. Things you can't forget are a lot more robust than things you can forget.
Finally, add a //go:generate directive to your Go program to build your CSS file when you run go generate:
//go:generate npm run build
When you change your HTML templates, you can run go generate to rebuild your CSS files.
Finally, make sure you import your Tailwind build in your HTML template:
<link rel="stylesheet" href="/static/css/tailwind.css" />
Now you can get started with using Tailwind in your HTML templates! I hope this helps.